English
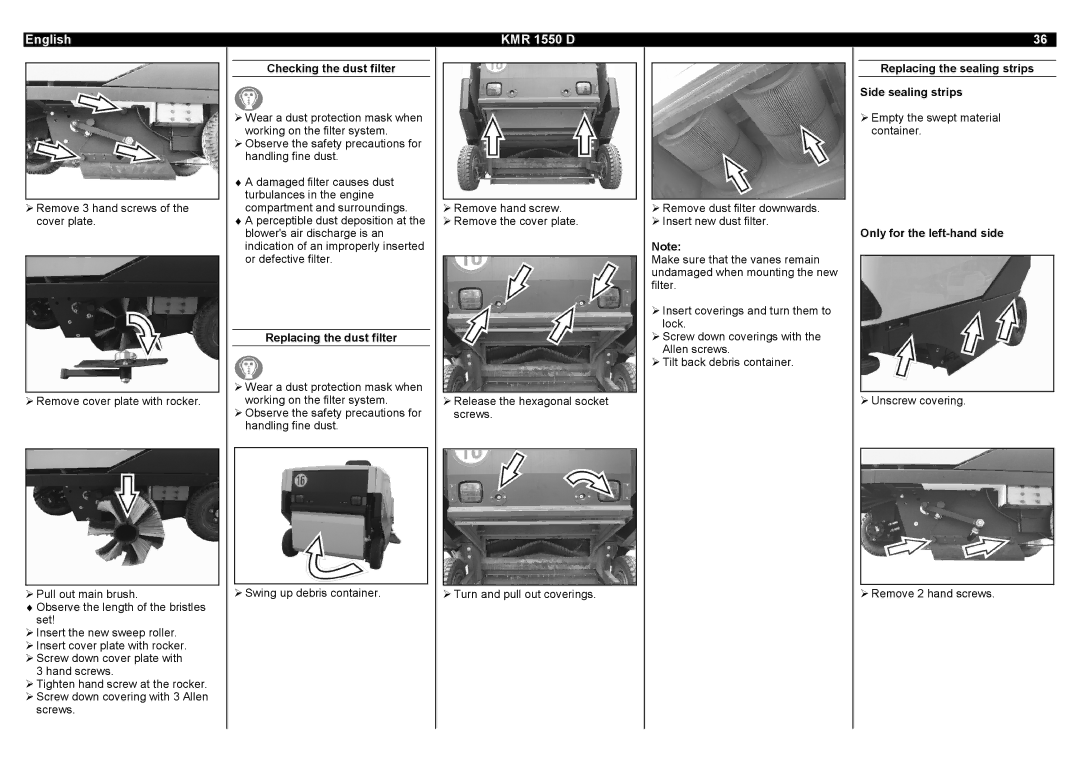
!Remove 3 hand screws of the cover plate.
!Remove cover plate with rocker.
!Pull out main brush.
♦Observe the length of the bristles set!
!Insert the new sweep roller.
!Insert cover plate with rocker.
!Screw down cover plate with 3 hand screws.
!Tighten hand screw at the rocker.
!Screw down covering with 3 Allen screws.
Checking the dust filter
!Wear a dust protection mask when working on the filter system.
!Observe the safety precautions for handling fine dust.
♦A damaged filter causes dust turbulances in the engine compartment and surroundings.
♦A perceptible dust deposition at the blower's air discharge is an indication of an improperly inserted or defective filter.
Replacing the dust filter
!Wear a dust protection mask when working on the filter system.
!Observe the safety precautions for handling fine dust.
!Swing up debris container.
KMR 1550 D
!Remove hand screw.
!Remove the cover plate.
!Release the hexagonal socket screws.
!Turn and pull out coverings.
!Remove dust filter downwards.
!Insert new dust filter.
Note:
Make sure that the vanes remain undamaged when mounting the new filter.
!Insert coverings and turn them to lock.
!Screw down coverings with the Allen screws.
!Tilt back debris container.
36
Replacing the sealing strips
Side sealing strips
!Empty the swept material container.