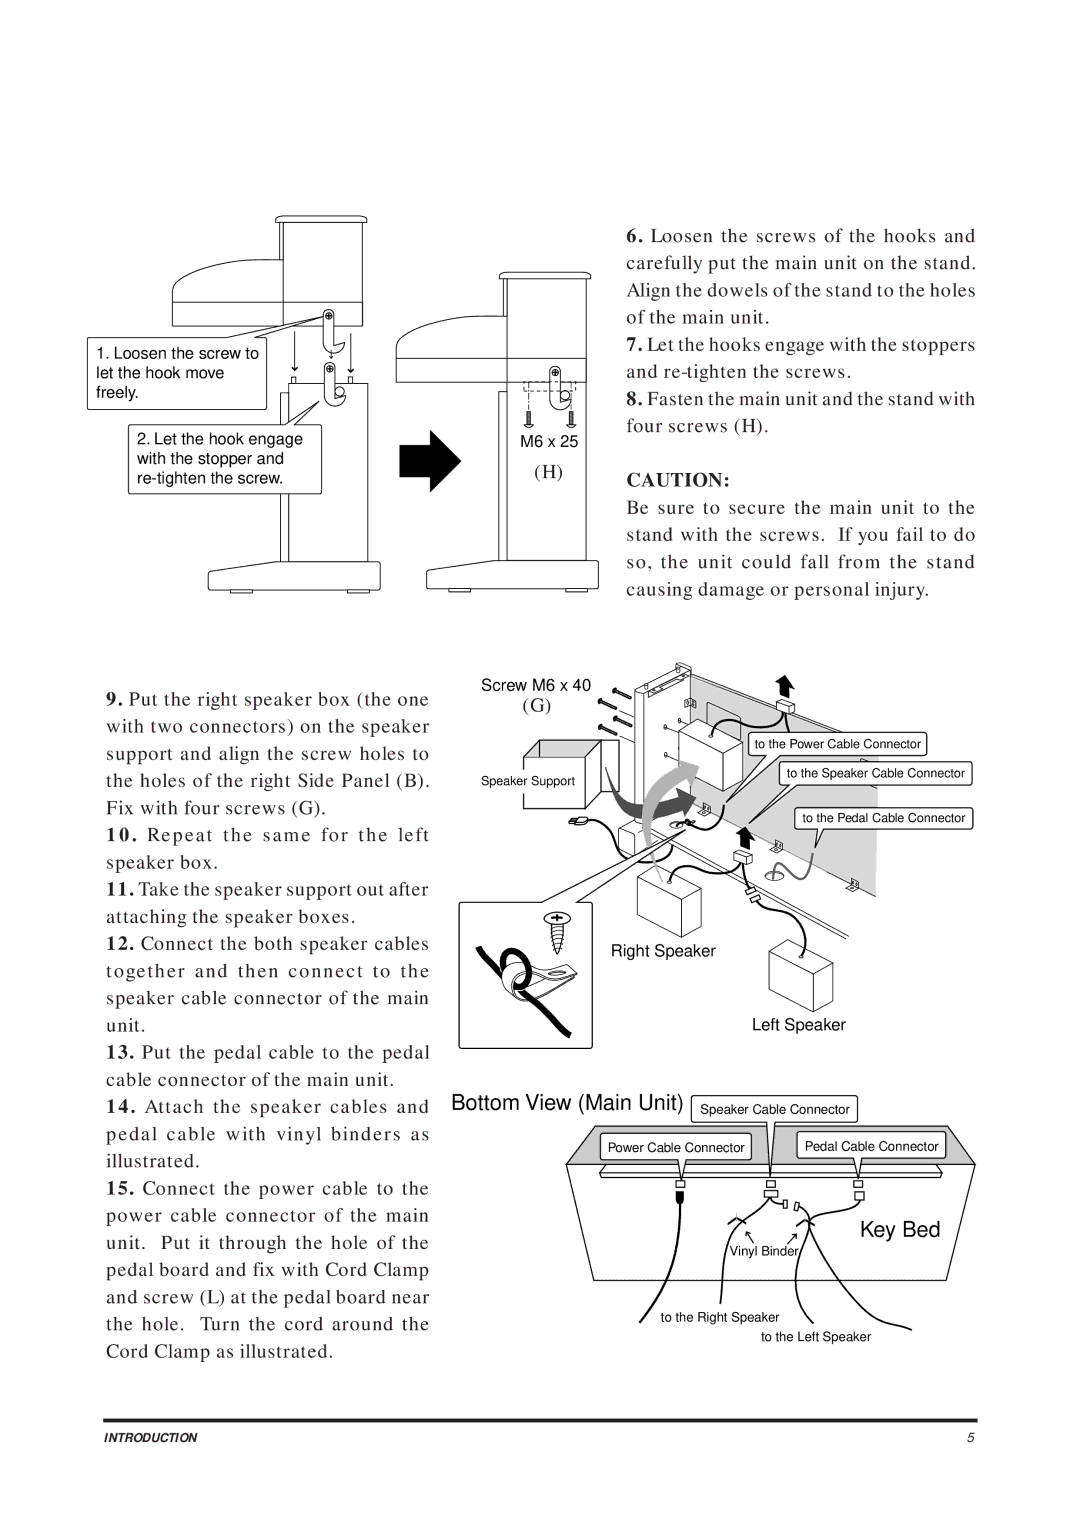
1. Loosen the screw to let the hook move freely.
2.Let the hook engage with the stopper and
M6 x 25
(H)
6.Loosen the screws of the hooks and carefully put the main unit on the stand. Align the dowels of the stand to the holes of the main unit.
7.Let the hooks engage with the stoppers and
8.Fasten the main unit and the stand with four screws (H).
CAUTION:
Be sure to secure the main unit to the stand with the screws. If you fail to do so, the unit could fall from the stand causing damage or personal injury.
9. Put the right speaker box (the one |
with two connectors) on the speaker |
support and align the screw holes to |
the holes of the right Side Panel (B). |
Fix with four screws (G). |
10. Repeat the same for the left |
speaker box. |
11. Take the speaker support out after |
attaching the speaker boxes. |
12. Connect the both speaker cables |
together and then connect to the |
speaker cable connector of the main |
unit. |
13. Put the pedal cable to the pedal |
cable connector of the main unit. |
Screw M6 x 40
(G)
Speaker Support
to the Power Cable Connector
to the Speaker Cable Connector
to the Pedal Cable Connector
Right Speaker
Left Speaker
14. Attach the speaker cables and |
pedal cable with vinyl binders as |
illustrated. |
15. Connect the power cable to the |
power cable connector of the main |
unit. Put it through the hole of the |
pedal board and fix with Cord Clamp |
and screw (L) at the pedal board near |
the hole. Turn the cord around the |
Cord Clamp as illustrated. |
Bottom View (Main Unit) Speaker Cable Connector
Power Cable Connector | Pedal Cable Connector |
Key Bed
Vinyl Binder
to the Right Speaker
to the Left Speaker
INTRODUCTION | 5 |