READ ME FIRST (CA1200)
Before beginning the assembly of your CA1200 read and become familiar with the assembly instructions that follow. Then, carefully unpack the piano and check your unit against the parts list.
PARTS PROVIDED |
|
|
| M6 x 40 |
|
|
| |
End Panel (A) | 2 pcs. | Screw H (M6 x 25) | 8 pcs. |
| M6 x 25 | M4 x 30 |
| |
Side Panel (B) | 2 pcs. | Screw I (M4 x 30) | 4 pcs. |
|
|
| ||
|
| M4 x 15 | ||||||
Back Board (C) | 1 pc. | Screw J (M4 x 15) | 4 pcs. |
|
| |||
|
|
|
| |||||
Front Panel (D) | 1 pc. | Screw K (ø4 x 20) | 10 pcs. |
|
|
|
| |
Pedal Board (E) | 1 pc. | Screw L (ø4 x 12) | 1 pc. | (G) | (H) | (I) | (J) | |
Speaker Box (F) | 2 pcs. | Cord Clamp (M) | 1 pc. | |||||
|
|
|
| |||||
Screw G (M6 x 40) | 8 pcs. | Adjuster (N) | 1 pc. | ø4 x 20 |
|
| Adjuster | |
|
|
|
|
|
| |||
|
|
|
|
| ø4 x 12 | Cord Clamp | ||
|
|
|
|
|
| |||
|
|
|
| (K) | (L) | (M) | (N) | |
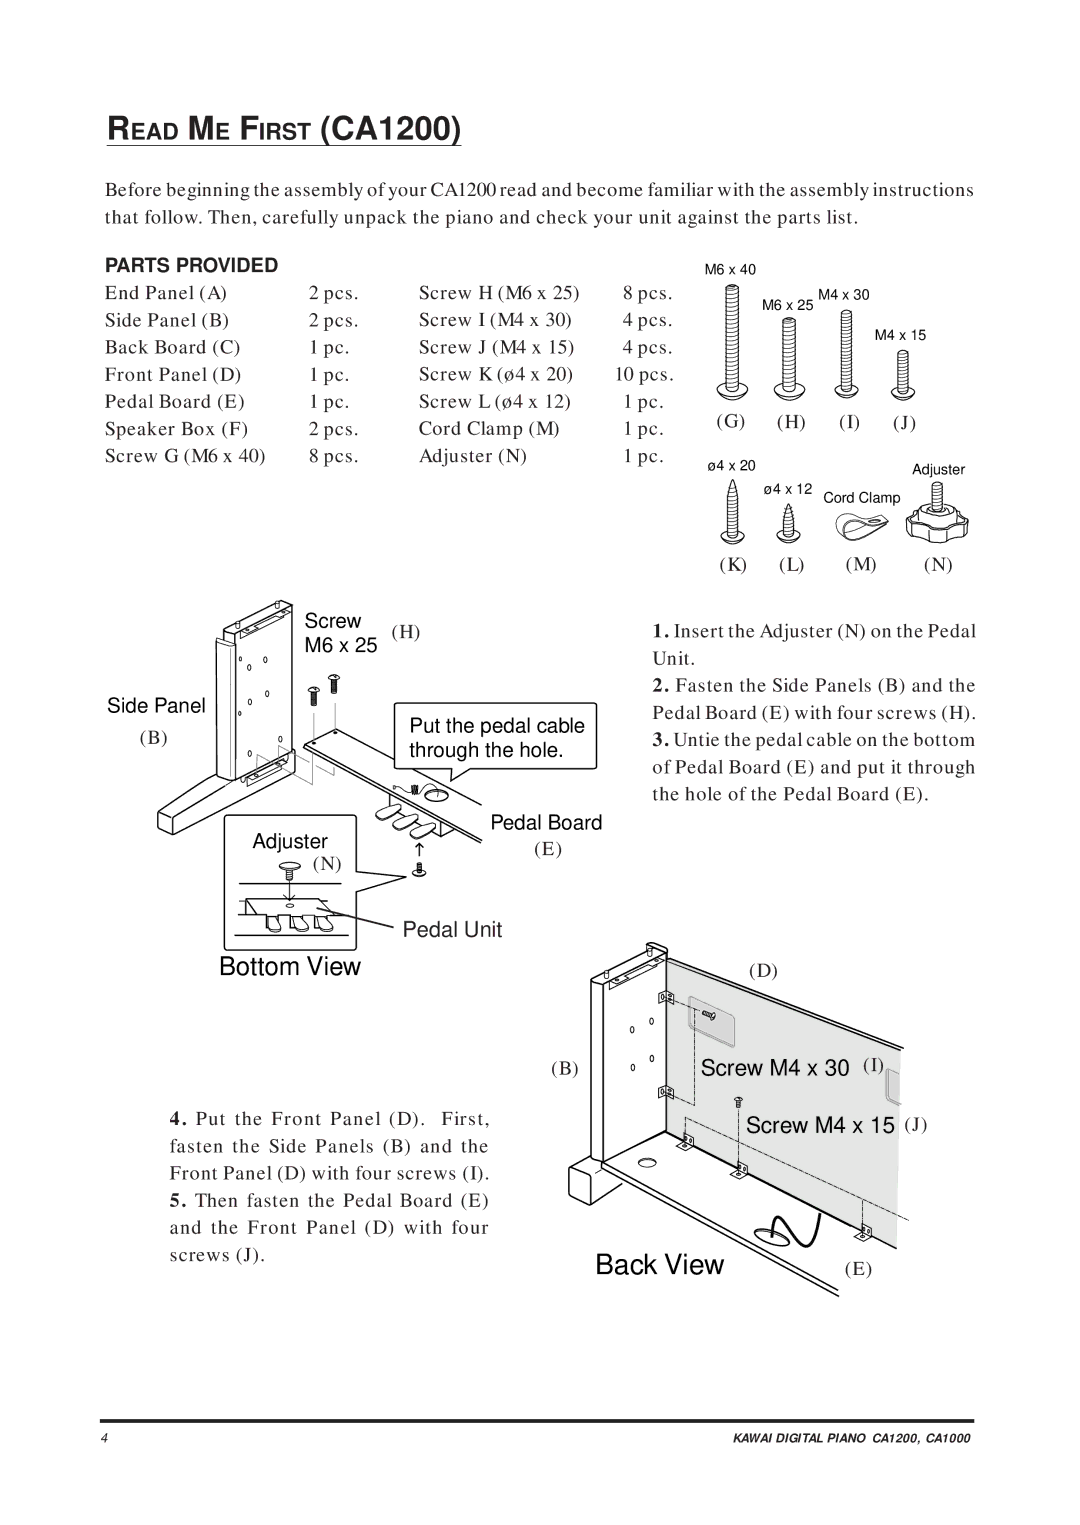
Side Panel
(B)
Screw
M6 x 25 (H)
Put the pedal cable through the hole.
Pedal Board
Adjuster ![]() (E)
(E)
(N)
1.Insert the Adjuster (N) on the Pedal Unit.
2.Fasten the Side Panels (B) and the Pedal Board (E) with four screws (H).
3.Untie the pedal cable on the bottom of Pedal Board (E) and put it through the hole of the Pedal Board (E).
Pedal Unit
Bottom View | (D) |
(B) | Screw M4 x 30 (I) |
4.Put the Front Panel (D). First, fasten the Side Panels (B) and the Front Panel (D) with four screws (I).
5.Then fasten the Pedal Board (E) and the Front Panel (D) with four screws (J).
Screw M4 x 15 (J)
Back View | (E) |
4 | KAWAI DIGITAL PIANO CA1200, CA1000 |