3 Erasing a part/song
This function is used to erase recorder parts/songs that have been recorded incorrectly, or are simply no
longer required.
1. Entering erase mode
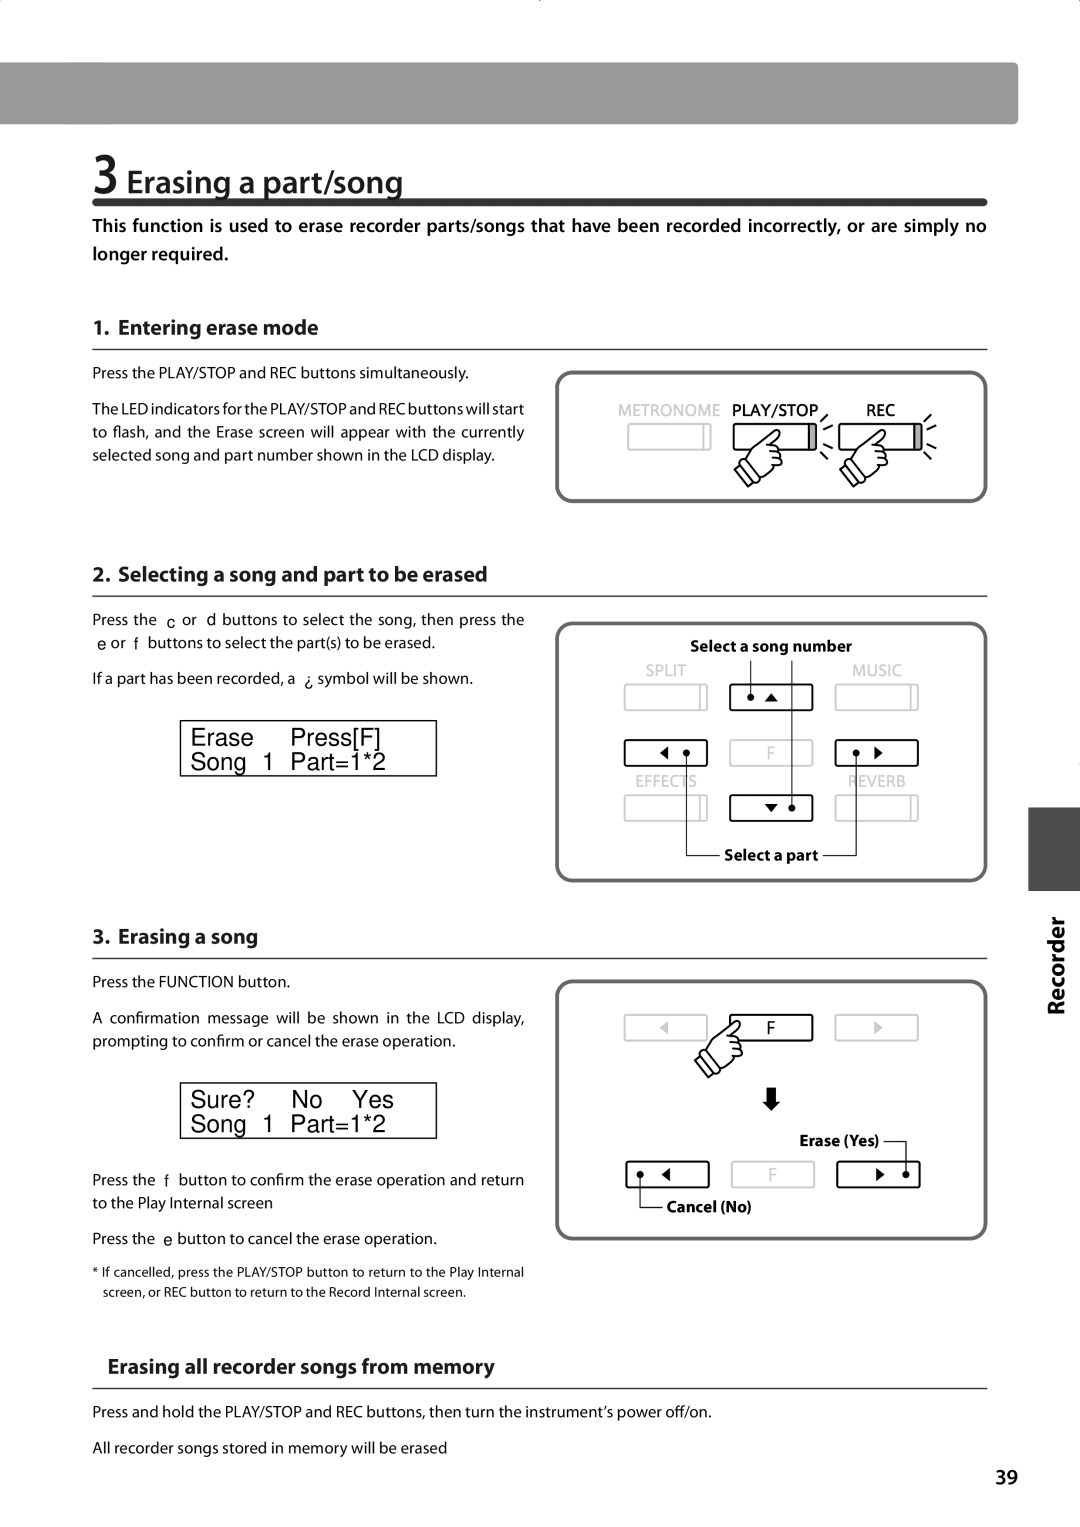
Press the PLAY/STOP and REC buttons simultaneously.
The LED indicators for the PLAY/STOP and REC buttons will start to flash, and the Erase screen will appear with the currently selected song and part number shown in the LCD display.
2. Selecting a song and part to be erased
Press the c or d buttons to select the song, then press the |
|
e or f buttons to select the part(s) to be erased. | Select a song number |
If a part has been recorded, a ¿ symbol will be shown.
Erase ≥Press[F]
Song 1 Part=1*2
Select a part
3. Erasing a song
Press the FUNCTION button.
A confirmation message will be shown in the LCD display, prompting to confirm or cancel the erase operation.
| Sure? ≤No | Yes≥ |
|
| Song 1 Part=1*2 | Erase (Yes) | |
|
|
| |
Press the f button to confirm the erase operation and return | |||
to the Play Internal screen |
| Cancel (No) | |
Press the e button to cancel the erase operation.
*If cancelled, press the PLAY/STOP button to return to the Play Internal screen, or REC button to return to the Record Internal screen.
Erasing all recorder songs from memory
Press and hold the PLAY/STOP and REC buttons, then turn the instrument’s power off/on.
All recorder songs stored in memory will be erased
Recorder
39
