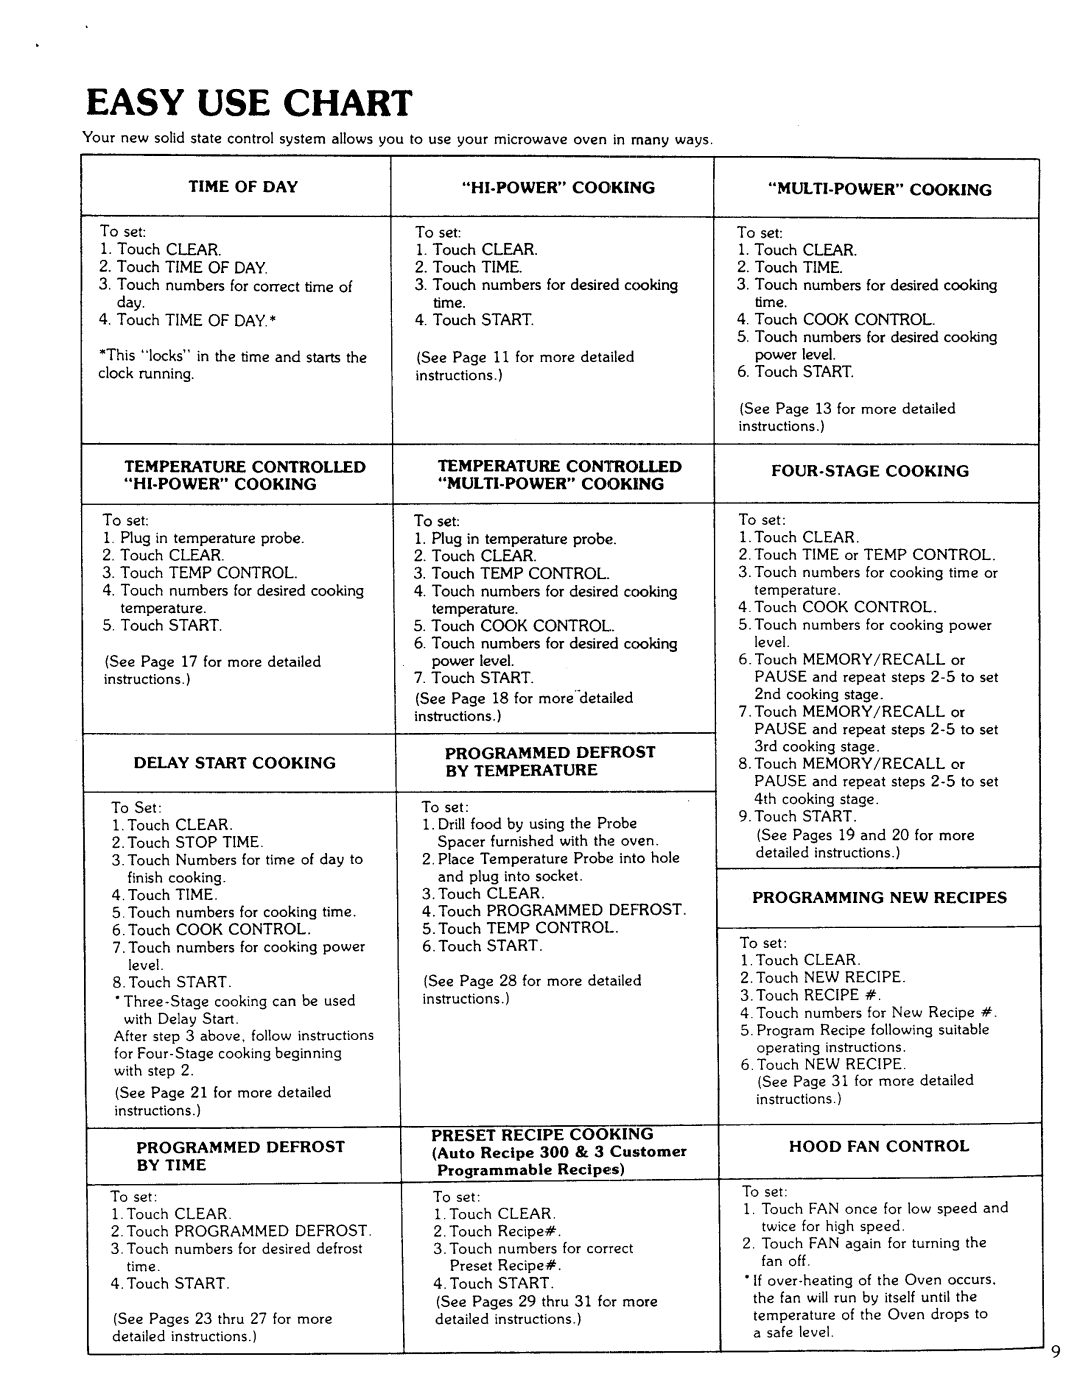
EASY | USE CHART |
|
|
|
|
|
| |||||||
Your | new solid | state | control | system allows you to use | your microwave | oven in many ways. | ||||||||
|
|
| TIME | OF DAY |
|
|
|
| COOKING | |||||
To | set: |
|
|
|
|
|
| To | set: |
|
|
| ||
I. | Touch CLEAR. |
|
|
|
| I. | Touch | CLEAR. |
|
| ||||
2. | Touch TIME | OF DAY. |
|
|
| 2. | Touch | TIME. |
|
| ||||
3. | Touch numbers | for correct | time | of | 3. | Touch | numbers | for | desired cooking | |||||
| day. |
|
|
|
|
|
|
| time. |
|
|
| ||
4. | Touch TIME | OF DAY.* |
|
|
| 4. | Touch | START. |
|
| ||||
*This | "locks" | in | the time | and | starts | the | (See | Page | II for | more | detailed | |||
clock | running. |
|
|
|
|
|
| instructions.) |
|
|
| |||
TEMPERATURE | CONTROLLED | TEMPERATURE | CONTROLLED |
COOKING | COOKING |
To set: |
|
|
|
| To set: | ||
I. | Plug in | temperature | probe, | i. Plug in temperature probe:. | |||
2. | Touch | CLEAR. |
|
| 2. | Touch CLEAR. | |
3. | Touch | TEMP | CONTROL. | 3. | Touch TEMP CONTROL. | ||
4. | Touch | numbers | for | desired cooking | 4. | Touch numbers for desired cooking | |
| temperature. |
|
|
|
| temperature. | |
5. | Touch | START. |
|
| 5. | Touch COOK CONTROL.. | |
|
|
|
|
|
| 6. | Touch numbers for desired cooking |
(See Page | 17 | for | more | detailed |
| power level. | |
instructions.) |
|
|
| 7. | Touch START. | ||
(See Page 18 for more"detailed instructions.)
"MULTI-POWER" COOKING
To set:
i. Touch CLEAR.
2.Touch TIME.
3.Touch numbers for desired cooking time.
4.Touch COOK CONTROL.
5.Touch numbers for desired cooking power level.
6.Touch START.
(See Page 13 for more detailed
instructions.)
FOUR-STAGE COOKING
To set:
I. Touch CLEAR.
2.Touch TIME or TEMP CONTROL.
3.Touch numbers for cooking time or
temperature.
4.Touch COOK CONTROL.
5. Touch | numbers for cooking power | ||||
| level |
|
|
|
|
6. | Touch | MEMORY/RECALL | or | ||
| PAUSE | and | repeat | steps | |
| 2nd cooking | stage. |
|
| |
7. Touch | MEMORY/RECALL | or | |||
| PAUSE | and | repeat | steps | |
DELAY START COOKING
To Set:
I. Touch CLEAR.
2. Touch STOP TIME.
3.Touch Numbers for time of day to finish cooking.
4.Touch TIME.
5.Touch numbers for cooking time.
6.Touch COOK CONTROL.
7.Touch numbers for cooking power level.
8.Touch START.
•
After step 3 above, follow instructions
for
(See Page 21 for more detailed instructions.)
PROGRAMMED DEFROST BY TIME
To set:
I. Touch CLEAR.
2.Touch PROGRAMMED DEFROST.
3.Touch numbers for desired defrost time.
4.Touch START.
(See Pages 23 thru 27 for more
detailed instructions.)
PROGRAMMED DEFROST
BY TEMPERATURE
To set:
I. Drill food by using the Probe
Spacer furnished with the oven.
2. Place Temperature Probe into hole and plug into socket.
3. Touch CLEAR.
4.Touch PROGRAMMED DEI:'ROST. 5. Touch TEMP CONTROl,.
6. Touch START.
(See Page 28 for more detailed instructions.)
PRESET RECIPE COOKING
(Auto Recipe 300 & 3 Customer
Programmable Recipes)
To set:
I. Touch CLEAR.
2. Touch Recipe#.
3. Touch numbers for correct
Preset Recipe#.
4. Touch START.
(See Pages 29 thru 31 for more
detailed instructions.)
| 3rd cooking | stage. |
| |
8. | Touch | MEMORY/RECALL | or | |
| PAUSE and repeat steps | |||
| 4th cooking | stage. |
| |
9. | Touch | START. |
| |
(See Pages 19 and 20 for more detailed instructions.)
PROGRAMMING NEW RECIPES
To set:
i. Touch CLEAR.
2.Touch NEW RECIPE. 3.Touch RECIPE #.
4.Touch numbers for New Recipe #.
5. Program Recipe following suitable
operating instructions.
6.Touch NEW RECIPE.
(See Page 31 for more detailed instructions.)
HOOD FAN CONTROL
To set:
I. Touch FAN once for low speed and twice for high speed.
2.Touch FAN again for turning the fan off.
"If
9
