Checking and adjusting the burners

The burners are tested and factory-set for most efficient operation. However, variations in gas supply and other conditions may make minor adjustments to air shutter or low flame setting necessary. Adjustments must be done by a qualified service technician.

NOTE: No adjustment can be made to the infrared rotisserie burner (not used on all models) or smoker tray burner(s).

Checking and adjusting the grill burner flames requires removing the grate and sear plates.

Sear burner flame characteristics:

The flames of the grill burners and surface burners (not used on all models) should be blue and stable with no excessive noise or lifting (L.P./propane gas flames will have a slightly yellow tip). A yellow flame indicates not enough air. If flame is noisy or lifts away from the burner, there is too much air. Some yellow tips on flames when the burner is set to HI setting are acceptable as long as no carbon or soot deposits appear.

Check that burners are not blocked by dirt, debris, insect nests, etc. and clean as necessary. If they are clean, adjust air shutters as needed.

IMPORTANT: Before adjusting air shutters, let burners cool down.

Adjusting the air shutters:

1.Light grill using information in the “Lighting the grill” section.

2.Observe flame to determine which burners need adjustment and how the flame is acting. See “Sear burner flame characteristics” above.

3.Turn off the valve and wait until grill and burners are cool.

4.Remove grill grates, sear plates.

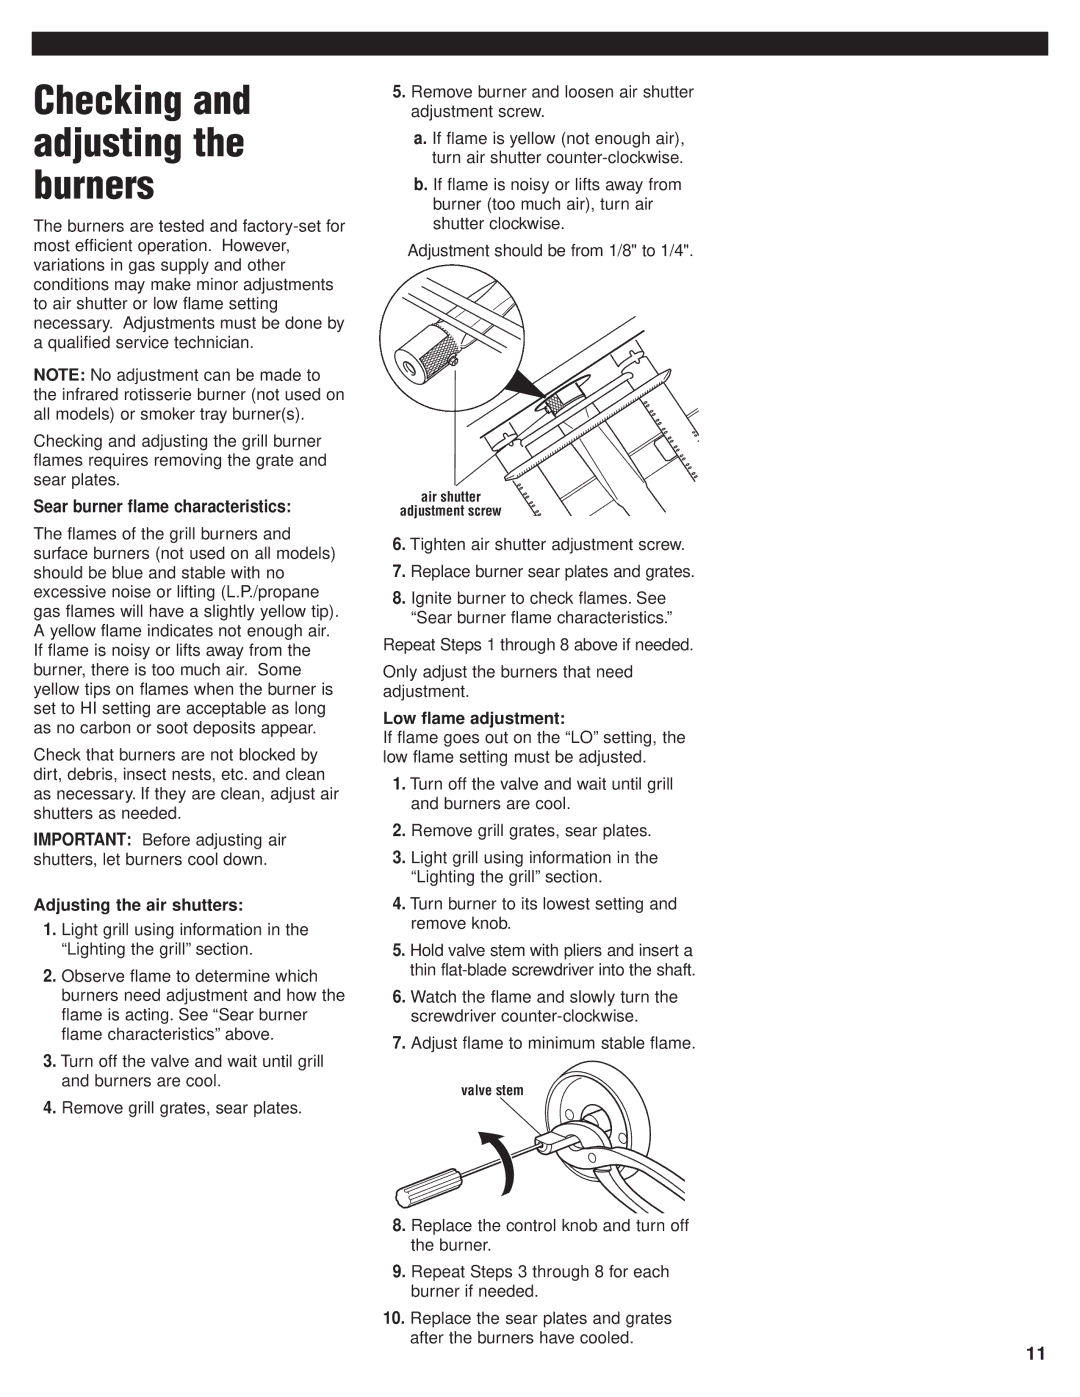
5.Remove burner and loosen air shutter adjustment screw.

a.If flame is yellow (not enough air), turn air shutter counter-clockwise.

b.If flame is noisy or lifts away from burner (too much air), turn air shutter clockwise.

Adjustment should be from 1/8" to 1/4".

air shutter

adjustment screw

6.Tighten air shutter adjustment screw.

7.Replace burner sear plates and grates.

8.Ignite burner to check flames. See “Sear burner flame characteristics.”

Repeat Steps 1 through 8 above if needed.

Only adjust the burners that need adjustment.

Low flame adjustment:

If flame goes out on the “LO” setting, the low flame setting must be adjusted.

1.Turn off the valve and wait until grill and burners are cool.

2.Remove grill grates, sear plates.

3.Light grill using information in the “Lighting the grill” section.

4.Turn burner to its lowest setting and remove knob.

5.Hold valve stem with pliers and insert a thin flat-blade screwdriver into the shaft.

6.Watch the flame and slowly turn the screwdriver counter-clockwise.

7.Adjust flame to minimum stable flame.

valve stem

8.Replace the control knob and turn off the burner.

9.Repeat Steps 3 through 8 for each burner if needed.

10.Replace the sear plates and grates after the burners have cooled.

11

Page 11
Image 11
KitchenAid KFGR364 Checking and adjusting the burners, Sear burner flame characteristics, Adjusting the air shutters

KBGN364, KBGN292, KBGN274, KFGR292, KFGR382 specifications

The KitchenAid line of refrigerators, specifically the KFGR382, KFGR274, KFGR364, KFGR292, and KBGN274 models, showcases innovation, efficiency, and convenience. Each of these models boasts unique features that cater to diverse culinary needs, all while maintaining a stylish aesthetic that complements any kitchen décor.

The KitchenAid KFGR382 stands out with its spacious 38-inch design, making it ideal for larger households. It features an advanced cooling system that ensures even temperature distribution, effectively preserving the freshness of food. The model is equipped with adjustable shelves that can easily accommodate tall items, providing flexibility and maximizing storage. A water and ice dispenser is integrated into the door, offering quick access to chilled water and ice for added convenience.

Next in line, the KFGR274 is a 27-inch refrigerator that emphasizes energy efficiency without compromising on performance. This model includes a unique FreshShield crispers technology that helps maintain optimal humidity levels, ensuring fruits and vegetables stay fresh longer. Notably, its sleek exterior and customizable interior lighting enhance visibility and create a modern look.

For those seeking a larger capacity, the KFGR364 presents a roomy 36-inch layout with an innovative cooling system designed to minimize fluctuations in temperature. This ensures that your ingredients are kept in ideal conditions, preventing spoilage. Additionally, the KFGR364 features a dual evaporator system that ensures separate airflow for both the refrigerator and freezer compartments, preserving flavor and freshness.

The KFGR292 model is ideal for compact spaces, measuring 29 inches, while still offering impressive storage capacity. It features a reversible door design, allowing for flexible installation in various kitchen layouts. This model also boasts a special temperature-controlled pantry drawer designed specifically for snacks and deli items.

Lastly, the KitchenAid KBGN274, with its built-in locker-like design, redefines versatility. This model incorporates smart technology such as Wi-Fi connectivity that allows users to monitor and control temperatures remotely via a smartphone app. It also includes a specialized ice-making system that produces clear, restaurant-style ice cubes, enhancing beverage presentation.

In summary, KitchenAid's KFGR and KBGN series exemplify functional elegance, enhanced cooling technologies, and user-friendly features designed for the modern kitchen. With a range of sizes and functionalities, these refrigerators cater to various needs, ensuring culinary enthusiasts can keep their ingredients at optimal freshness while enjoying a seamless kitchen experience.