
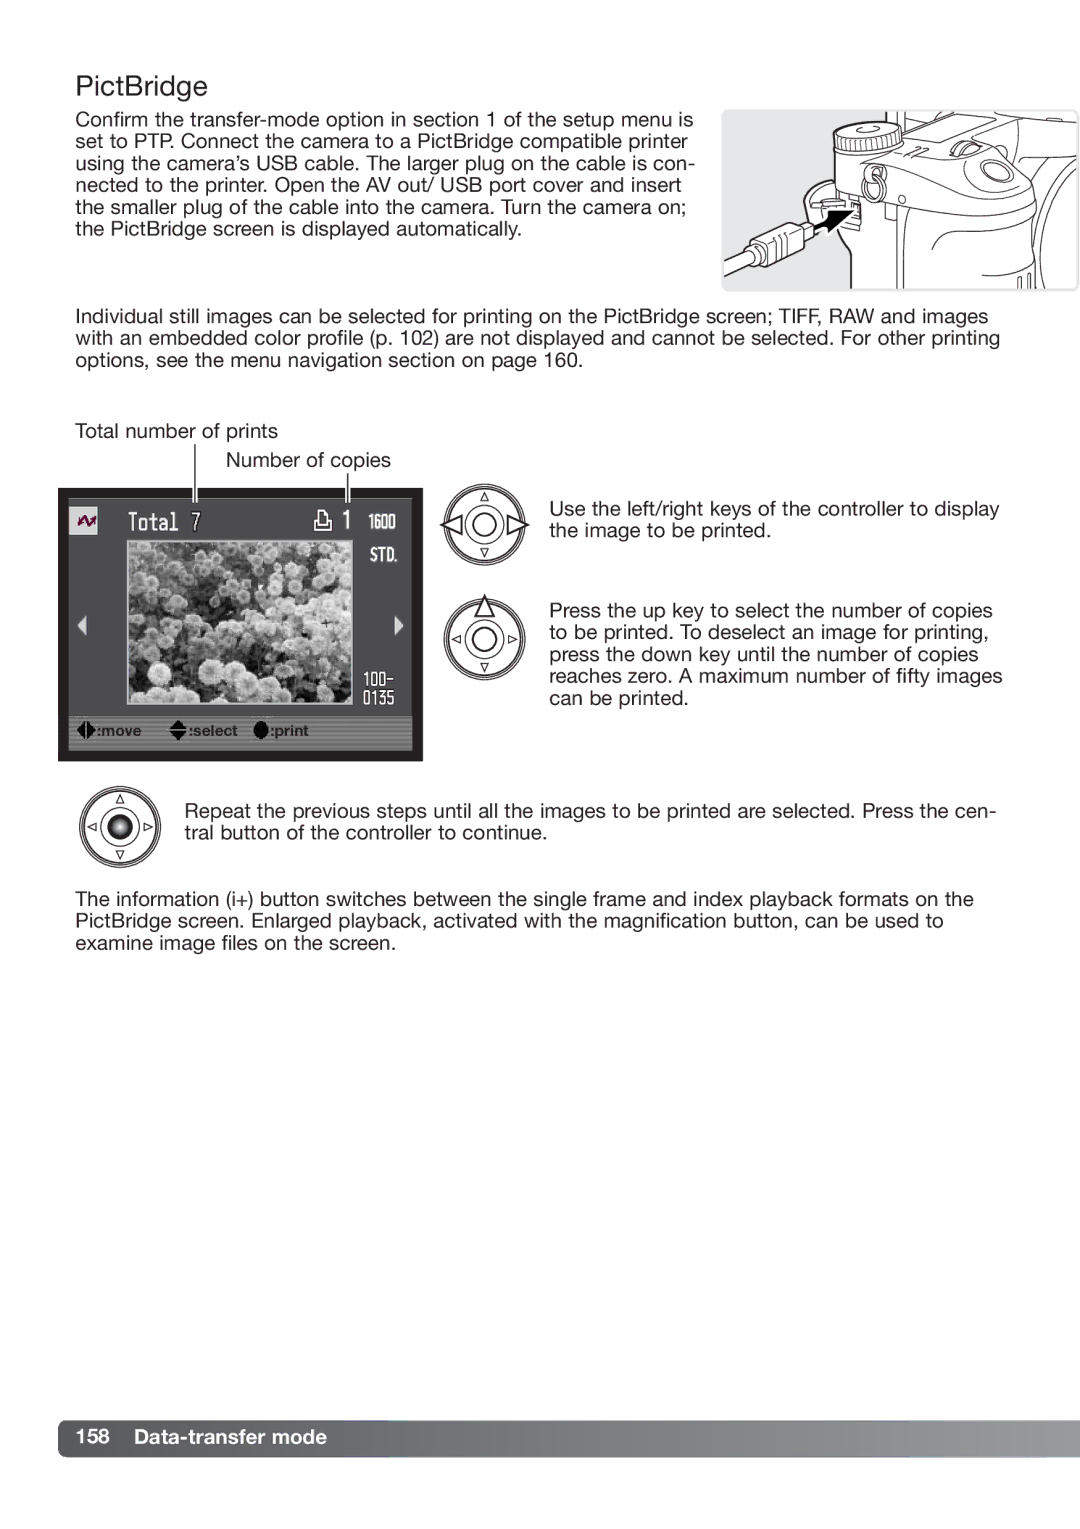
DiMAGE_A2 specifications
The Konica Minolta DiMAGE A2, introduced in 2004, is a notable digital camera that marked a significant step in the evolution of compact digital photography. Sporting a sleek design and an array of advanced features, the DiMAGE A2 is ideal for both amateurs and photography enthusiasts seeking versatility and quality in a compact package.One of the standout features of the DiMAGE A2 is its impressive 8-megapixel CCD sensor, which delivers stunning image quality with rich colors and fine detail. The camera supports a wide ISO range from 50 to 800, allowing users to capture clear images in various lighting conditions, reducing the need for flash in low-light environments.
Equipped with a powerful 7x optical zoom lens, the DiMAGE A2 boasts a focal length equivalent to 28-200mm in 35mm format. This range provides users with the flexibility to shoot wide-angle landscapes or zoom in on distant subjects, all while maintaining sharpness and clarity. Additionally, the lens features a fast maximum aperture of f/2.8, which enhances performance in low-light situations.
The camera is built around Konica Minolta's Advanced Anti-shake technology, offering significantly reduced camera shake, especially during handheld shooting. This system stabilizes the sensor, making it easier to capture sharp images without the need for a tripod, even at slower shutter speeds.
For enhanced usability, the DiMAGE A2 includes a flip-out LCD display, offering a versatile viewing experience whether you're shooting at low or high angles. The 1.8-inch color LCD is complemented by an electronic viewfinder, providing users with the option to compose shots in a manner they find most comfortable.
Moreover, the DiMAGE A2 features an extensive range of manual controls, including custom white balance, exposure compensation, and metering modes, allowing photographers to fine-tune their settings according to specific shooting scenarios. These capabilities cater to the creative demands of users looking to explore different photographic techniques.
The camera also supports various shooting modes, such as portrait, landscape, and macro, making it easy to switch styles based on the subject matter. Its ability to shoot in RAW format provides more flexibility in post-processing, enabling photographers to make significant adjustments without compromising quality.
Connectivity options include USB and video out, making it convenient to transfer images and connect to external devices. The DiMAGE A2 is powered by rechargeable lithium-ion batteries, ensuring that users have the energy needed for extended shooting sessions.
In summary, the Konica Minolta DiMAGE A2 stands out for its combination of an 8-megapixel sensor, a versatile zoom lens, advanced stabilization technology, and user-friendly features. It remains a compelling choice for those looking to explore the world of digital photography with a capable and compact camera system.