
FAX2900/FAX3900 specifications
The Konica Minolta FAX2900 and FAX3900 are advanced multifunction fax machines designed for businesses looking to enhance their communication efficiency. Both models combine elegance with robustness, catering to high-volume faxing while maintaining a compact footprint suitable for office environments.One of the standout features of the FAX2900 and FAX3900 is their rapid fax transmission speed. Capable of sending documents in as little as 3 seconds per page, these machines minimize waiting times and streamline operations. This efficiency is particularly beneficial in fast-paced settings where timely communication is critical.
Another notable characteristic is the device's high-resolution output. The FAX2900 and FAX3900 utilize a 600 x 600 dpi printing resolution, ensuring that faxed documents maintain clarity and detail. This is essential for businesses that rely on delivering professional documents, such as contracts or proposals, where clarity can impact negotiations.
Both models are equipped with advanced compression technologies, including MH, MR, and MMR, which facilitate the sending and receiving of images in a compressed format. This results in quicker transmission speeds, reducing the time spent on each fax and conserving communication resources.
The FAX2900 and FAX3900 provide an array of convenient features, such as a built-in telephone handset, allowing users to make voice calls directly from the machine. Additionally, with features like speed dialing and a maximum memory capacity for up to 200 pages, users can expect seamless navigation when sending multiple faxes.
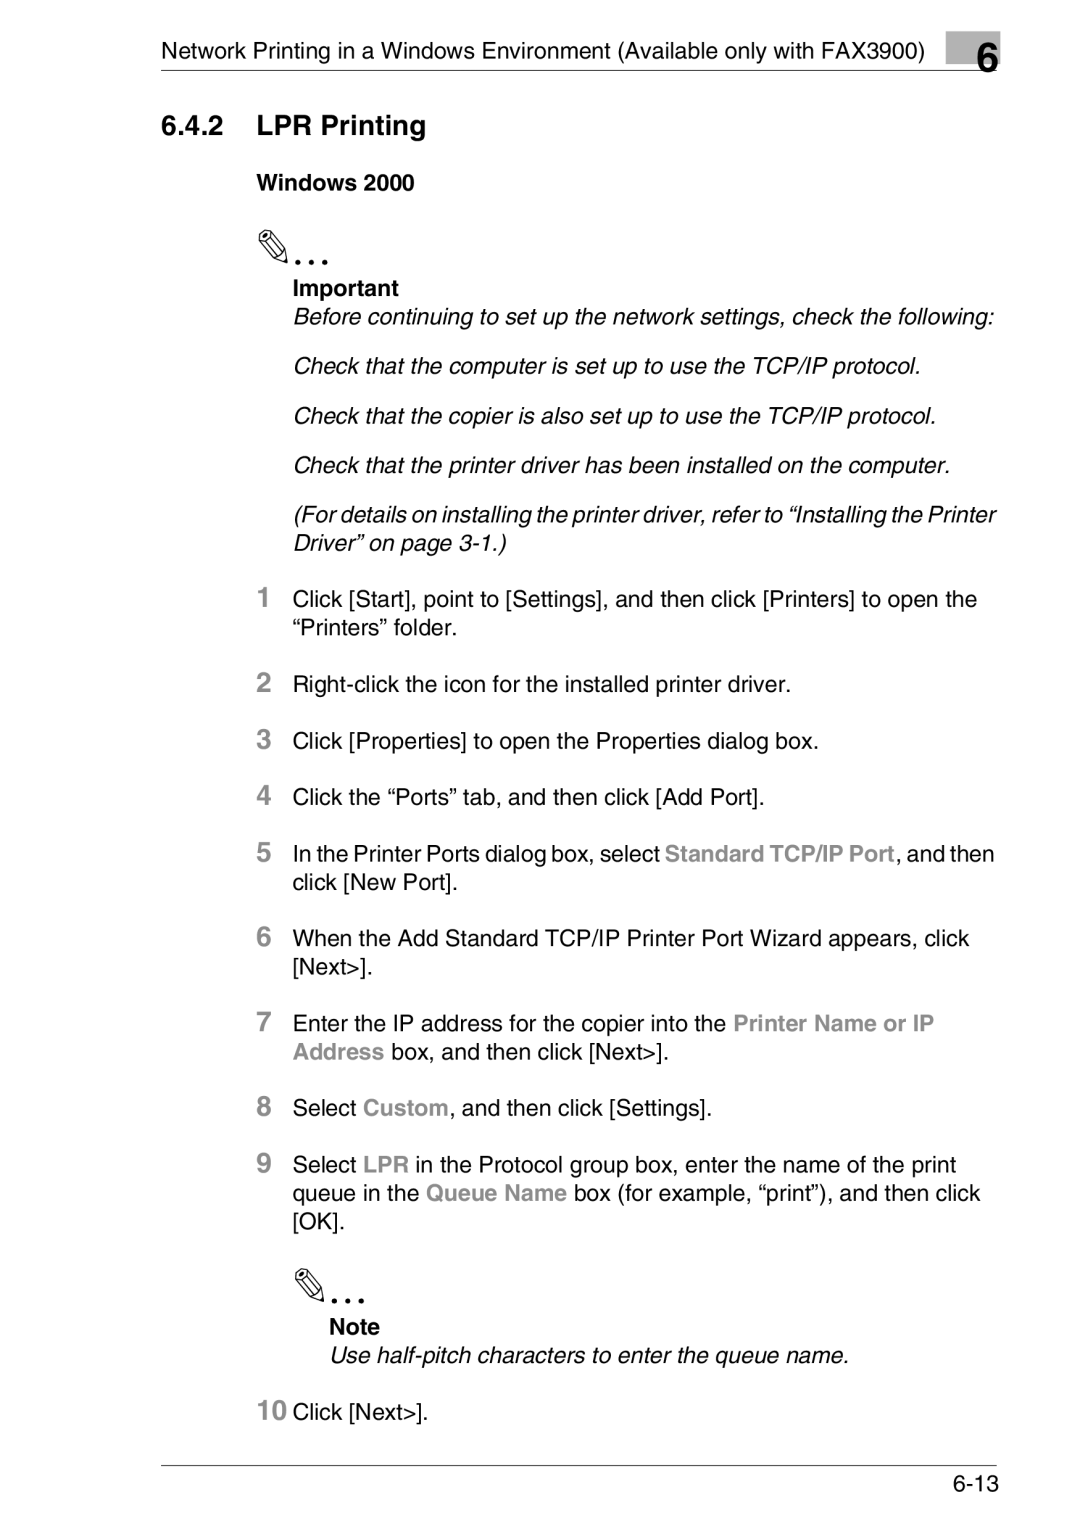
For enhanced connectivity, the FAX3900 also includes the option for network integration. This enables multiple users within an organization to send and receive faxes directly from their workstations, further improving workflow efficiency.
Moreover, the design of these models emphasizes user-friendliness. The intuitive control panel and LCD screen make operation straightforward, catering to employees of all tech-savviness levels. Maintenance is facilitated by easily changeable consumables, reducing downtime and ensuring the machines remain operational.
In conclusion, the Konica Minolta FAX2900 and FAX3900 are well-equipped to meet the demands of modern businesses. Their combination of speed, clarity, and ease of use positions them as reliable solutions for efficient fax communications in any professional setting.