Introduction
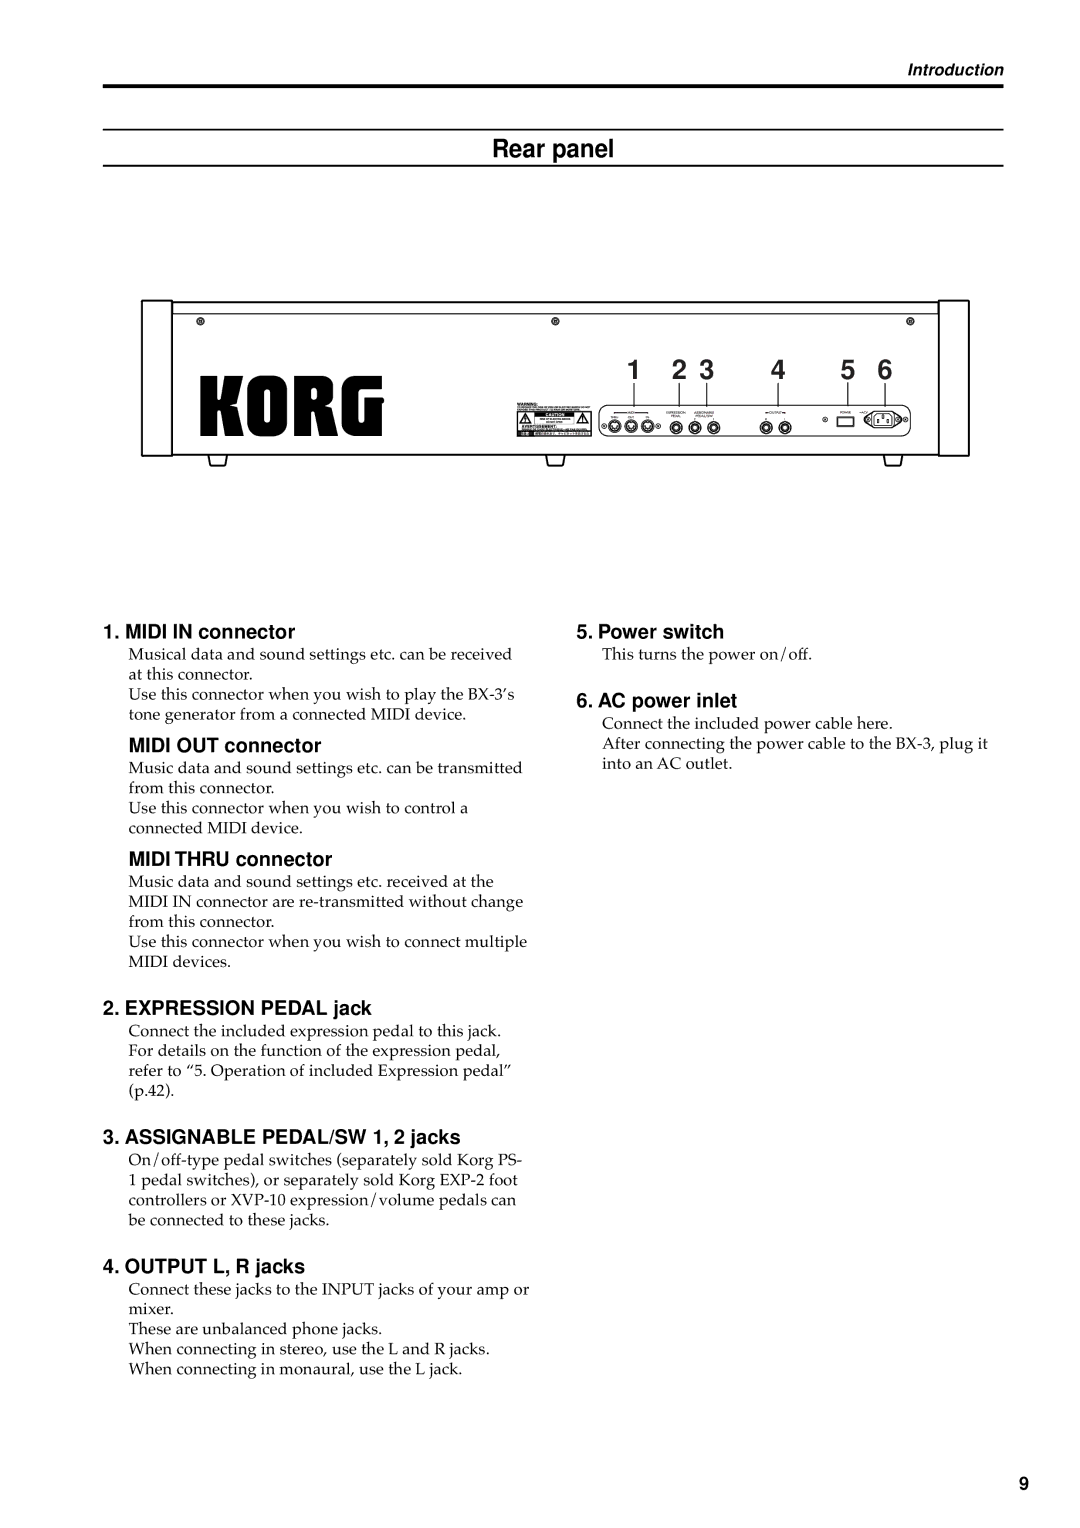
Rear panel
|
|
|
|
|
|
|
|
| 1 | 2 3 | 4 | 5 | 6 |
| |||||||
|
|
|
|
|
|
|
|
|
|
|
|
|
|
|
|
|
|
|
|
|
|
|
|
|
|
|
|
|
|
|
|
|
|
|
|
|
|
|
|
|
|
|
|
|
|
|
|
|
|
|
|
|
|
|
|
|
|
|
|
|
|
|
|
|
|
|
|
|
|
|
|
|
|
|
|
|
|
|
|
|
|
|
|
|
|
|
|
|
|
|
|
|
|
|
|
|
|
|
|
|
|
|
|
|
|
|
|
|
|
|
|
|
|
|
|
|
|
|
|
|
|
|
|
|
|
|
|
|
|
|
|
1. MIDI IN connector
Musical data and sound settings etc. can be received at this connector.
Use this connector when you wish to play the
MIDI OUT connector
Music data and sound settings etc. can be transmitted from this connector.
Use this connector when you wish to control a connected MIDI device.
5. Power switch
This turns the power on/off.
6. AC power inlet
Connect the included power cable here.
After connecting the power cable to the
MIDI THRU connector
Music data and sound settings etc. received at the MIDI IN connector are
Use this connector when you wish to connect multiple MIDI devices.
2. EXPRESSION PEDAL jack
Connect the included expression pedal to this jack. For details on the function of the expression pedal, refer to “5. Operation of included Expression pedal” (p.42).
3. ASSIGNABLE PEDAL/SW 1, 2 jacks
1pedal switches), or separately sold Korg
4.OUTPUT L, R jacks
Connect these jacks to the INPUT jacks of your amp or mixer.
These are unbalanced phone jacks.
When connecting in stereo, use the L and R jacks. When connecting in monaural, use the L jack.
9
