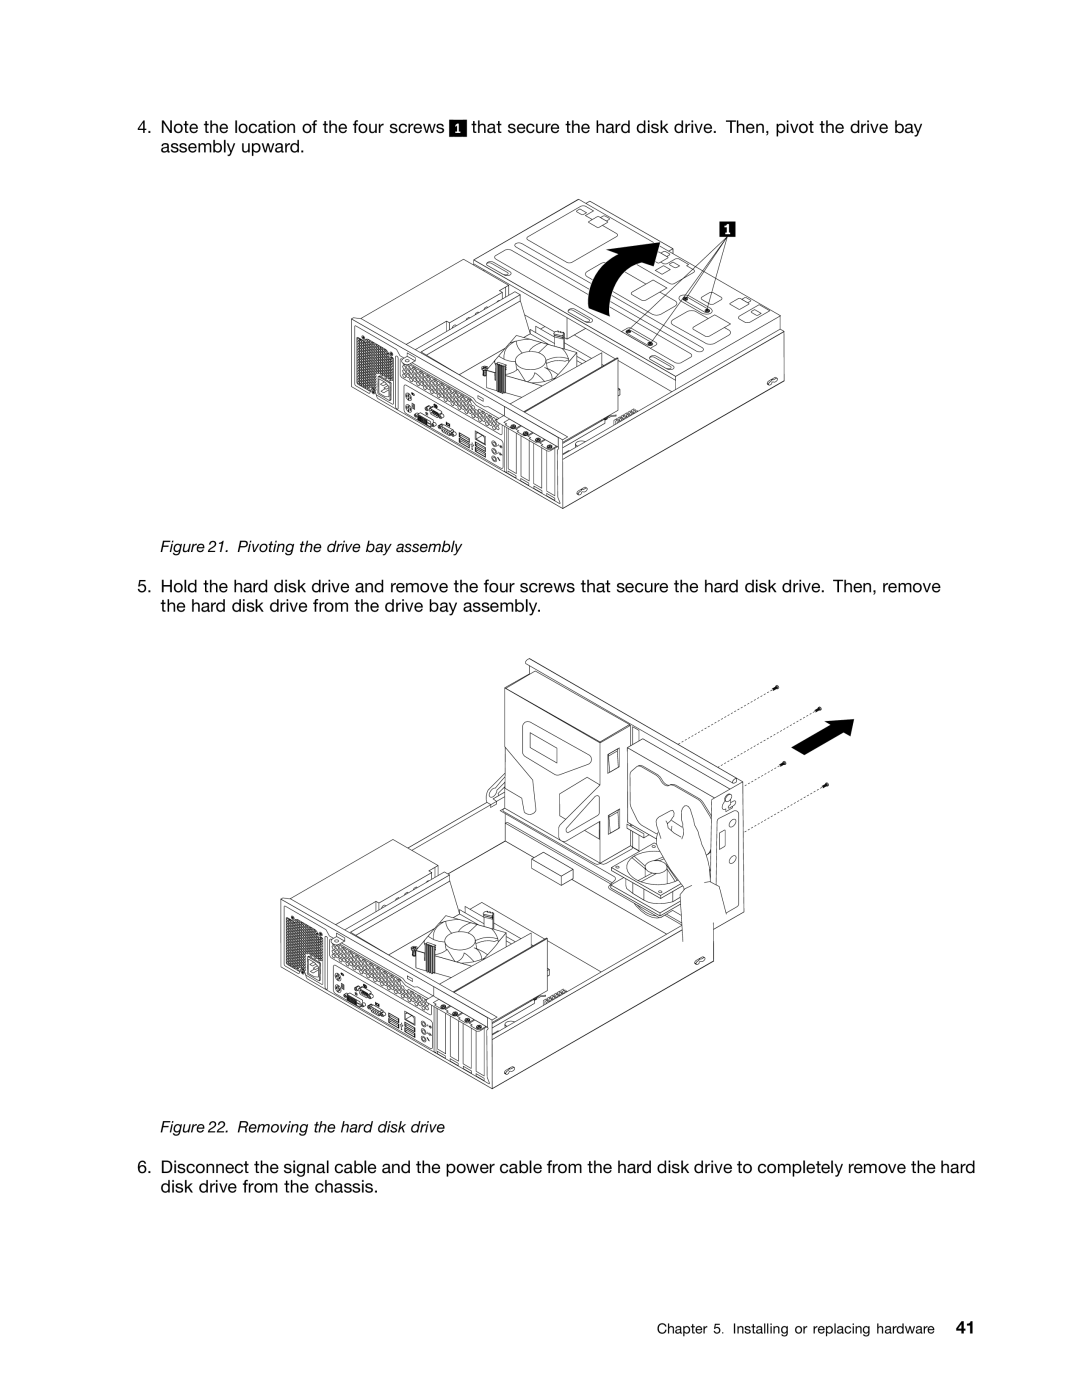
4.Note the location of the four screws assembly upward.
1
that secure the hard disk drive. Then, pivot the drive bay
Figure 21. Pivoting the drive bay assembly
5.Hold the hard disk drive and remove the four screws that secure the hard disk drive. Then, remove the hard disk drive from the drive bay assembly.
Figure 22. Removing the hard disk drive
6.Disconnect the signal cable and the power cable from the hard disk drive to completely remove the hard disk drive from the chassis.
Chapter 5. Installing or replacing hardware 41
