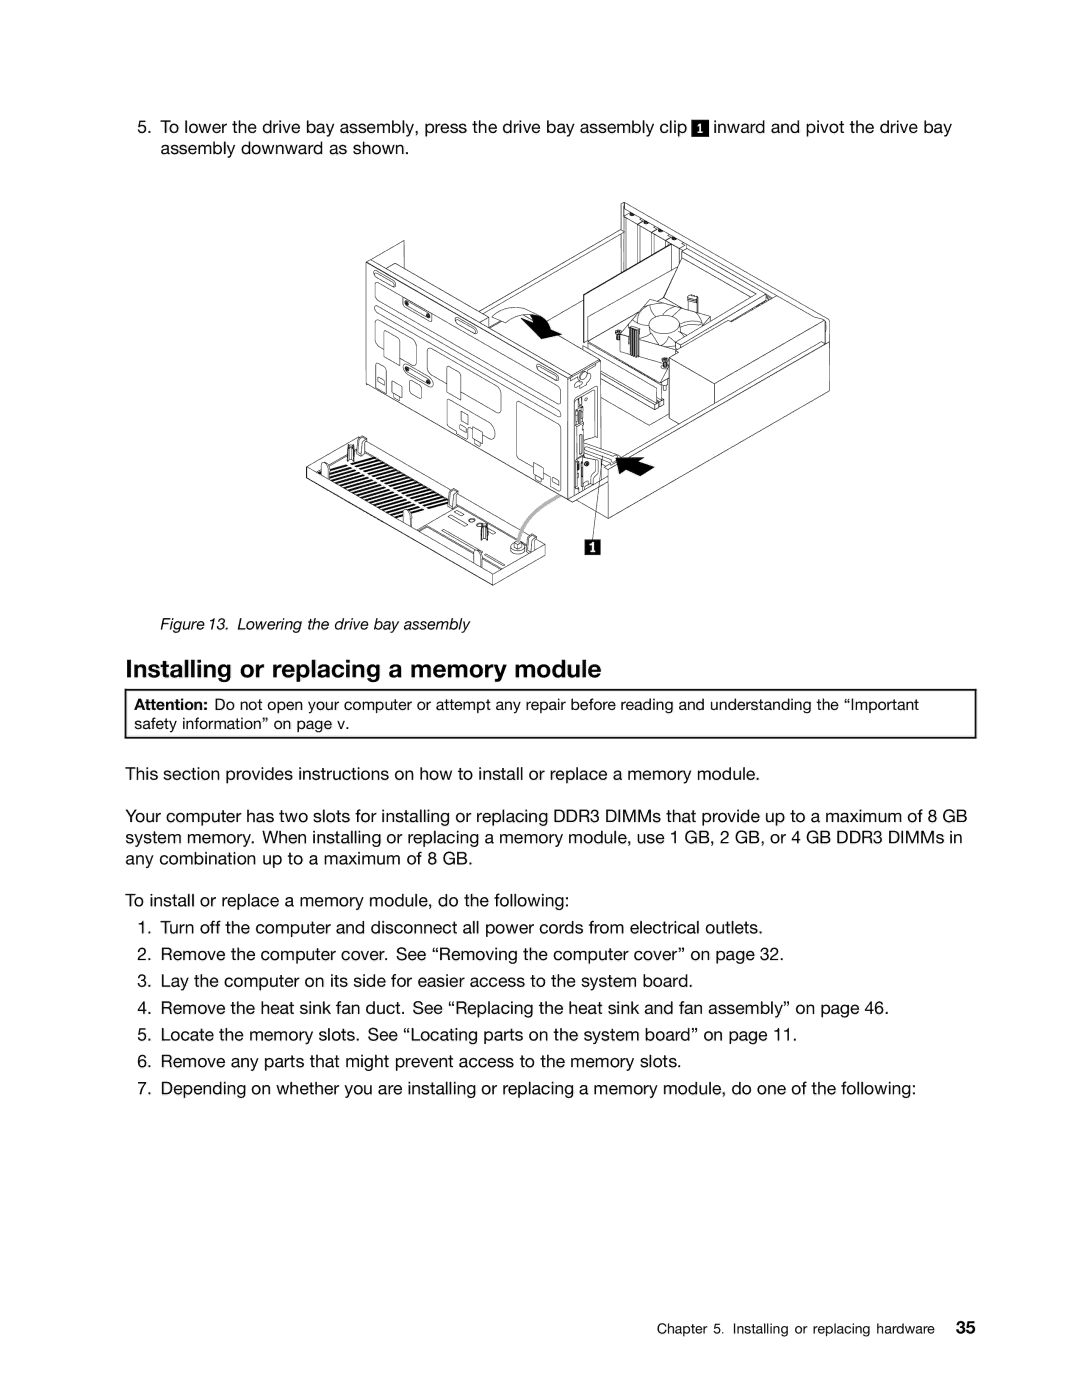
5.To lower the drive bay assembly, press the drive bay assembly clip assembly downward as shown.
1
inward and pivot the drive bay
Figure 13. Lowering the drive bay assembly
Installing or replacing a memory module
Attention: Do not open your computer or attempt any repair before reading and understanding the “Important safety information” on page v.
This section provides instructions on how to install or replace a memory module.
Your computer has two slots for installing or replacing DDR3 DIMMs that provide up to a maximum of 8 GB system memory. When installing or replacing a memory module, use 1 GB, 2 GB, or 4 GB DDR3 DIMMs in any combination up to a maximum of 8 GB.
To install or replace a memory module, do the following:
1.Turn off the computer and disconnect all power cords from electrical outlets.
2.Remove the computer cover. See “Removing the computer cover” on page 32.
3.Lay the computer on its side for easier access to the system board.
4.Remove the heat sink fan duct. See “Replacing the heat sink and fan assembly” on page 46.
5.Locate the memory slots. See “Locating parts on the system board” on page 11.
6.Remove any parts that might prevent access to the memory slots.
7.Depending on whether you are installing or replacing a memory module, do one of the following:
Chapter 5. Installing or replacing hardware 35
