Wireless Access Point User Guide
2.On your Web Server, create a suitable welcome page.
The welcome page must have a link or button to allow the user to input their user name and password on the uamlogon.htm page on the Access Point.
3.On the Access Point’s UAM screen, select External
4.Add users on your RADIUS server as required, and allow access by these users.
5.Client PCs must have the correct Wireless settings in order to associate with the Wireless Access Point.
6.When an associated client tries to use HTTP (TCP, port 80) connections, they will be re- directed to the welcome page on your Web Server. They must then click the link or button in order to reach the Access Point’s login page.
7.The client (user) must then enter the user name and password, as defined on the Radius Server. (You must provide some system to let users know the correct name and password to use.)
8.If the user name and password is correct, Internet access is allowed. Otherwise, the user remains on the login page.
•Clients which pass the authentication are listed as “xx:xx:xx:xx:xx:xx WEB authentication” in the log table, and station status would show as “Authenticated” on the station list table.
•If a client fails authentication, “xx:xx:xx:xx:xx:xx WEB authentication failed” is shown in the log, and station status is shown as “Authenticating” on the station list table.
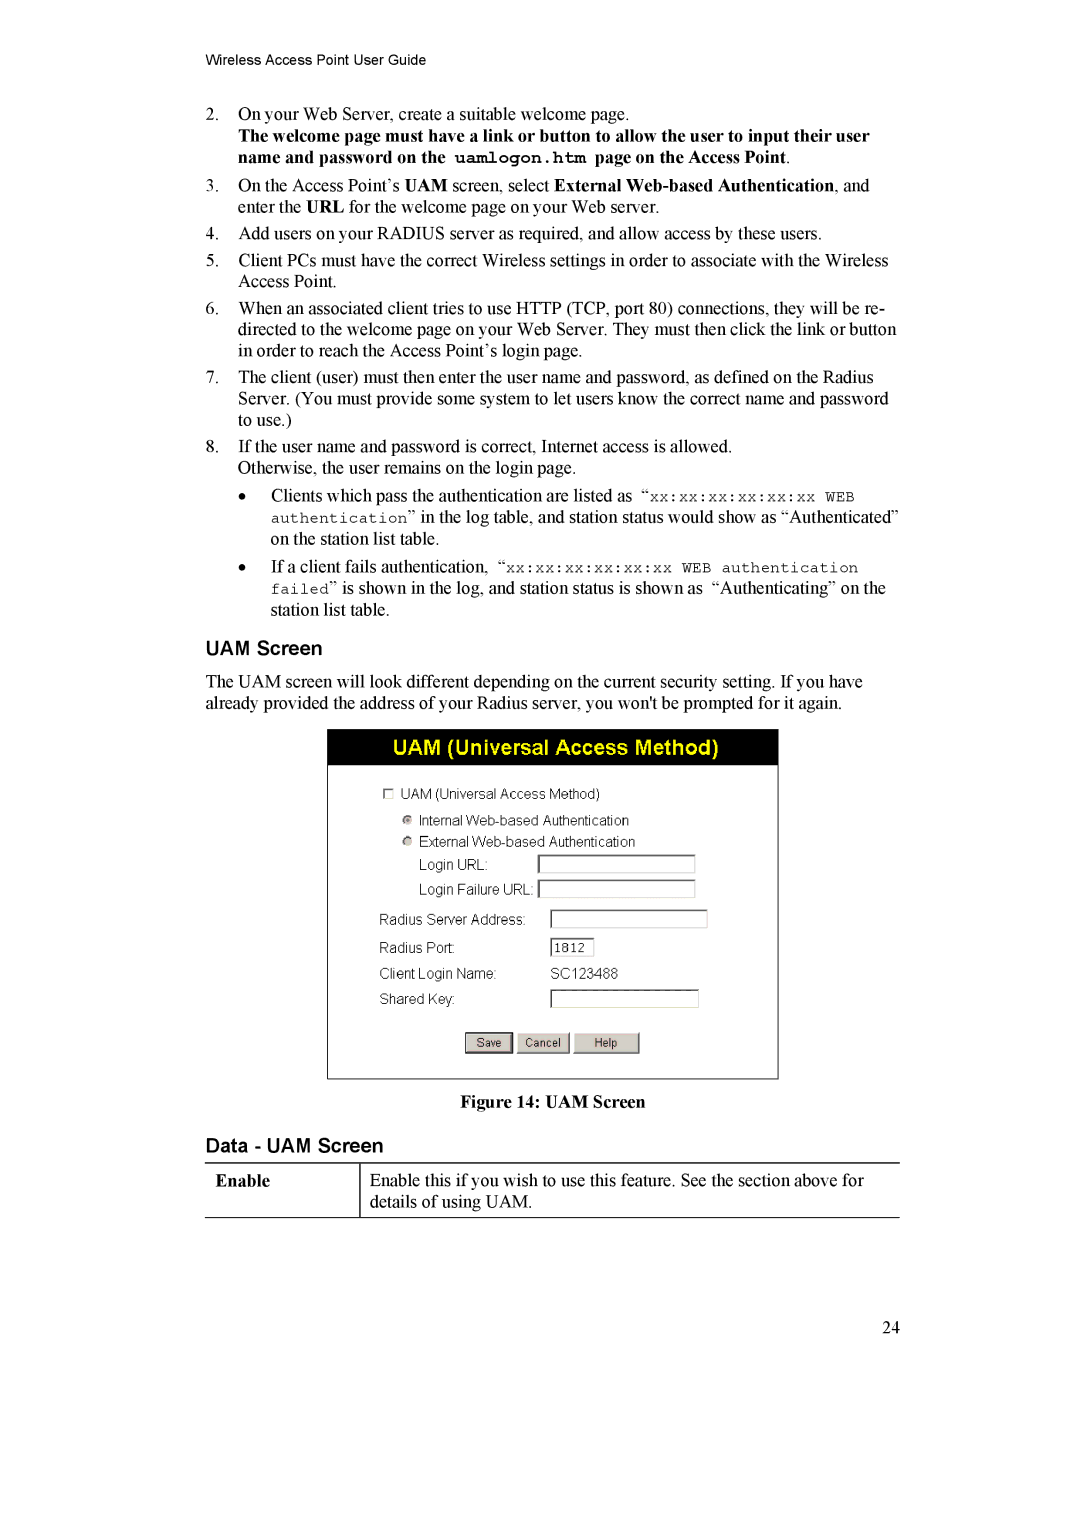
UAM Screen
The UAM screen will look different depending on the current security setting. If you have already provided the address of your Radius server, you won't be prompted for it again.
Figure 14: UAM Screen
Data - UAM Screen
Enable
Enable this if you wish to use this feature. See the section above for details of using UAM.
24