INSTALLATION | ||
|
|
|
UNDERCARRIAGE ASSEMBLY
![]() WARNING
WARNING


 CYLINDER may explode


 if damaged.
• Keep cylinder upright and secured to support.
•Keep cylinder away from areas where it may be damaged.
•Never lift welder with cylinder attached.
•Never allow welding electrode to touch cylinder.
•Keep cylinder away from welding or other live electrical circuits.
•The undercarriage is not intended for transport- ing the
•If the
•Do not lift the
•If the
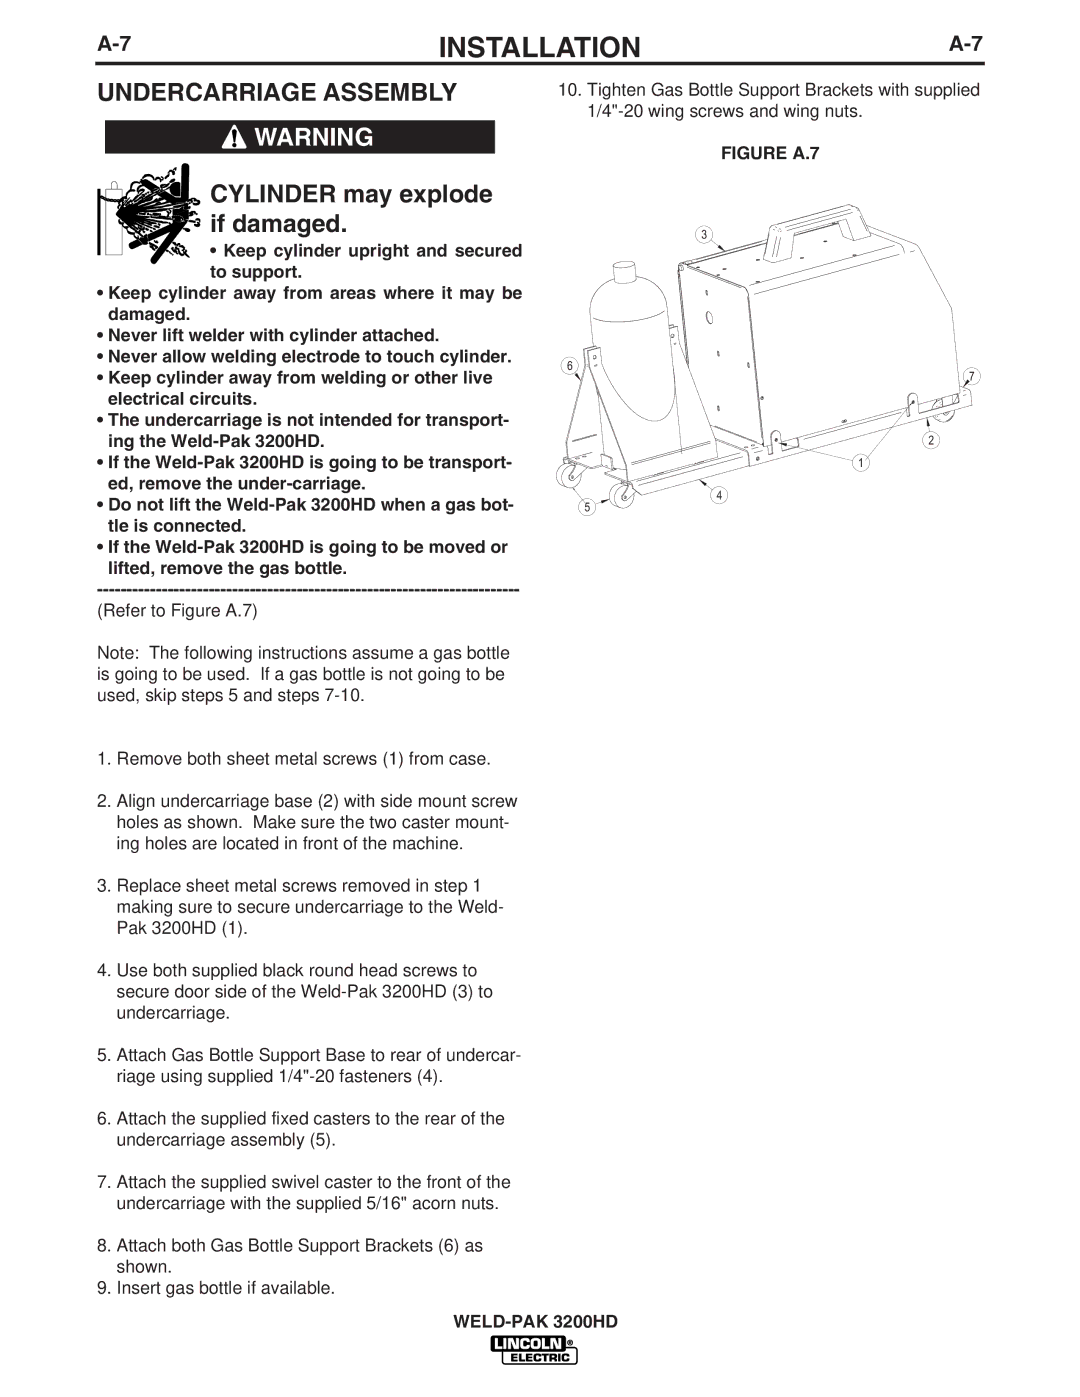
(Refer to Figure A.7)
Note: The following instructions assume a gas bottle is going to be used. If a gas bottle is not going to be used, skip steps 5 and steps
1.Remove both sheet metal screws (1) from case.
2.Align undercarriage base (2) with side mount screw holes as shown. Make sure the two caster mount- ing holes are located in front of the machine.
3.Replace sheet metal screws removed in step 1 making sure to secure undercarriage to the Weld- Pak 3200HD (1).
4.Use both supplied black round head screws to secure door side of the
5.Attach Gas Bottle Support Base to rear of undercar- riage using supplied
6.Attach the supplied fixed casters to the rear of the undercarriage assembly (5).
7.Attach the supplied swivel caster to the front of the undercarriage with the supplied 5/16" acorn nuts.
8.Attach both Gas Bottle Support Brackets (6) as shown.
9.Insert gas bottle if available.
10.Tighten Gas Bottle Support Brackets with supplied
FIGURE A.7
3 ![]()
6
7 ![]()
2 ![]()
1 ![]()
![]()
![]()
![]() 4
4 ![]() 5
5 ![]()
![]()
![]()
