Wireless-G Ethernet Bridge with 5-Port Switch
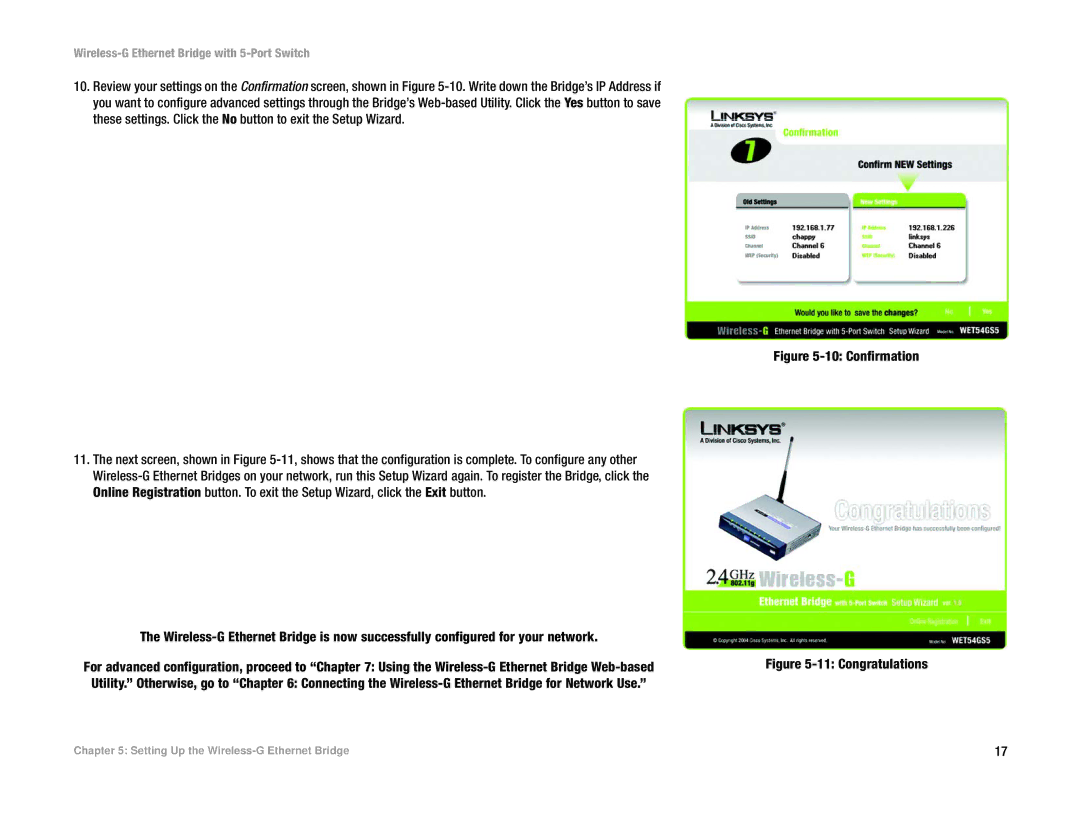
10.Review your settings on the Confirmation screen, shown in Figure 5-10. Write down the Bridge’s IP Address if you want to configure advanced settings through the Bridge’s Web-based Utility. Click the Yes button to save these settings. Click the No button to exit the Setup Wizard.
11.The next screen, shown in Figure 5-11, shows that the configuration is complete. To configure any other Wireless-G Ethernet Bridges on your network, run this Setup Wizard again. To register the Bridge, click the Online Registration button. To exit the Setup Wizard, click the Exit button.
The Wireless-G Ethernet Bridge is now successfully configured for your network.
For advanced configuration, proceed to “Chapter 7: Using the Wireless-G Ethernet Bridge Web-based Utility.” Otherwise, go to “Chapter 6: Connecting the Wireless-G Ethernet Bridge for Network Use.”