Wireless-G Broadband Router with 2 Phone Ports
Appendix E: Finding the MAC Address and IP Address for Your Ethernet Adapter
This section describes how to find the MAC address for your computer’s Ethernet adapter so you can use the MAC filtering and/or MAC address cloning feature of the Router. You can also find the IP address of your computer’s Ethernet adapter. This IP address is used for the Router’s filtering, forwarding, and/or DMZ features. Follow the steps in this appendix to find the adapter’s MAC or IP address in Windows 2000, XP or Vista.
Windows 2000 or XP Instructions
1. Click Start and Run. In the Open field, enter cmd. Press the Enter key or click the OK button.
2. At the command prompt, enter ipconfig /all. Then press the Enter key.
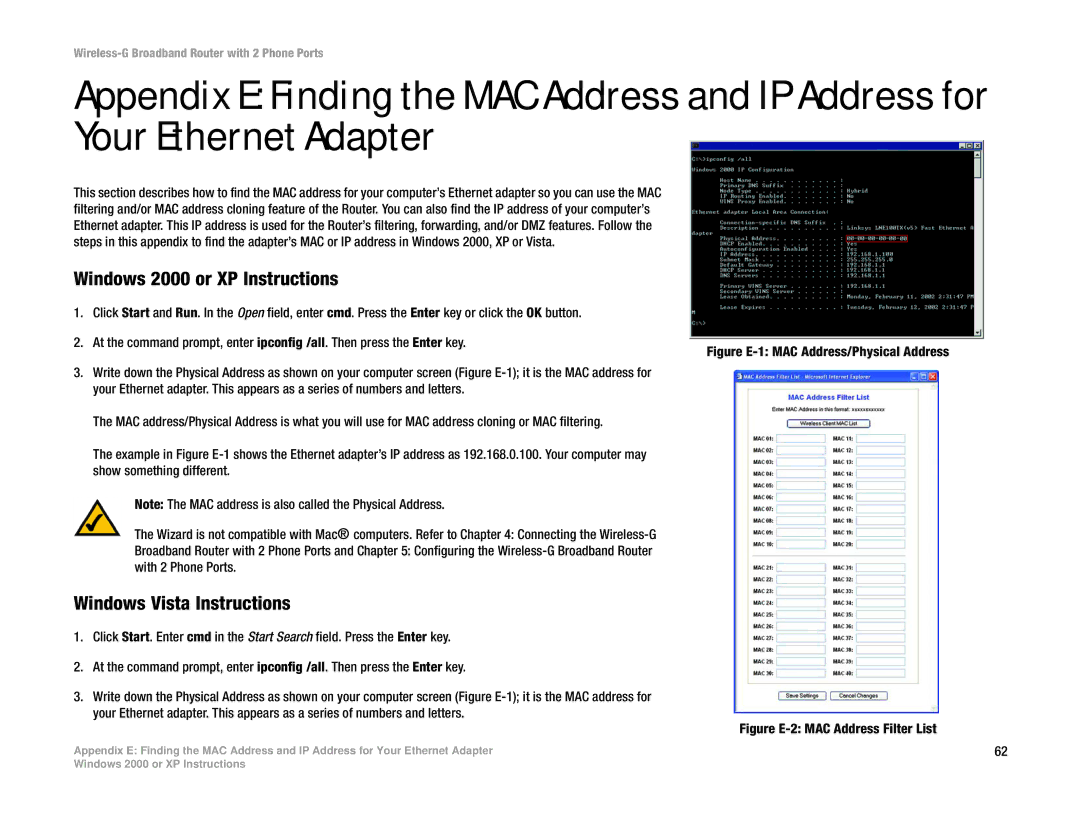
Figure E-1: MAC Address/Physical Address
3.Write down the Physical Address as shown on your computer screen (Figure E-1); it is the MAC address for your Ethernet adapter. This appears as a series of numbers and letters.
The MAC address/Physical Address is what you will use for MAC address cloning or MAC filtering.
The example in Figure E-1 shows the Ethernet adapter’s IP address as 192.168.0.100. Your computer may show something different.
Note: The MAC address is also called the Physical Address.
The Wizard is not compatible with Mac® computers. Refer to Chapter 4: Connecting the Wireless-G
Broadband Router with 2 Phone Ports and Chapter 5: Configuring the Wireless-G Broadband Router with 2 Phone Ports.
Windows Vista Instructions
1.Click Start. Enter cmd in the Start Search field. Press the Enter key.
2.At the command prompt, enter ipconfig /all. Then press the Enter key.
3.Write down the Physical Address as shown on your computer screen (Figure
Figure E-2: MAC Address Filter List
Appendix E: Finding the MAC Address and IP Address for Your Ethernet Adapter | 62 |
Windows 2000 or XP Instructions
