INSTALLATION
Recommended Setting
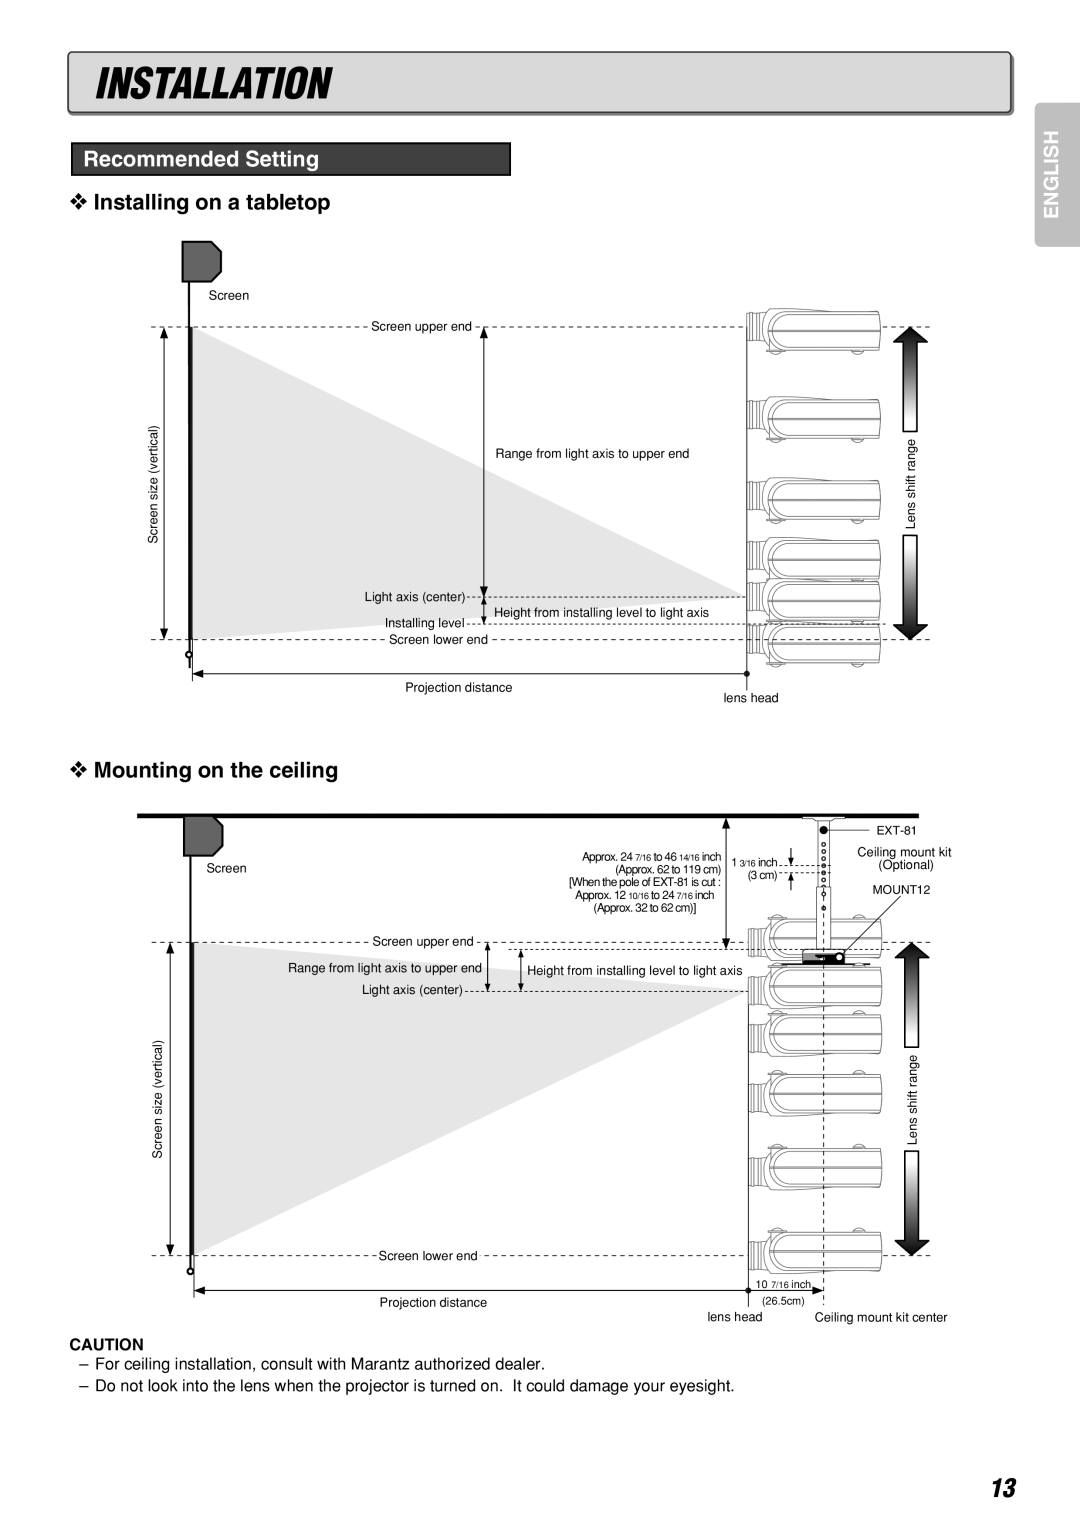
❖Installing on a tabletop
Screen
Screen upper end
sizeScreen(vertical) | shiftLensrange |
| Range from light axis to upper end |
| Light axis (center) |
| Height from installing level to light axis |
| Installing level |
| Screen lower end |
| Projection distance |
| lens head |
❖Mounting on the ceiling
|
|
| ||
| Approx. 24 7/16 to 46 14/16 inch | 1 3/16 inch | Ceiling mount kit | |
Screen | (Optional) | |||
(Approx. 62 to 119 cm) | ||||
| [When the pole of | (3 cm) |
| |
|
| MOUNT12 | ||
| Approx. 12 10/16 to 24 7/16 inch |
| ||
|
|
| ||
| (Approx. 32 to 62 cm)] |
|
|
Screen upper end
Range from light axis to upper end | Height from installing level to light axis |
|
Light axis (center) |
|
|
Screen size (vertical) |
| Lens shift range |
Screen lower end |
|
|
| 10 7/16 inch |
|
Projection distance | (26.5cm) |
|
| lens head | Ceiling mount kit center |
CAUTION
–For ceiling installation, consult with Marantz authorized dealer.
–Do not look into the lens when the projector is turned on. It could damage your eyesight.
ENGLISH
13