IBM BladeCenter Deployment Guide
4 Installation Process for Red Hat Linux
4.1 Red Hat Advanced Server 2.1/3.0 Installation
This section is intended to detail the OS installation steps and may reference steps that have been described and completed in previous sections. The steps below assume that the QLogic configuration steps in Section 3.2 have been completed. These steps have been confirmed for Red Hat AS 2.1 Update
4 and Red Hat AS 3.0 Update 3 and above.. Please see Section 4.4 for known issues related to this and other releases of Red Hat.
1.Recommended: From the secondary QLogic Fibre Channel switch module, DISABLE the port of the secondary HBA. (This HBA can be
2.The bootnet.img diskette provided in the Red Hat AS2.1 Update 4 does not contain the network drivers for the network chips on either blades (HS20: tg3; HS40:e1000). A custom bootnet image file is required for using this kickstart process. A single image can be built that works for both HS20 and HS40 blades.
3.One of the differences between installing 2.1 and 3.0 on the blades is that in Version 3.0, the network drivers do not fit on single floppy image with the installation kernel. What we’ve done to support Kickstart from a floppy is create separate boot diskettes for the HS20 and HS40.
4.Using the Management Module, boot the blade server from the kickstart floppy using the following steps.
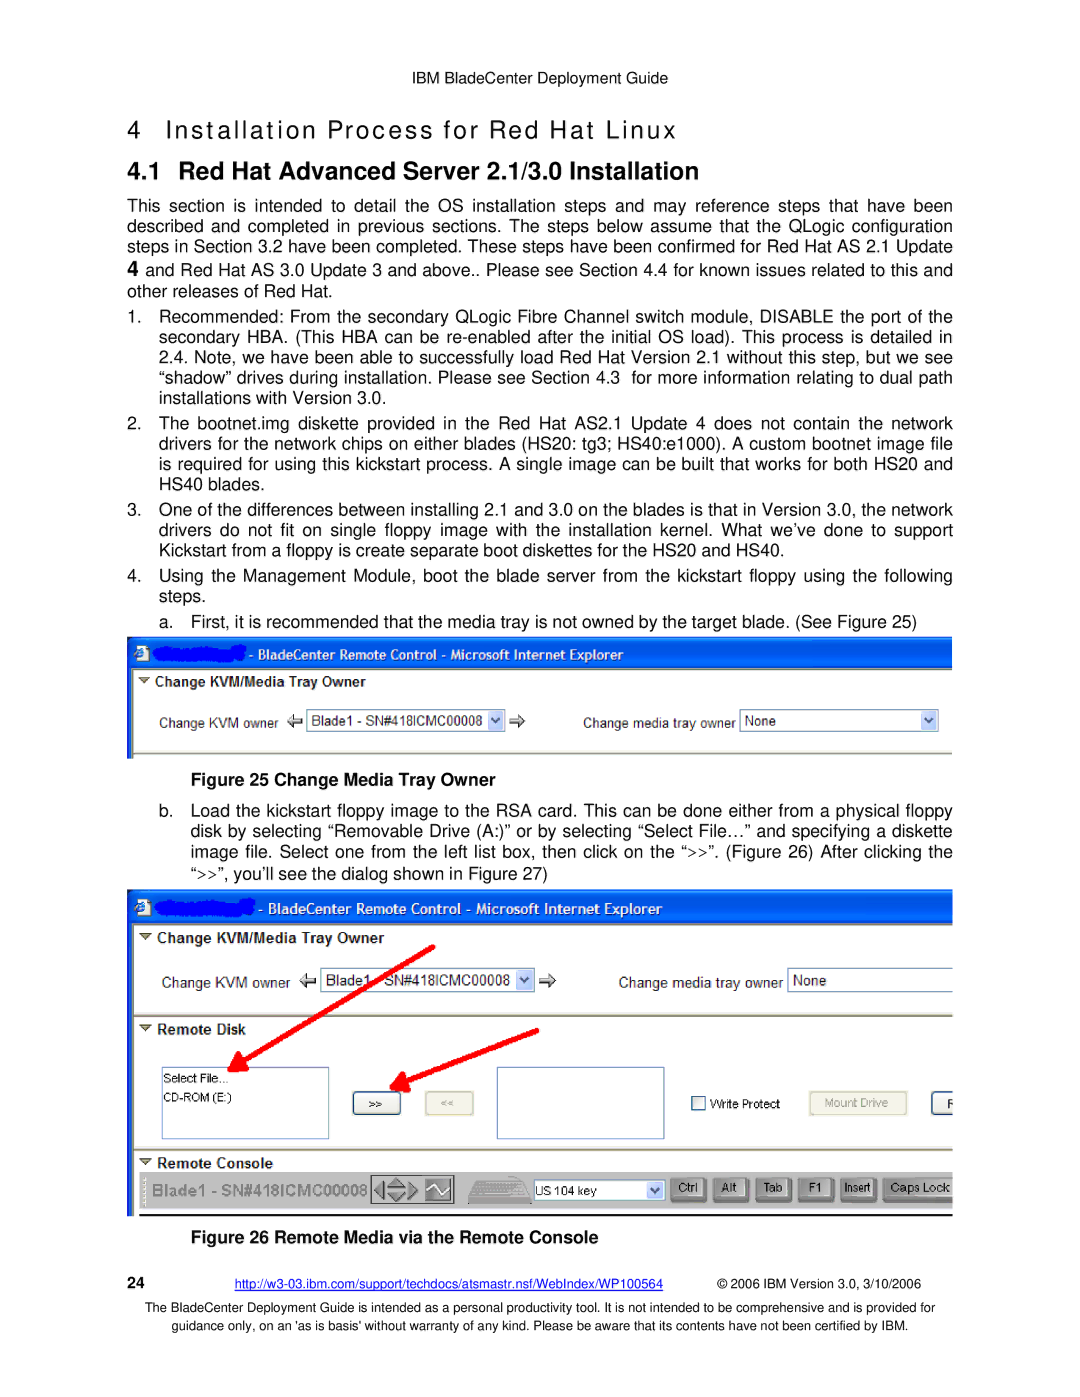
a.First, it is recommended that the media tray is not owned by the target blade. (See Figure 25)
Figure 25 Change Media Tray Owner
b.Load the kickstart floppy image to the RSA card. This can be done either from a physical floppy disk by selecting “Removable Drive (A:)” or by selecting “Select File…” and specifying a diskette image file. Select one from the left list box, then click on the “>>”. (Figure 26) After clicking the “>>”, you’ll see the dialog shown in Figure 27)
Figure 26 Remote Media via the Remote Console
24 | © 2006 IBM Version 3.0, 3/10/2006 |
The BladeCenter Deployment Guide is intended as a personal productivity tool. It is not intended to be comprehensive and is provided for
guidance only, on an 'as is basis' without warranty of any kind. Please be aware that its contents have not been certified by IBM.