ENGLISH
II. NORMAL OPERATION - STEP-BY-STEP
A.DAILYSTARTUPPROCEDURE
1.Check that the circuit breaker/fused disconnect is in the on position. Check that the window is closed.
2.Turn the "BLOWER" ( )
switch to the “ON” ("I") position.
3. Turn the "CONVEYOR" (![]() ) switch to the “ON” ("I") position.
) switch to the “ON” ("I") position.
7. (Gasovensonly)Ifthe"RE- SET" (![]() ) switch illumi- nates, the gas burner did not light. Press the "RE-
) switch illumi- nates, the gas burner did not light. Press the "RE-
SET" (![]() ) switch (repeat-
) switch (repeat-
edly if necessary) to attempt to light the burner.
NOTE: If the burner does not light within 15 minutes, the oven enters a safety lockout mode that disables the "RE- SET" (![]() ) switch. If this occurs, turn the "HEAT" (
) switch. If this occurs, turn the "HEAT" (![]() ), "BLOWER" (
), "BLOWER" (![]() ), and "CONVEYOR" (
), and "CONVEYOR" (![]() ) switches to the
) switches to the
"OFF" ("O") position. Wait for AT LEAST FIVE MINUTES.
Then, repeat the Daily Startup procedure.
7. Wait for the oven to heat to the setpoint temperature. Higher |
setpoint temperatures will require a longer wait. The oven |
4. If necessary, adjust the |
conveyor speed setting |
can reach a temperature of 232°C in approximately 5 |
minutes. |
by pressing the | or |
| ||
pushbuttons on the con- | ||||
veyor speed controller to | ||||
change | the | displayed | ||
bake time. |
|
|
| |
Some ovens may be | ||||
equipped | with | a | ||
thumbwheel speed con- | ||||
troller. For these ovens, | ||||
turn | the |
| three | |
thumbwheels to change | ||||
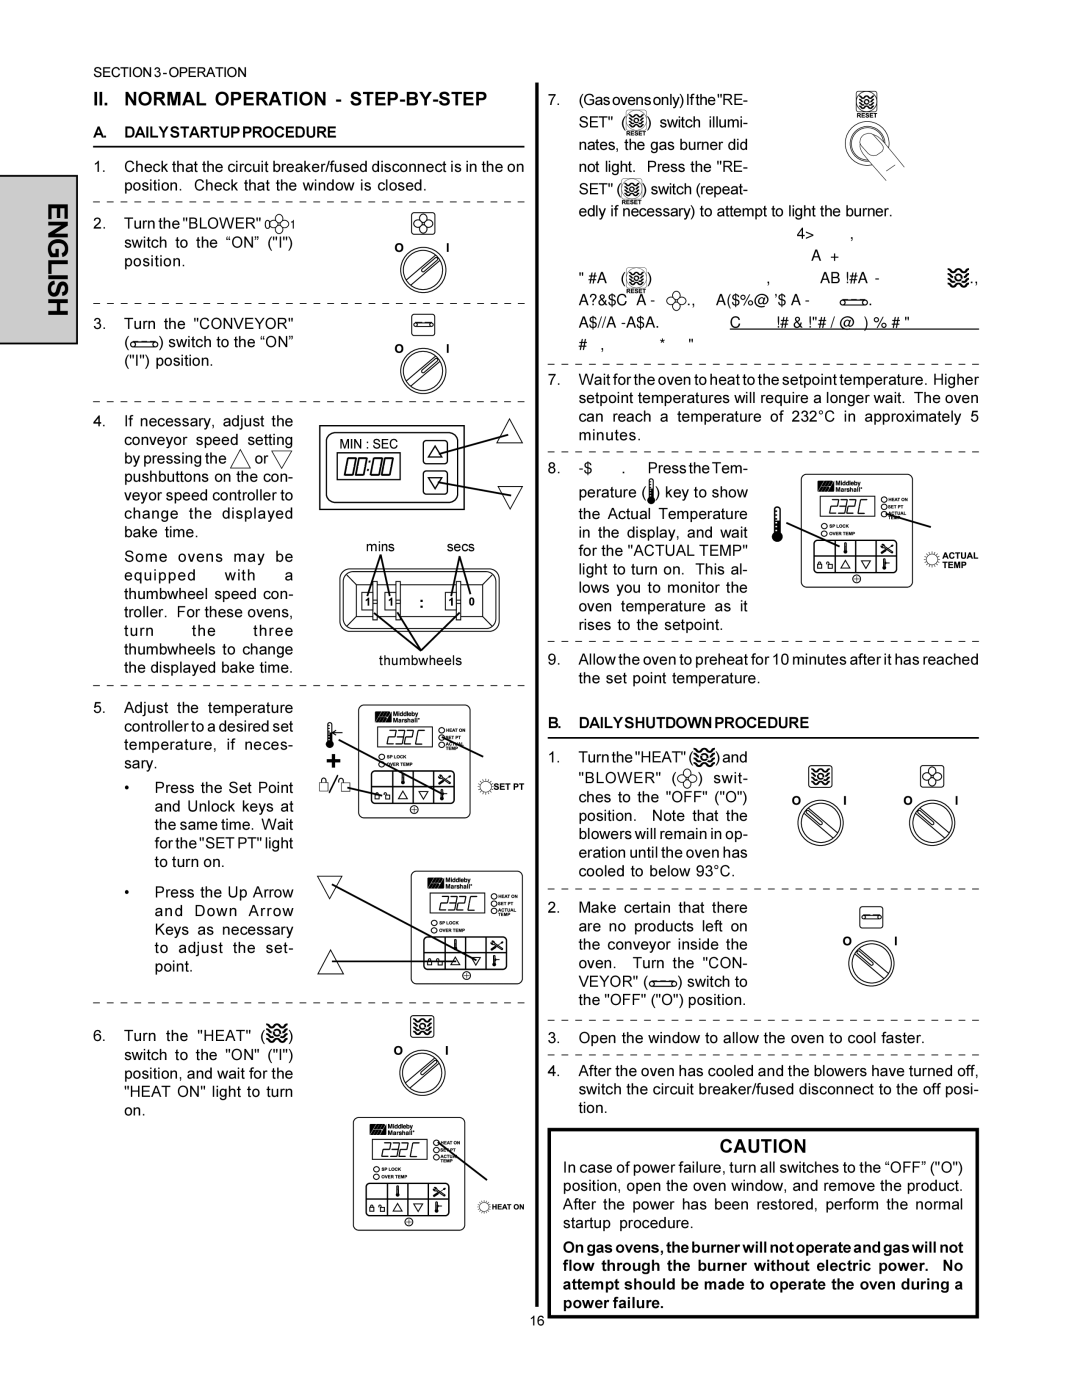
8.(Optional) Press the Tem- perature (![]() ) key to show the Actual Temperature in the display, and wait for the "ACTUAL TEMP" light to turn on. This al- lows you to monitor the oven temperature as it rises to the setpoint.
) key to show the Actual Temperature in the display, and wait for the "ACTUAL TEMP" light to turn on. This al- lows you to monitor the oven temperature as it rises to the setpoint.


 wait
wait 


 for
for
the displayed bake time. |
5. Adjust the temperature |
controller to a desired set |
temperature, if neces- |
sary. |
• Press the Set Point |
and Unlock keys at |
the same time. Wait |
for the "SET PT" light |
to turn on. |
• Press the Up Arrow |
and Down Arrow |
Keys as necessary |
to adjust the set- |
point. |
or
mins secs
| thumbwheels |
+ | wait |
for |
or
9.Allow the oven to preheat for 10 minutes after it has reached the set point temperature.
B. DAILYSHUTDOWNPROCEDURE
1. Turn the "HEAT" ( | ) and |
|
"BLOWER" ( | ) swit- |
|
ches to the "OFF" ("O") | + | |
position. Note that the | ||
blowers will remain in op- eration until the oven has cooled to below 93°C.
2. Make certain that there are no products left on the conveyor inside the oven. Turn the "CON- VEYOR" (![]() ) switch to the "OFF" ("O") position.
) switch to the "OFF" ("O") position.
6. Turn the "HEAT" (![]() ) switch to the "ON" ("I") position, and wait for the "HEAT ON" light to turn on.
) switch to the "ON" ("I") position, and wait for the "HEAT ON" light to turn on.
wait
for
3. Open the window to allow the oven to cool faster.
4.After the oven has cooled and the blowers have turned off, switch the circuit breaker/fused disconnect to the off posi- tion.
CAUTION
In case of power failure, turn all switches to the “OFF” ("O") position, open the oven window, and remove the product. After the power has been restored, perform the normal startup procedure.
On gas ovens, the burner will not operate and gas will not flow through the burner without electric power. No attempt should be made to operate the oven during a power failure.
16