SECTION 5 − INSTALLATION - STUD GUN
5-1. Chuck Installation
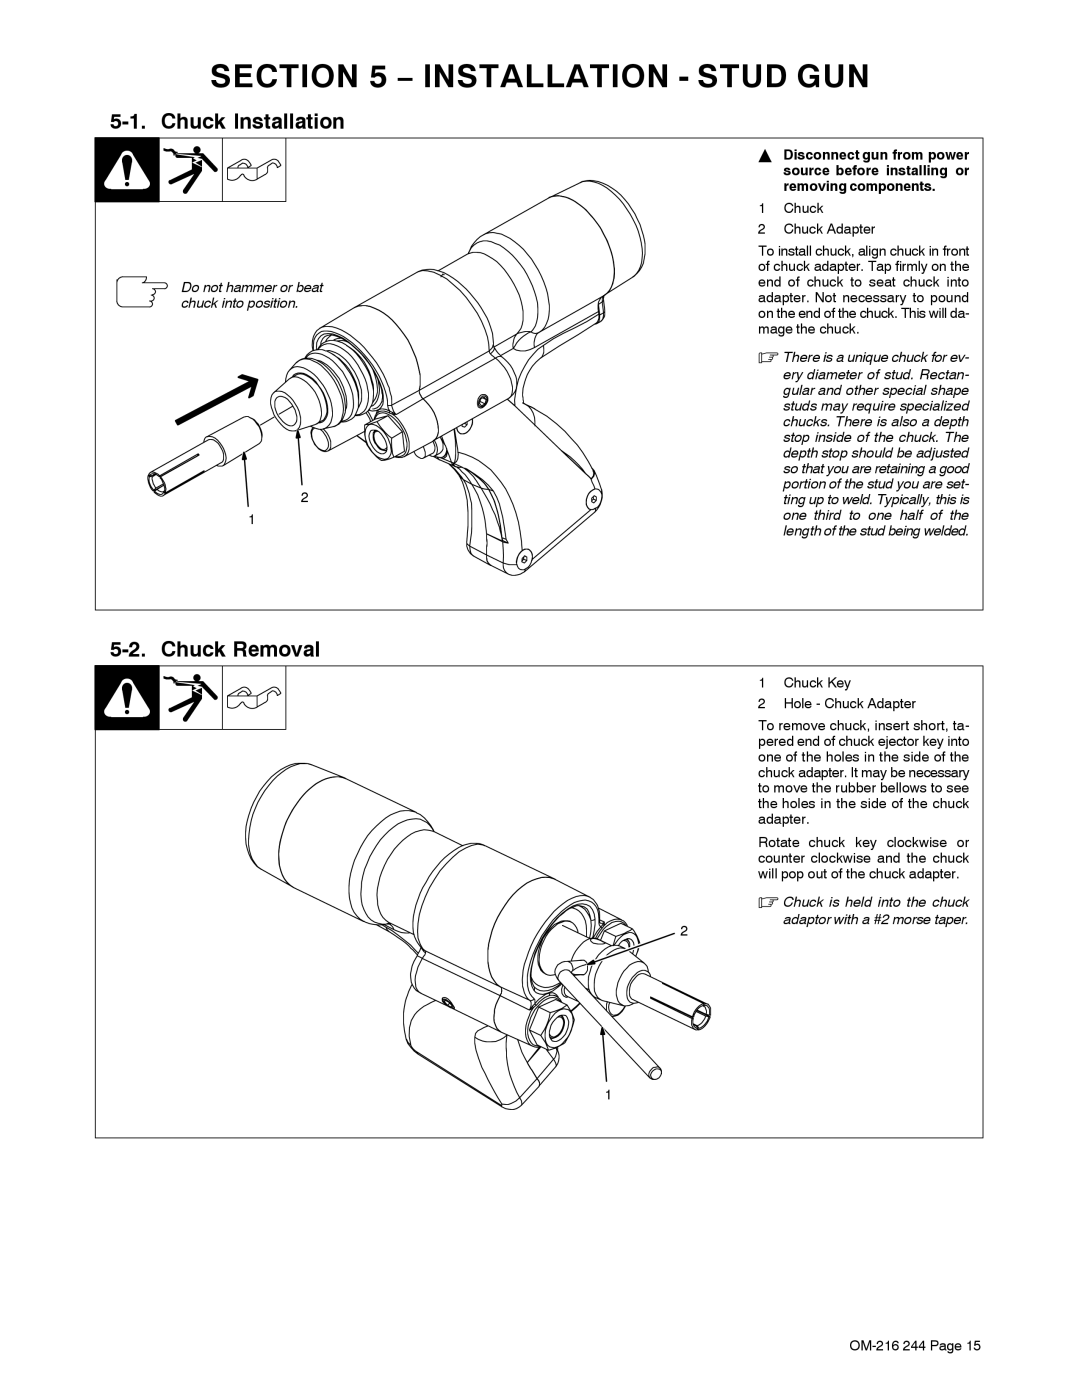
Do not hammer or beat chuck into position.
2
1
YDisconnect gun from power source before installing or removing components.
1Chuck
2Chuck Adapter
To install chuck, align chuck in front of chuck adapter. Tap firmly on the end of chuck to seat chuck into adapter. Not necessary to pound on the end of the chuck. This will da- mage the chuck.
.There is a unique chuck for ev-
ery diameter of stud. Rectan- gular and other special shape studs may require specialized chucks. There is also a depth stop inside of the chuck. The depth stop should be adjusted so that you are retaining a good portion of the stud you are set- ting up to weld. Typically, this is one third to one half of the length of the stud being welded.
5-2. Chuck Removal
1 Chuck Key
2 Hole - Chuck Adapter
To remove chuck, insert short, ta- pered end of chuck ejector key into one of the holes in the side of the chuck adapter. It may be necessary to move the rubber bellows to see the holes in the side of the chuck adapter.
Rotate chuck key clockwise or counter clockwise and the chuck will pop out of the chuck adapter.
. Chuck is held into the chuck
2
1
adaptor with a #2 morse taper.