SECTION 7 − OPERATION - STUD GUN
7-1. Stud Gun Tool Functions
Y Disconnect gun from power source before installing or removing compo- nents.
The stud gun automates the stud welding process.
Several key functions are:
• Holds the ferrule, spark shield or gas de- livery system
• Holds the stud
• Strikes the arc
• Establishes the arc length (lift distance)
• Thru the power source, the gun controls the arc time
• Controls rate of plunge of the stud into the base metal
7-2. Stud Welding Procedures
. Before welding it is important to review the set up. Correct set up will produce the best welding results. Approximately 95% of all stud welding problems are due to improper gun set up or power set-
|
| tings. |
|
| Welding Procedures: |
|
| • Place stud to be welded into weld chuck. |
|
| • Insert a ferrule into the ferrule grip (this |
|
| step is not necessary if using a spark shield) |
|
| • Position end of stud in location to be |
|
| welded. |
|
| • Press gun downward so the ferrule is sit- |
|
| ting on the base metal. |
|
| • Pull trigger to begin weld sequence. |
|
| • Hold gun still during the arcing process. |
|
| • After weld is complete, continue to hold |
|
| the gun still for 1 second to allow the molten |
|
| metal to solidify. |
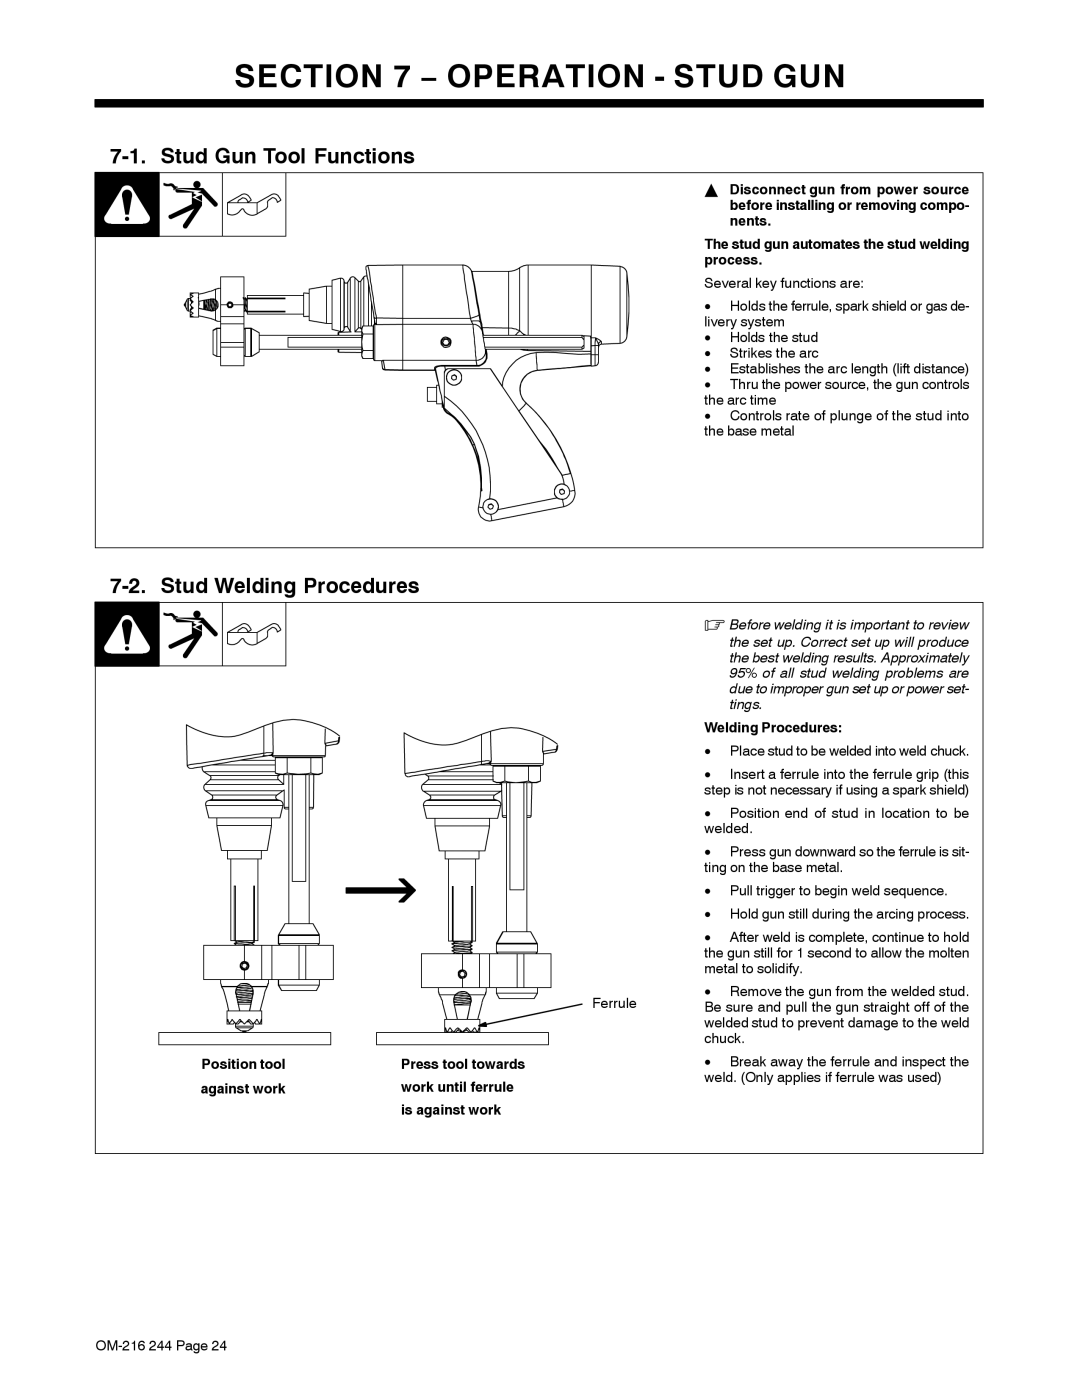
| Ferrule | • Remove the gun from the welded stud. |
| Be sure and pull the gun straight off of the | |
|
| welded stud to prevent damage to the weld |
|
| chuck. |
Position tool | Press tool towards | • Break away the ferrule and inspect the |
against work | work until ferrule | weld. (Only applies if ferrule was used) |
| ||
| is against work |
|