1.DISASSEMBLY/REASSEMBLY
NOTENOTE
•Before reassembling, make sure that the amount of storage memory used is 0%.
•If the amount of memory used is not 0%, print out or delete any data in the memory.
1-1. Removing parts
The following procedures describe the removal of parts related to the network scanner, net- work interface and printer functions.
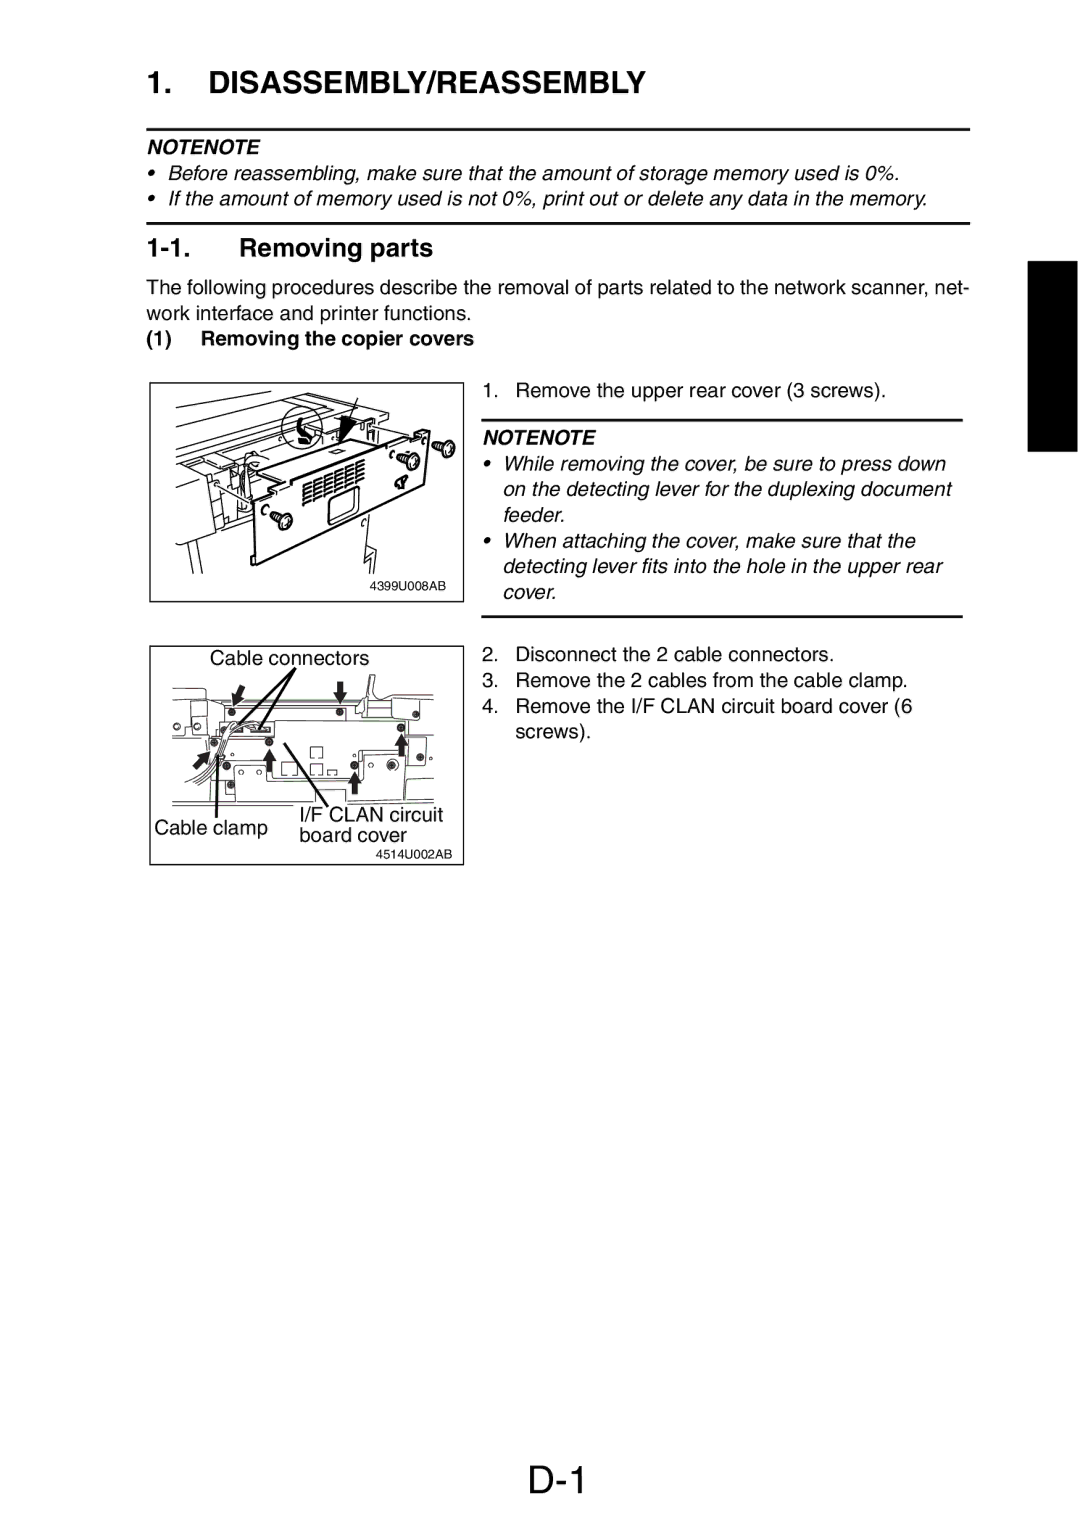
(1)Removing the copier covers
4399U008AB |
Cable connectors | ||
Cable clamp | I/F CLAN circuit | |
board cover | ||
| ||
| 4514U002AB | |
1. Remove the upper rear cover (3 screws).
NOTENOTE
•While removing the cover, be sure to press down on the detecting lever for the duplexing document feeder.
•When attaching the cover, make sure that the detecting lever fits into the hole in the upper rear cover.
2.Disconnect the 2 cable connectors.
3.Remove the 2 cables from the cable clamp.
4.Remove the I/F CLAN circuit board cover (6 screws).