6. NetCommand Control of an A/V Receiver (837 Series) | 55 |
Setting Up A/V Receiver Control, continued
Case 3: Automatic Audio and
Video Switching via HDMI
If your A/V receiver has an HDMI output, it may be convenient to route video signals from multiple devices over a single cable to the TV. Use this procedure to set up NetCommand control of the A/V receiver’s audio and video switching over a single HDMI cable. The connected source devices can be analog, digital, or a mixture or the two. When this setup is complete, you can use the TV’s Activity menu to select a video device connected to the A/V receiver.
TV | A/V Receiver |
HDMI | |
| Output |
HDMI Cable |
|
VCR
DVD player
Cable box
More About Using an HDMI Connection
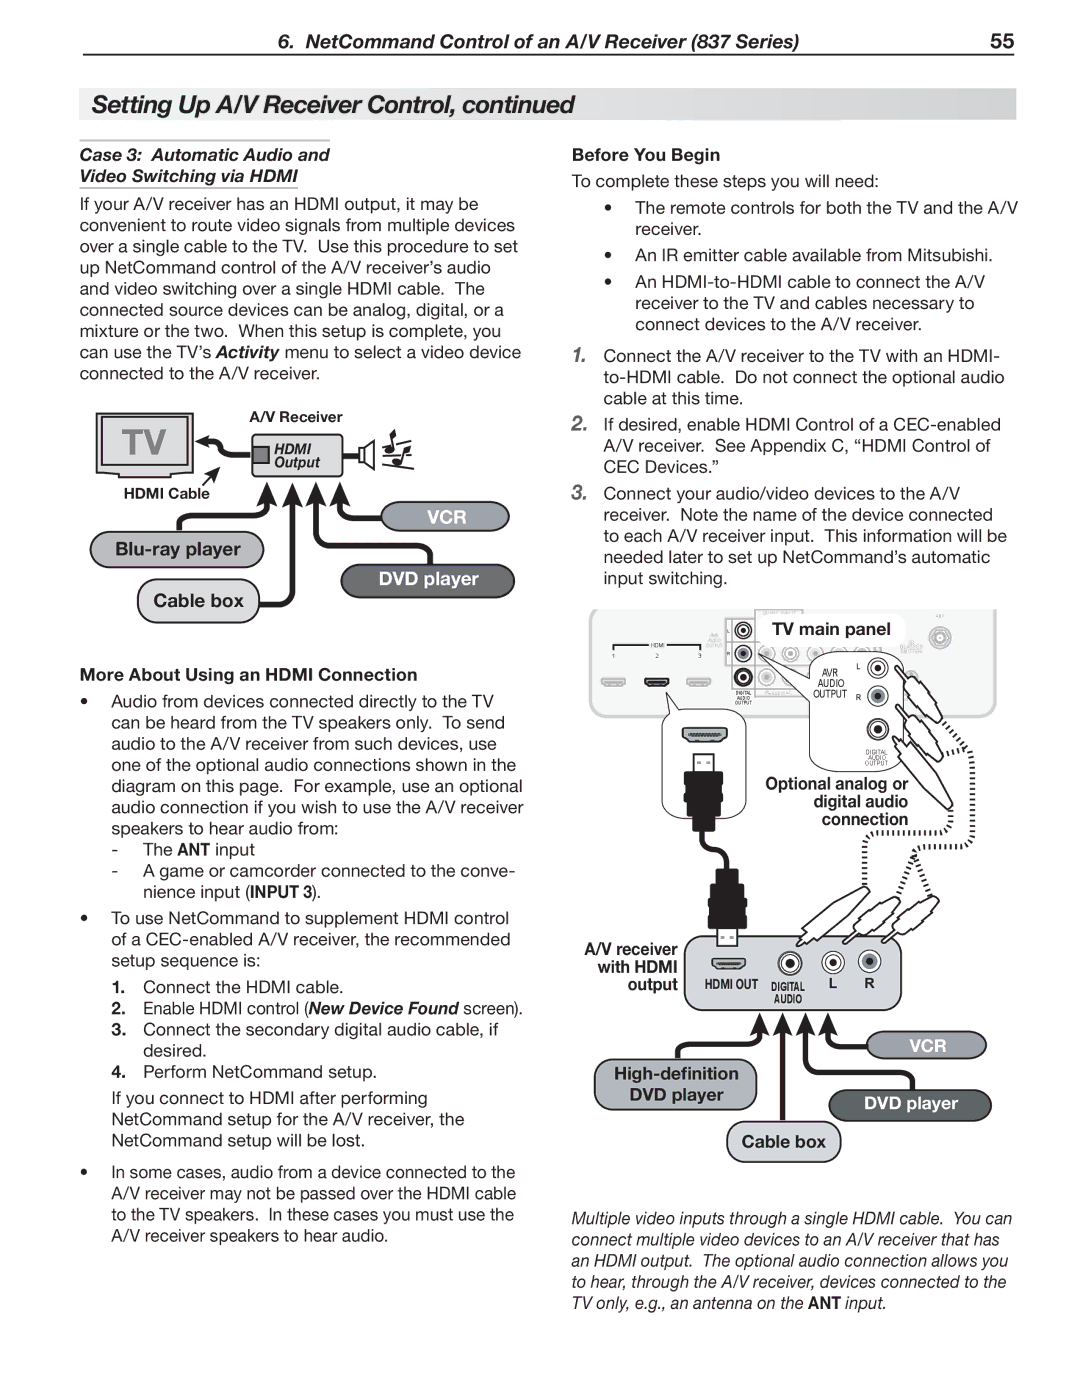
•Audio from devices connected directly to the TV can be heard from the TV speakers only. To send audio to the A/V receiver from such devices, use one of the optional audio connections shown in the diagram on this page. For example, use an optional audio connection if you wish to use the A/V receiver speakers to hear audio from:
•To use NetCommand to supplement HDMI control of a
1.Connect the HDMI cable.
2.Enable HDMI control (New Device Found screen).
3.Connect the secondary digital audio cable, if desired.
4.Perform NetCommand setup.
If you connect to HDMI after performing NetCommand setup for the A/V receiver, the NetCommand setup will be lost.
•In some cases, audio from a device connected to the A/V receiver may not be passed over the HDMI cable to the TV speakers. In these cases you must use the A/V receiver speakers to hear audio.
Before You Begin
To complete these steps you will need:
•The remote controls for both the TV and the A/V receiver.
•An IR emitter cable available from Mitsubishi.
•An
1.Connect the A/V receiver to the TV with an HDMI-
2.If desired, enable HDMI Control of a
3.Connect your audio/video devices to the A/V receiver. Note the name of the device connected to each A/V receiver input. This information will be needed later to set up NetCommand’s automatic input switching.
|
|
|
|
| DVI/PC INPUT |
|
|
| ANT |
|
|
|
|
| R AUDIO L |
|
|
| |
|
|
| AVR | L | TV main panel |
| |||
| HDMI |
| AUDIO |
| Y/ VIDEO | Pb | Pr |
| 3D |
|
| OUTPUT |
| 2 | |||||
|
|
|
|
|
| GLASSES | |||
1 | 2 | 3 |
| R |
|
| L | INPUT1 | EMITTER |
|
|
|
| ||||||
|
|
|
|
|
| ||||
|
|
|
|
|
| AVR |
| INPUT |
|
|
|
|
|
| Y/ VIDEO | AUDIO | Pr |
| |
|
|
|
|
|
|
| |||
|
|
|
| AUDIO | R AUDIO L | OUTPUT | R |
| Output |
|
|
|
| DIGITAL | (480i / 480p / 720p / 1080i) |
| |||
|
|
|
| OUTPUT |
|
|
|
|
|
DIGITAL
AUDIO
OUTPUT
Optional analog or digital audio connection
A/V receiver |
|
with HDMI |
|
output HDMI OUT DIGITAL L R | |
| AUDIO |
| VCR |
| |
DVD player | DVD player |
| |
| Cable box |
Multiple video inputs through a single HDMI cable. You can connect multiple video devices to an A/V receiver that has an HDMI output. The optional audio connection allows you to hear, through the A/V receiver, devices connected to the TV only, e.g., an antenna on the ANT input.