<MPX DISPLAY SETTINGS>
The multiplexer function of this unit allows the connected camera video to be displayed using SPLIT4 screen and SPLIT9 screens. It is also possible to set the order of the camera number displayed. Basic operations of the multi-
plexer can also be found on  see page 19.
■Multiplexer function related button operations/operation table
♦Camera number button operations
When pressing a camera number button, the video of the cam- era connected to that camera number terminal is displayed using a single screen. Even during split/sequential screen dis- play, video from any camera can be displayed using a single screen by pressing the respective camera number button.
♦SPLIT/SEQUENCE button operations
By pressing the SPLIT/SEQUENCE button, the display modes shown below set in each split screen setting of the multiplexer setting can be displayed in order.
Available modes
“SPLIT9”, “SPLIT4(a)”, “SPLIT4(b)”, “SPLIT4(c)”, “SPLIT4 sequential”, “Single screen sequential”.
![]() During playback, the underlined displayed modes and single screen can be selected.
During playback, the underlined displayed modes and single screen can be selected.
![]() The split screen setting can be set using “SPLIT4 SCREEN SETTING” and “SPLIT9 SCREEN SET- TING” in the <OUTPUT A> screen and <OUTPUT B> screen respectively.
The split screen setting can be set using “SPLIT4 SCREEN SETTING” and “SPLIT9 SCREEN SET- TING” in the <OUTPUT A> screen and <OUTPUT B> screen respectively.
![]() The update speed of camera video becomes slower as the quantity of camera increases. Also, when performing live communication by LAN via Ethernet, the update speed may decrease.
The update speed of camera video becomes slower as the quantity of camera increases. Also, when performing live communication by LAN via Ethernet, the update speed may decrease.
To return the screen to single screen display Pressing a camera number button (1 ~ 9) cancels the split/ sequential display and returns to the single screen display of the pressed camera number button. Pressing the SPLIT/ SEQUENCE button again returns the screen to the split/ sequential display previous to cancelling.
![]() When a menu screen is displayed, the single screen display will not appear even when pressing a camera number button (1 ~ 9). In this case, clear the menu screen and then press a camera number but- ton (1 ~ 9).
When a menu screen is displayed, the single screen display will not appear even when pressing a camera number button (1 ~ 9). In this case, clear the menu screen and then press a camera number but- ton (1 ~ 9).
♦ZOOM button operations
By pressing the ZOOM button in single screen display, the displayed video can be viewed at 100%, 200% or 400% magnification.
![]() If the OUTPUT B indicator is turned off in the screen of OUTPUT A, the ZOOM button will function. The ZOOM button dose not function when the OUTPUT B indicator illuminates by pressing the OUTPUT B button.
If the OUTPUT B indicator is turned off in the screen of OUTPUT A, the ZOOM button will function. The ZOOM button dose not function when the OUTPUT B indicator illuminates by pressing the OUTPUT B button.
![]() The magnification display function can only be set when in the single screen mode. The screen can be moved vertically and horizontally with the magni- fication centre point (X) as the axis by pressing the MOVE buttons.
The magnification display function can only be set when in the single screen mode. The screen can be moved vertically and horizontally with the magni- fication centre point (X) as the axis by pressing the MOVE buttons.
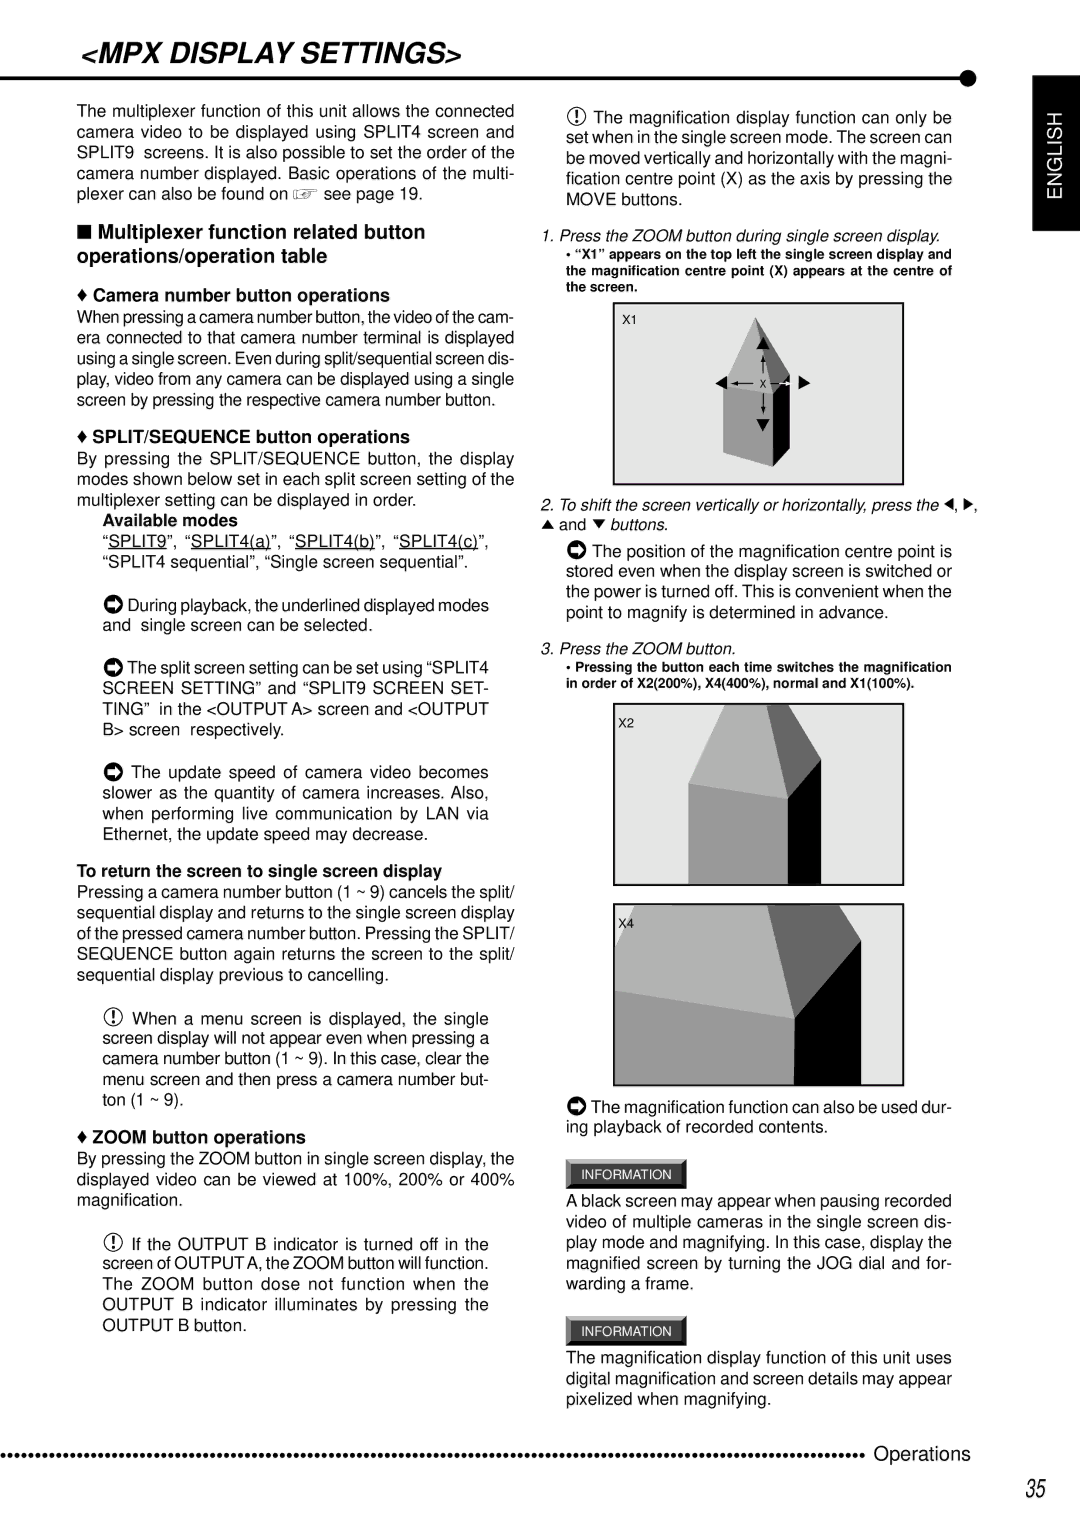
1.Press the ZOOM button during single screen display.
•“X1” appears on the top left the single screen display and the magnification centre point (X) appears at the centre of the screen.
X1
X ![]()
![]()
2.To shift the screen vertically or horizontally, press the ![]() ,
, ![]() ,
, ![]() and
and ![]() buttons.
buttons.
![]() The position of the magnification centre point is stored even when the display screen is switched or the power is turned off. This is convenient when the point to magnify is determined in advance.
The position of the magnification centre point is stored even when the display screen is switched or the power is turned off. This is convenient when the point to magnify is determined in advance.
3.Press the ZOOM button.
•Pressing the button each time switches the magnification in order of X2(200%), X4(400%), normal and X1(100%).
X2
X4 |
![]() The magnification function can also be used dur- ing playback of recorded contents.
The magnification function can also be used dur- ing playback of recorded contents.
INFORMATION
A black screen may appear when pausing recorded video of multiple cameras in the single screen dis- play mode and magnifying. In this case, display the magnified screen by turning the JOG dial and for- warding a frame.
INFORMATION
The magnification display function of this unit uses digital magnification and screen details may appear pixelized when magnifying.
ENGLISH
•••••••••••••••••••••••••••••••••••••••••••••••••••••••••••••••••••••••••••••••••••••••••••••••••••••••••••••••••••••••••••• | Operations |
35