Various search (continued)
![]() Search may not perform properly at times de- pending on the recorded condition of the index signals.
Search may not perform properly at times de- pending on the recorded condition of the index signals.
![]() Search may take time, depending on the recording status of the index signal. Press the STOP button while searching to end search.
Search may take time, depending on the recording status of the index signal. Press the STOP button while searching to end search.
6. To clear the search screen, press the SEARCH button twice.
■ALARM LIST SEARCH
This unit stores the start time of alarm recording and emer- gency recording in the alarm list when such recording be- gins. It is also possible to index search the desired time (or the closest time) from the list of alarm recording (emer- gency recording) start times stored in the alarm list.
 To clear the alarm list, erase the data in the
<MAIN HDD DATA CLEAR> (<SUB HDD DATA CLEAR>) screen. Beware that executing it erases all the data of HDD contained the video data. Alarm recording then will be stored again from 00001.
![]() Up to 10,000 alarm recording (emergency re- cording) start times can be stored and displayed.
Up to 10,000 alarm recording (emergency re- cording) start times can be stored and displayed.
![]() In the alarm list, items with the ALARM IN termi- nal on the rear grounded are indicated in white, items that were detected with motion are indicated in green and items with the EMERGENCY terminal grounded are indicated in red.
In the alarm list, items with the ALARM IN termi- nal on the rear grounded are indicated in white, items that were detected with motion are indicated in green and items with the EMERGENCY terminal grounded are indicated in red.
1.Press the SEARCH button.
•The search screen selected in the “SEARCH TYPE” ( ![]() see page 67) appears.
see page 67) appears.
<SEARCH | SELECTION> | ALARM LIST | |
>>SEARCH | TYPE | ||
SELECTION CAMERA NUMBER | ALL | ||
DATE/TIME - - | : | : | |
PLAYBACK DEVICE |
| SUB | |
SUB |
|
|
START | 00:00:00 | |
END | 12:30:15 |
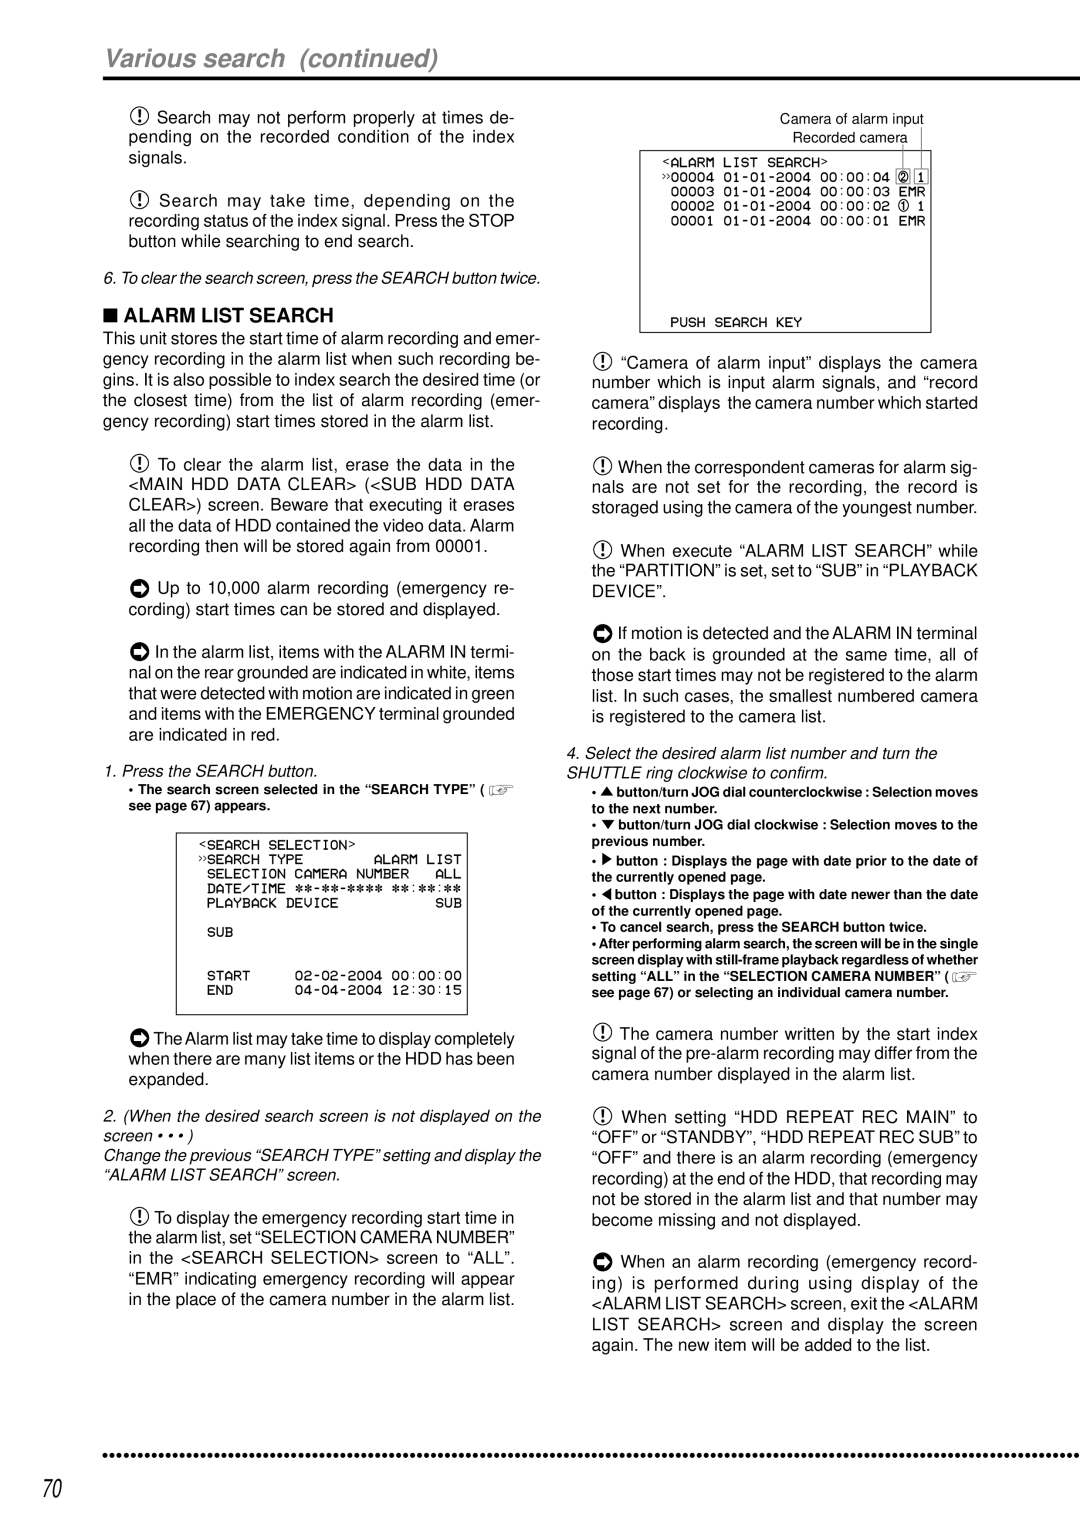
Camera of alarm input
Recorded camera
<ALARM LIST SEARCH>
>>00004 ![]()
![]() 1 00003
1 00003
PUSH SEARCH KEY
![]() “Camera of alarm input” displays the camera number which is input alarm signals, and “record camera” displays the camera number which started recording.
“Camera of alarm input” displays the camera number which is input alarm signals, and “record camera” displays the camera number which started recording.
![]() When the correspondent cameras for alarm sig- nals are not set for the recording, the record is storaged using the camera of the youngest number.
When the correspondent cameras for alarm sig- nals are not set for the recording, the record is storaged using the camera of the youngest number.
![]() When execute “ALARM LIST SEARCH” while the “PARTITION” is set, set to “SUB” in “PLAYBACK DEVICE”.
When execute “ALARM LIST SEARCH” while the “PARTITION” is set, set to “SUB” in “PLAYBACK DEVICE”.
![]() If motion is detected and the ALARM IN terminal on the back is grounded at the same time, all of those start times may not be registered to the alarm list. In such cases, the smallest numbered camera is registered to the camera list.
If motion is detected and the ALARM IN terminal on the back is grounded at the same time, all of those start times may not be registered to the alarm list. In such cases, the smallest numbered camera is registered to the camera list.
4.Select the desired alarm list number and turn the SHUTTLE ring clockwise to confirm.
•![]() button/turn JOG dial counterclockwise : Selection moves to the next number.
button/turn JOG dial counterclockwise : Selection moves to the next number.
•![]() button/turn JOG dial clockwise : Selection moves to the previous number.
button/turn JOG dial clockwise : Selection moves to the previous number.
•![]() button : Displays the page with date prior to the date of the currently opened page.
button : Displays the page with date prior to the date of the currently opened page.
•![]() button : Displays the page with date newer than the date of the currently opened page.
button : Displays the page with date newer than the date of the currently opened page.
•To cancel search, press the SEARCH button twice.
•After performing alarm search, the screen will be in the single screen display with
setting “ALL” in the “SELECTION CAMERA NUMBER” ( ![]() see page 67) or selecting an individual camera number.
see page 67) or selecting an individual camera number.
![]() The Alarm list may take time to display completely when there are many list items or the HDD has been expanded.
The Alarm list may take time to display completely when there are many list items or the HDD has been expanded.
2.(When the desired search screen is not displayed on the screen • • • )
Change the previous “SEARCH TYPE” setting and display the “ALARM LIST SEARCH” screen.
![]() To display the emergency recording start time in the alarm list, set “SELECTION CAMERA NUMBER” in the <SEARCH SELECTION> screen to “ALL”. “EMR” indicating emergency recording will appear in the place of the camera number in the alarm list.
To display the emergency recording start time in the alarm list, set “SELECTION CAMERA NUMBER” in the <SEARCH SELECTION> screen to “ALL”. “EMR” indicating emergency recording will appear in the place of the camera number in the alarm list.
![]() The camera number written by the start index signal of the
The camera number written by the start index signal of the
![]() When setting “HDD REPEAT REC MAIN” to “OFF” or “STANDBY”, “HDD REPEAT REC SUB” to “OFF” and there is an alarm recording (emergency recording) at the end of the HDD, that recording may not be stored in the alarm list and that number may become missing and not displayed.
When setting “HDD REPEAT REC MAIN” to “OFF” or “STANDBY”, “HDD REPEAT REC SUB” to “OFF” and there is an alarm recording (emergency recording) at the end of the HDD, that recording may not be stored in the alarm list and that number may become missing and not displayed.
![]() When an alarm recording (emergency record- ing) is performed during using display of the <ALARM LIST SEARCH> screen, exit the <ALARM LIST SEARCH> screen and display the screen again. The new item will be added to the list.
When an alarm recording (emergency record- ing) is performed during using display of the <ALARM LIST SEARCH> screen, exit the <ALARM LIST SEARCH> screen and display the screen again. The new item will be added to the list.
••••••••••••••••••••••••••••••••••••••••••••••••••••••••••••••••••••••••••••••••••••••••••••••••••••••••••••••••••••••••••••••• | ••••••••••••• |
70