Rebuilding Virtual![]()
![]() Disk
Disk
This topic describes the procedure to manually rebuild a degraded virtual disk by using the Marvell BIOS setup utility. This is applicable to the RAID 1 virtual disk.
Important
The rebuild process is both initiated and completed in the Marvell BIOS setup. The Mar- vell RAID Utility (MRU), which runs in as OS environment, cannot be used to either initi- ate, resume, or complete the rebuild process Spare physical disks are not supported.
1.When a virtual disk is degraded, the “Status” of a virtual disk is changed from Func- tional![]() to Degrade.
to Degrade.
2.Replace the faulty physical disk with an identical physical disk. (Note: If an identi- cal disk is unavailable, use a replacement physical disk of larger size or one with a slightly smaller size as determined the Gigabyte Rounding setting for the virtual disk.) The BIOS detects the new physical disk and lists the device under “Free Physical Disks” in the [Topology] pane.
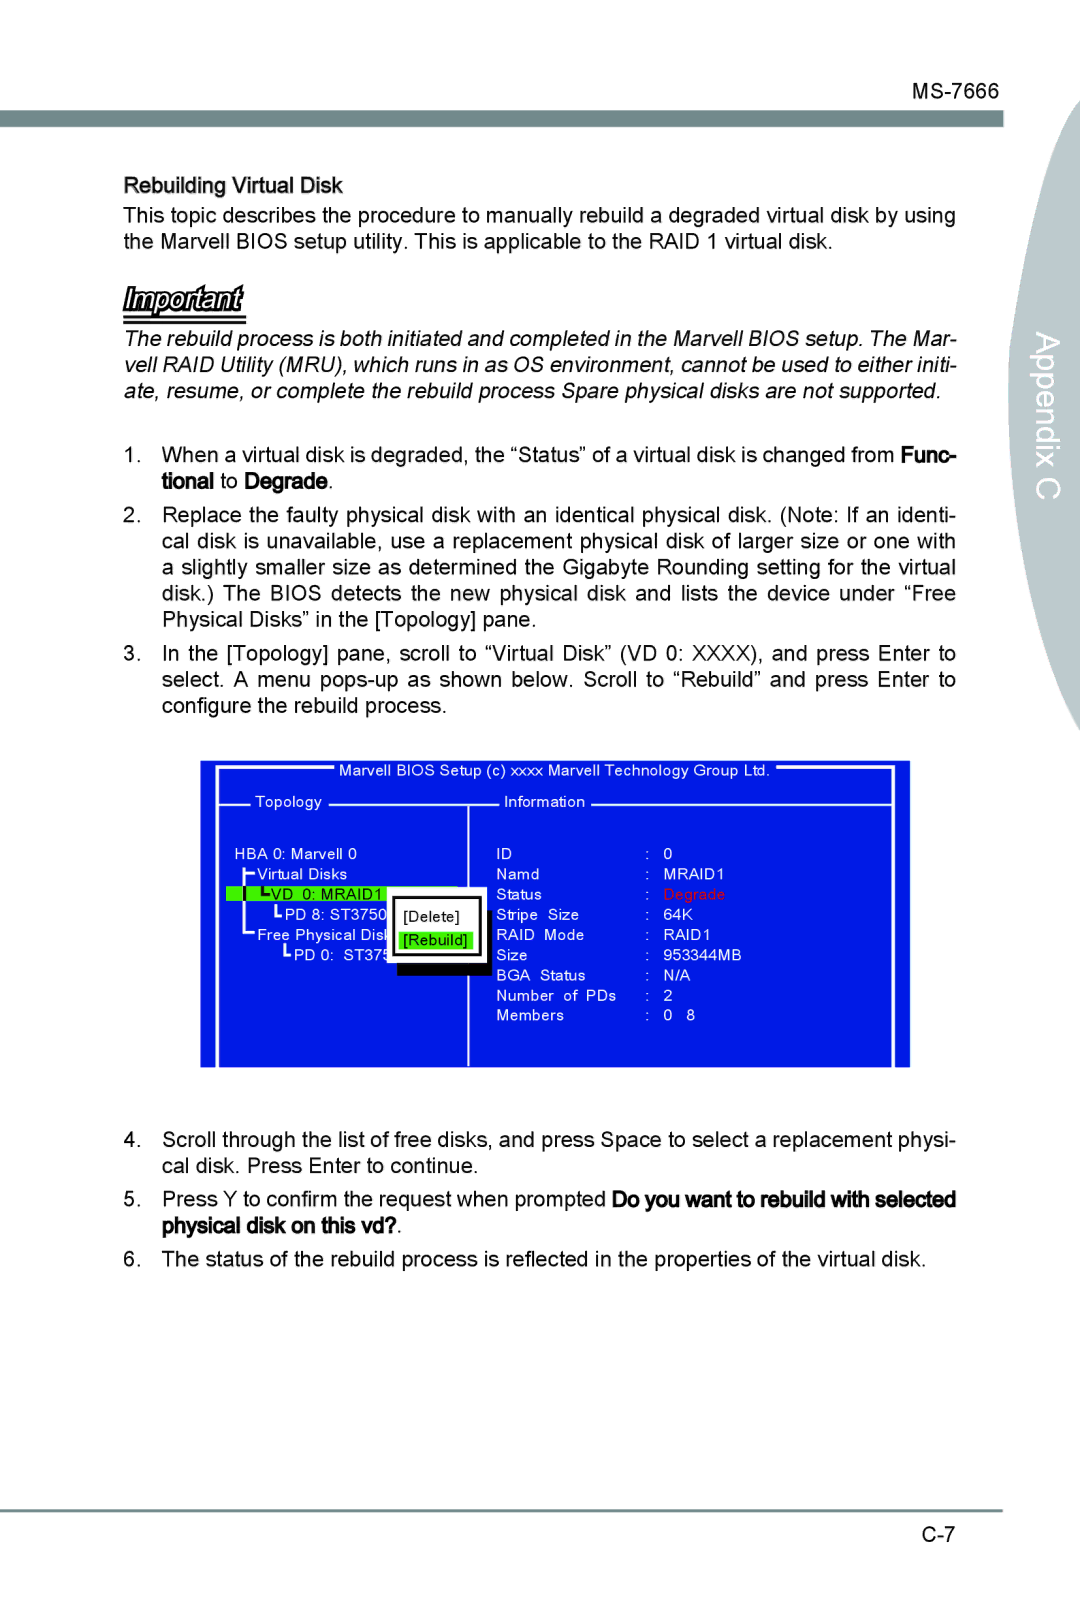
3.In the [Topology] pane, scroll to “Virtual Disk” (VD 0: XXXX), and press Enter to select. A menu
Marvell BIOS Setup (c) xxxx Marvell Technology Group Ltd.
Appendix C
Topology
HBA 0: Marvell 0
Virtual Disks
![]() VD 0: MRAID1
VD 0: MRAID1 ![]()
![]() PD 8: ST3750330MS[Delete]
PD 8: ST3750330MS[Delete]
Free Physical Disks [Rebuild]
![]() PD 0: ST3750XXX
PD 0: ST3750XXX
Information |
|
|
ID | : | 0 |
Namd | : | MRAID1 |
Status | : | Degrade |
Stripe Size | : | 64K |
RAID Mode | : | RAID1 |
Size | : | 953344MB |
BGA Status | : | N/A |
Number of PDs | : | 2 |
Members | : | 0 8 |
4.Scroll through the list of free disks, and press Space to select a replacement physi- cal disk. Press Enter to continue.
5.Press Y to confirm the request when prompted Do you want to rebuild with selected physical![]() disk on this vd?.
disk on this vd?.
6.The status of the rebuild process is reflected in the properties of the virtual disk.