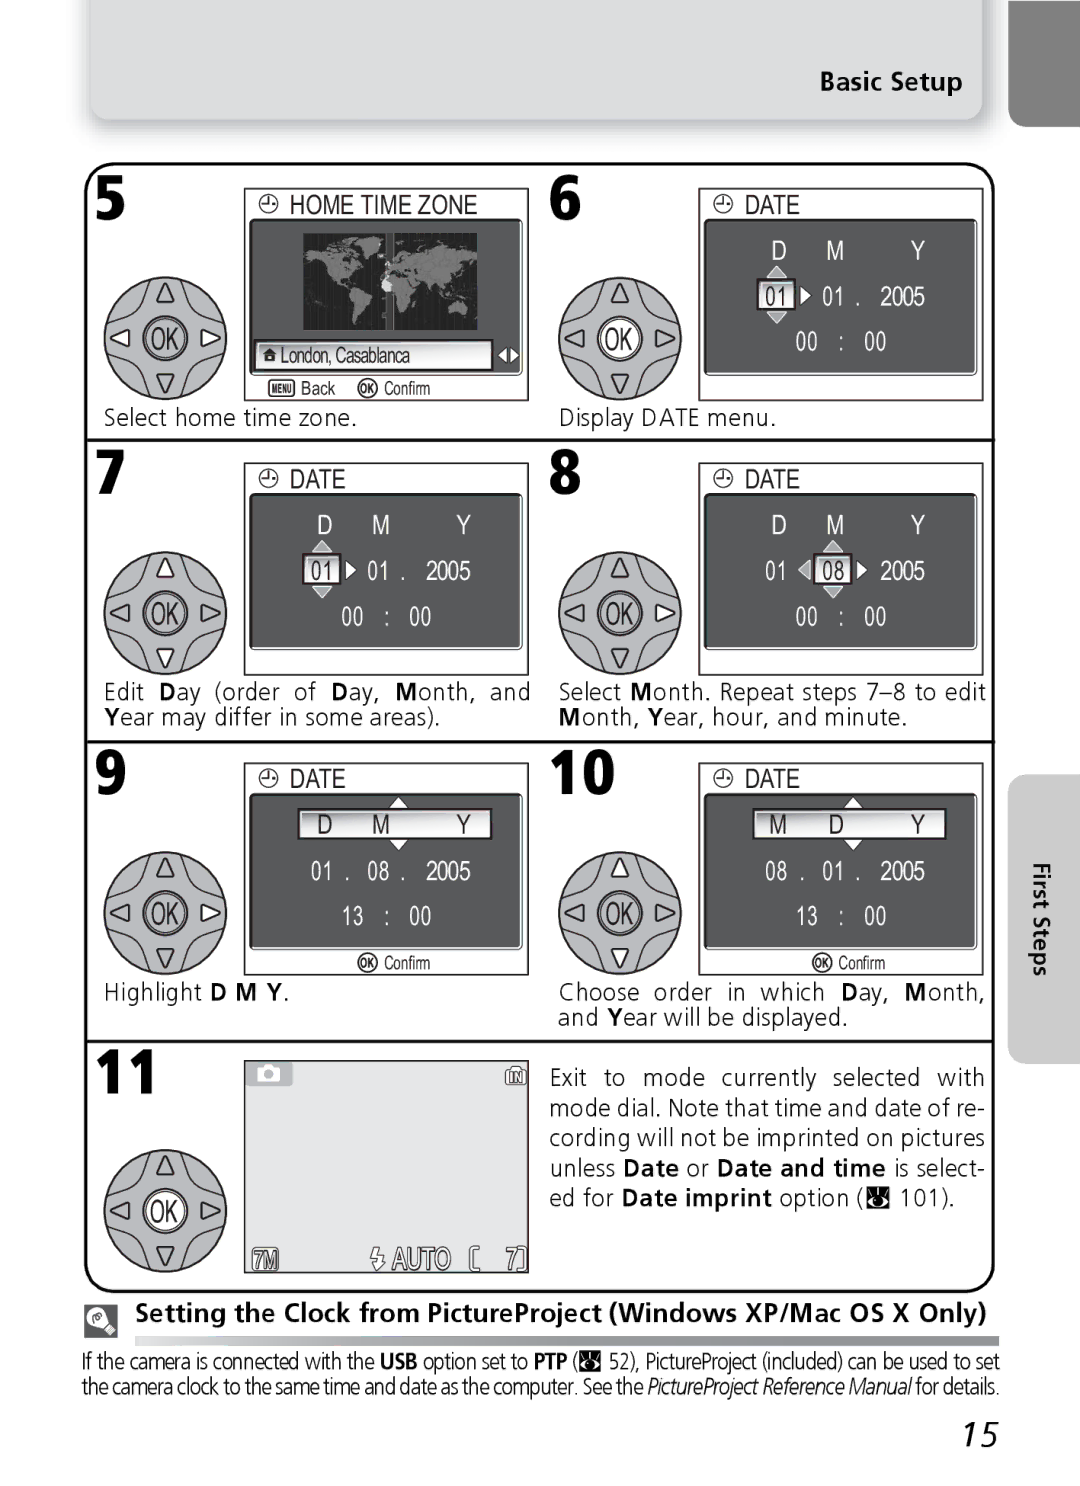
Basic Setup
5
HOME TIME ZONE | 6 | |
|
| |
London, Casablanca |
| |
Back | Confirm |
|
 DATE
DATE
D M Y

 01
01 
 01 . 2005
00 : 00
:Set
Select home time zone. | Display DATE menu. |
7 DATE
DATE
D M Y
![]()
![]() 01
01 ![]()
![]() 01 . 2005
01 . 2005
00 : 00
:Set
Edit Day (order of Day, Month, and Year may differ in some areas).
8 DATE
DATE
D M Y
01 ![]()
![]()
![]() 08
08 ![]()
![]() 2005
2005
00 : 00
:Set
Select Month. Repeat steps
9 DATE
DATE
D M Y
01 . 08 . 2005
13 : 00
![]() Confirm
Confirm
Highlight D M Y.
10![]() DATE
DATE
![]()
![]() M D Y
M D Y
08 . 01 . 2005
13 : 00
![]() Confirm
Confirm
Choose order in which Day, Month, and Year will be displayed.
First Steps
11
7M | AUTO | 7 |
Exit to mode currently selected with mode dial. Note that time and date of re- cording will not be imprinted on pictures unless Date or Date and time is select- ed for Date imprint option (Q 101).
Setting the Clock from PictureProject (Windows XP/Mac OS X Only)
If the camera is connected with the USB option set to PTP (Q52), PictureProject (included) can be used to set the camera clock to the same time and date as the computer. See the PictureProject Reference Manual for details.
15