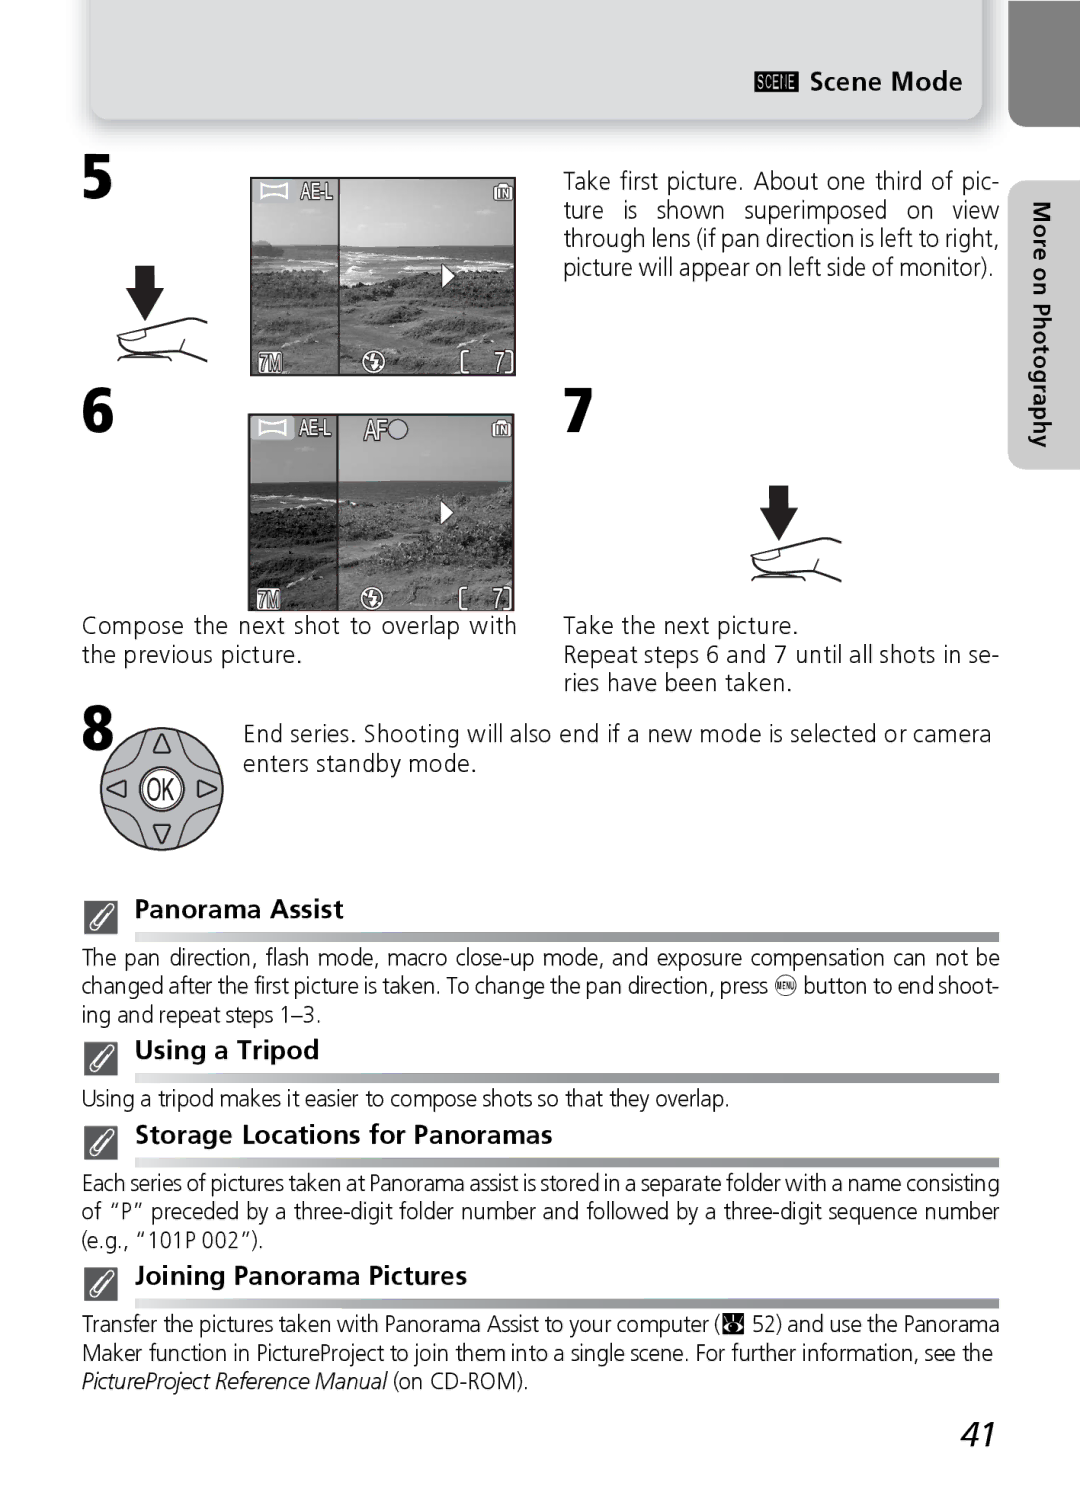
5 ![]()
7M | 7 |
6 |
7M | 7 |
Compose the next shot to overlap with the previous picture.
e Scene Mode
Take first picture. About one third of pic- ture is shown superimposed on view through lens (if pan direction is left to right, picture will appear on left side of monitor).
7
Take the next picture.
Repeat steps 6 and 7 until all shots in se- ries have been taken.
More on Photography
8 | End series. Shooting will also end if a new mode is selected or camera |
| |
| enters standby mode. |
Panorama Assist
The pan direction, flash mode, macro
Using a Tripod
Using a tripod makes it easier to compose shots so that they overlap.
Storage Locations for Panoramas
Each series of pictures taken at Panorama assist is stored in a separate folder with a name consisting of “P” preceded by a
Joining Panorama Pictures
Transfer the pictures taken with Panorama Assist to your computer (Q52) and use the Panorama Maker function in PictureProject to join them into a single scene. For further information, see the PictureProject Reference Manual (on
41