INSTALLATION AND CONNECTIONS
Attaching the Projector to a Tripod
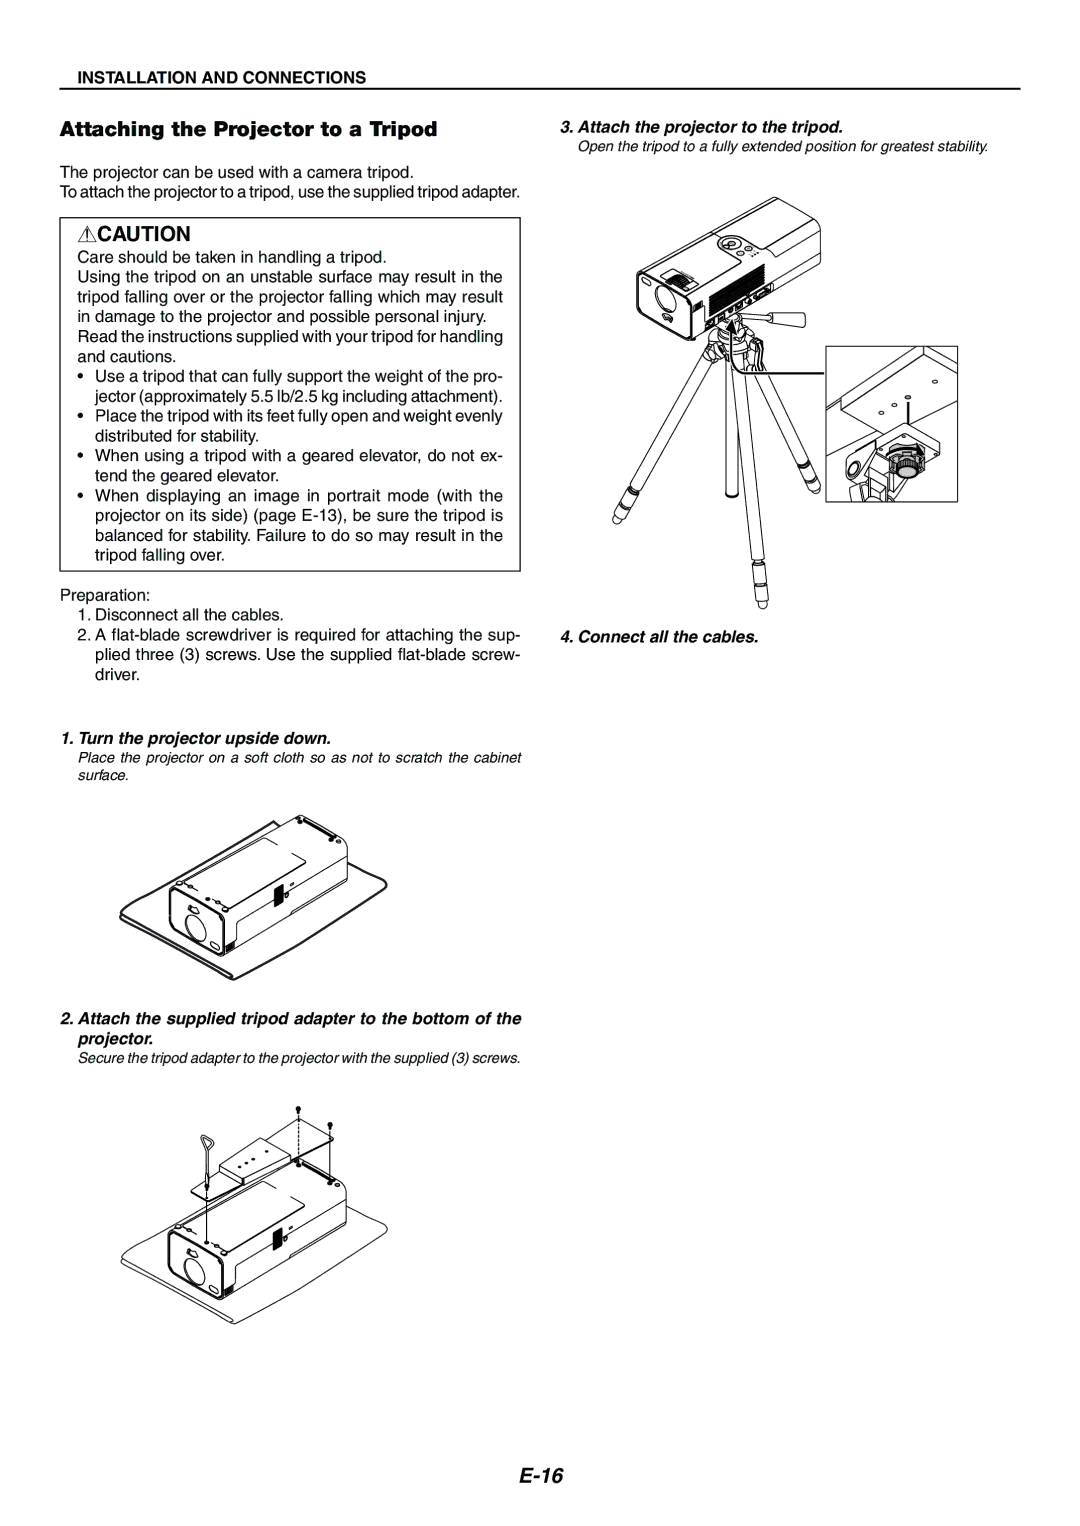
3.Attach the projector to the tripod.
Open the tripod to a fully extended position for greatest stability.
The projector can be used with a camera tripod.
To attach the projector to a tripod, use the supplied tripod adapter.
![]() CAUTION
CAUTION
Care should be taken in handling a tripod.
Using the tripod on an unstable surface may result in the tripod falling over or the projector falling which may result in damage to the projector and possible personal injury.
Read the instructions supplied with your tripod for handling and cautions.
•Use a tripod that can fully support the weight of the pro- jector (approximately 5.5 lb/2.5 kg including attachment).
•Place the tripod with its feet fully open and weight evenly distributed for stability.
•When using a tripod with a geared elevator, do not ex- tend the geared elevator.
•When displaying an image in portrait mode (with the projector on its side) (page
Preparation:
1.Disconnect all the cables.
2.A
1.Turn the projector upside down.
Place the projector on a soft cloth so as not to scratch the cabinet surface.
2.Attach the supplied tripod adapter to the bottom of the projector.
Secure the tripod adapter to the projector with the supplied (3) screws.
SE