USING ON-SCREEN MENU
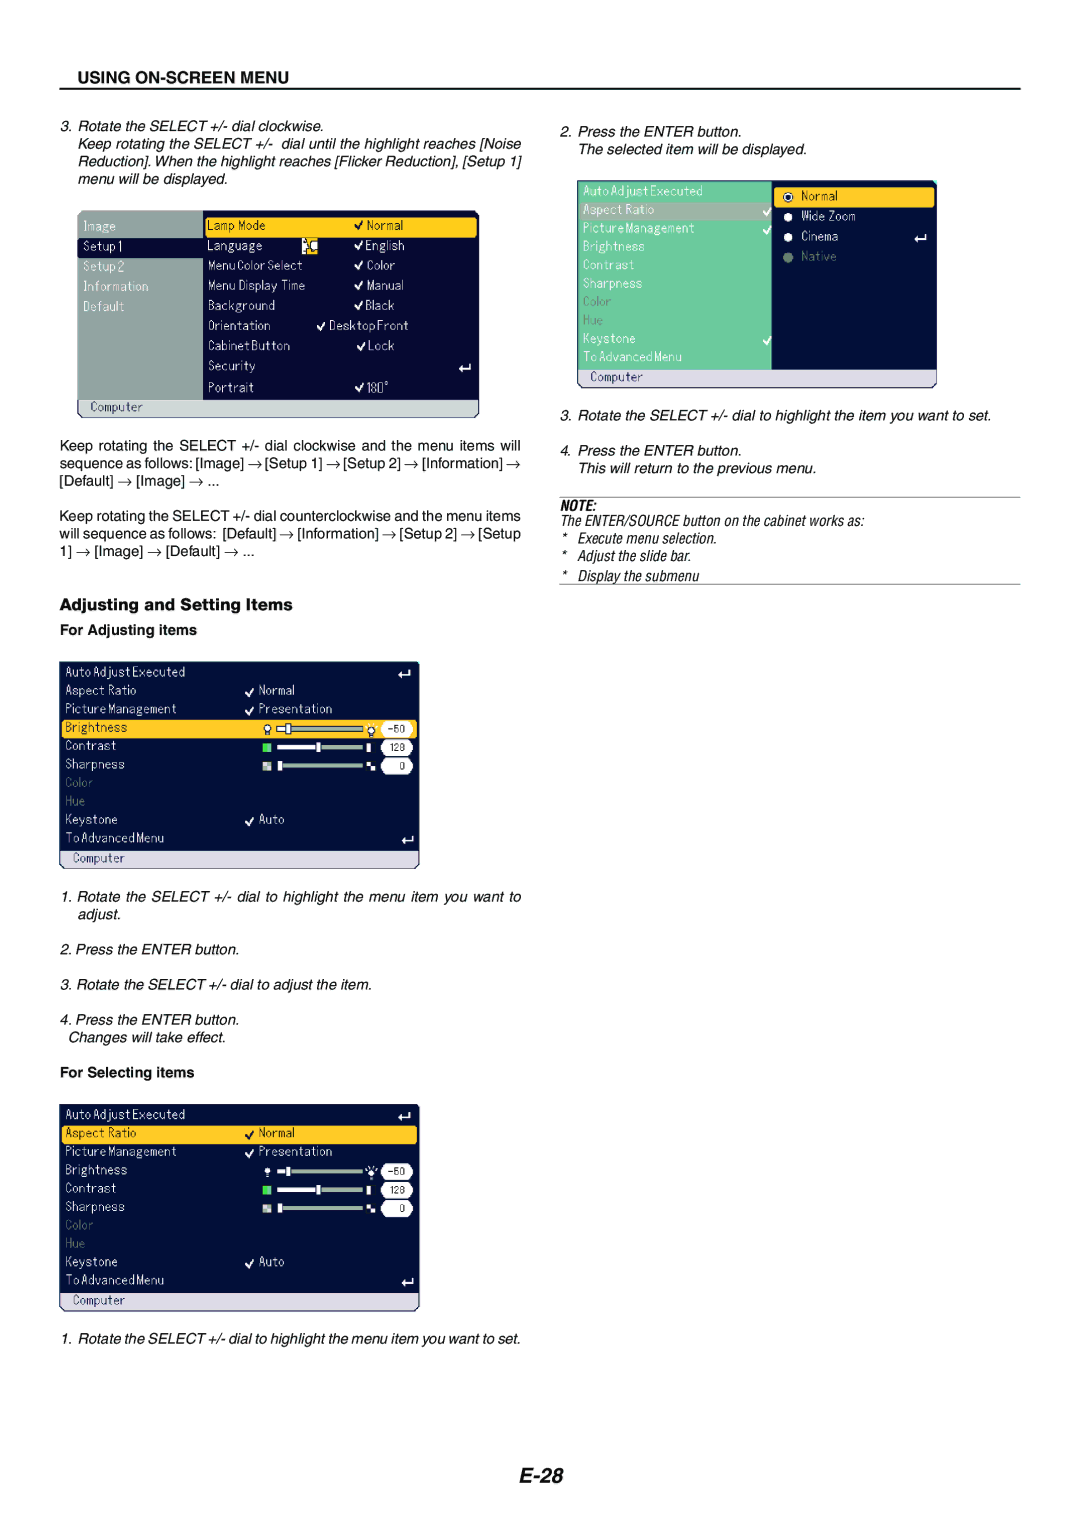
3.Rotate the SELECT +/- dial clockwise.
Keep rotating the SELECT +/- dial until the highlight reaches [Noise Reduction]. When the highlight reaches [Flicker Reduction], [Setup 1] menu will be displayed.
Keep rotating the SELECT +/- dial clockwise and the menu items will sequence as follows: [Image] → [Setup 1] → [Setup 2] → [Information] → [Default] → [Image] → ...
Keep rotating the SELECT +/- dial counterclockwise and the menu items will sequence as follows: [Default] → [Information] → [Setup 2] → [Setup 1] → [Image] → [Default] → ...
Adjusting and Setting Items
For Adjusting items
1.Rotate the SELECT +/- dial to highlight the menu item you want to adjust.
2.Press the ENTER button.
3.Rotate the SELECT +/- dial to adjust the item.
4.Press the ENTER button.
Changes will take effect.
For Selecting items
1. Rotate the SELECT +/- dial to highlight the menu item you want to set.
2.Press the ENTER button.
The selected item will be displayed.
3.Rotate the SELECT +/- dial to highlight the item you want to set.
4.Press the ENTER button.
This will return to the previous menu.
NOTE:
The ENTER/SOURCE button on the cabinet works as:
*Execute menu selection.
*Adjust the slide bar.
*Display the submenu
