USING ON-SCREEN MENU
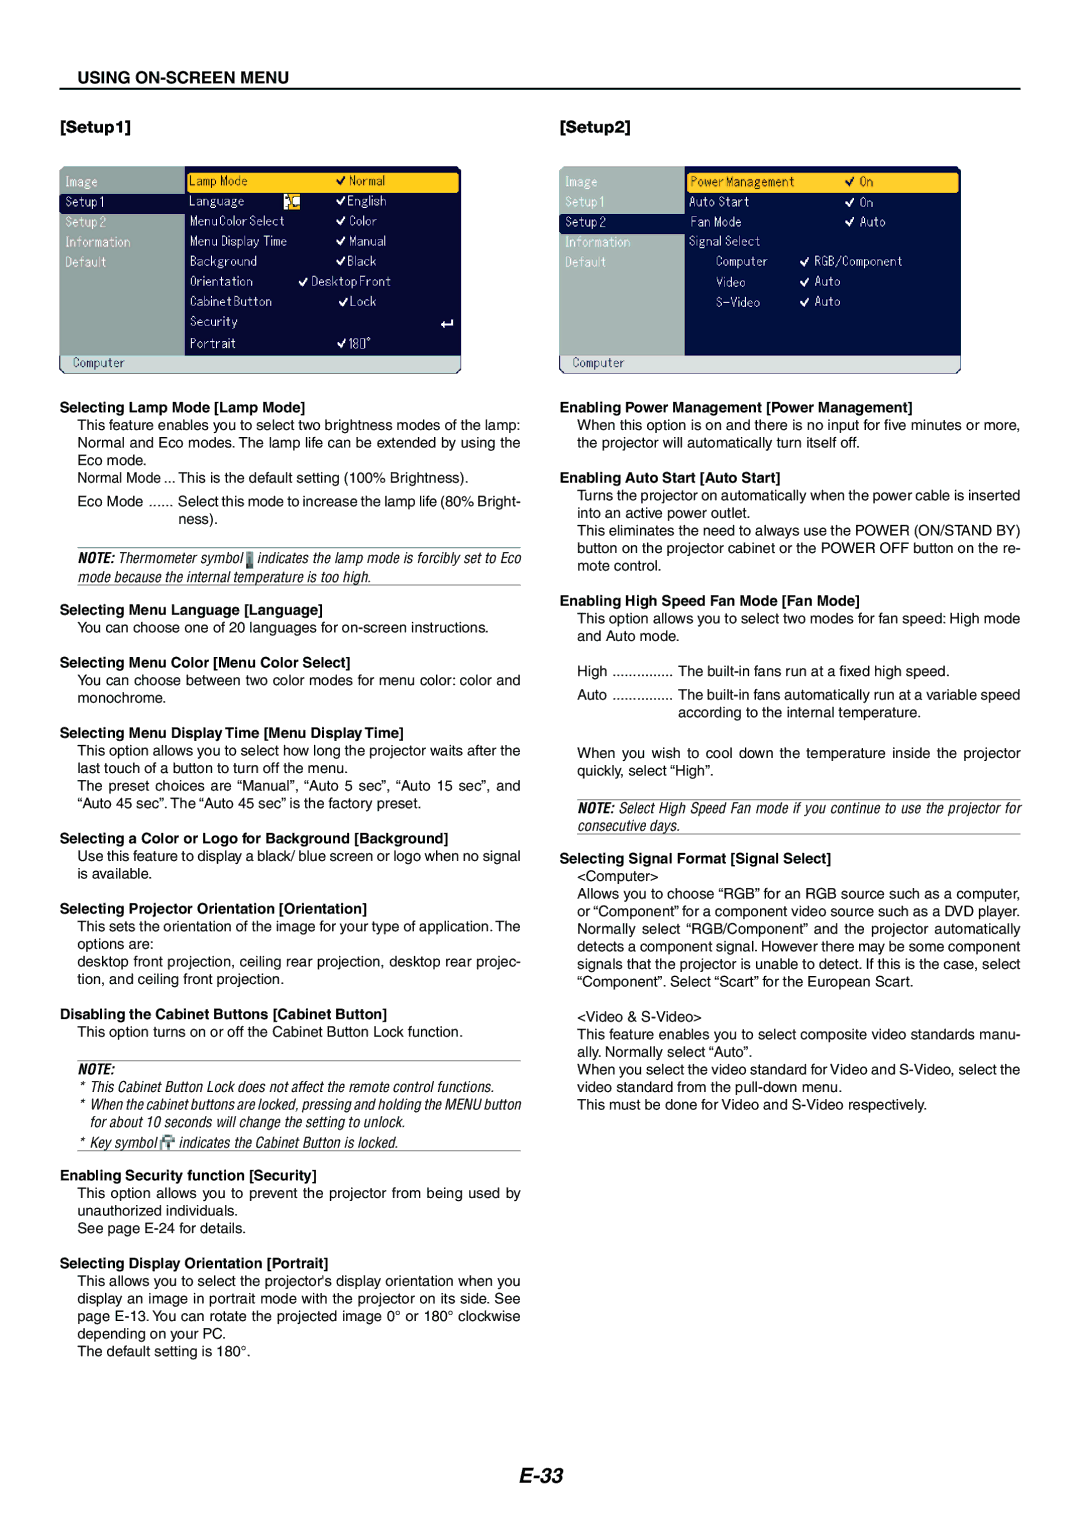
[Setup1] | [Setup2] |
Selecting Lamp Mode [Lamp Mode]
This feature enables you to select two brightness modes of the lamp: Normal and Eco modes. The lamp life can be extended by using the Eco mode.
Normal Mode ... This is the default setting (100% Brightness).
Eco Mode | Select this mode to increase the lamp life (80% Bright- |
| ness). |
NOTE: Thermometer symbol ![]() indicates the lamp mode is forcibly set to Eco mode because the internal temperature is too high.
indicates the lamp mode is forcibly set to Eco mode because the internal temperature is too high.
Selecting Menu Language [Language]
You can choose one of 20 languages for
Selecting Menu Color [Menu Color Select]
You can choose between two color modes for menu color: color and monochrome.
Selecting Menu Display Time [Menu Display Time]
This option allows you to select how long the projector waits after the last touch of a button to turn off the menu.
The preset choices are “Manual”, “Auto 5 sec”, “Auto 15 sec”, and “Auto 45 sec”. The “Auto 45 sec” is the factory preset.
Selecting a Color or Logo for Background [Background]
Use this feature to display a black/ blue screen or logo when no signal is available.
Selecting Projector Orientation [Orientation]
This sets the orientation of the image for your type of application. The options are:
desktop front projection, ceiling rear projection, desktop rear projec- tion, and ceiling front projection.
Disabling the Cabinet Buttons [Cabinet Button]
This option turns on or off the Cabinet Button Lock function.
NOTE:
*This Cabinet Button Lock does not affect the remote control functions.
*When the cabinet buttons are locked, pressing and holding the MENU button for about 10 seconds will change the setting to unlock.
*Key symbol ![]() indicates the Cabinet Button is locked.
indicates the Cabinet Button is locked.
Enabling Security function [Security]
This option allows you to prevent the projector from being used by unauthorized individuals.
See page
Selecting Display Orientation [Portrait]
This allows you to select the projector's display orientation when you display an image in portrait mode with the projector on its side. See page
The default setting is 180°.
Enabling Power Management [Power Management]
When this option is on and there is no input for five minutes or more, the projector will automatically turn itself off.
Enabling Auto Start [Auto Start]
Turns the projector on automatically when the power cable is inserted into an active power outlet.
This eliminates the need to always use the POWER (ON/STAND BY) button on the projector cabinet or the POWER OFF button on the re- mote control.
Enabling High Speed Fan Mode [Fan Mode]
This option allows you to select two modes for fan speed: High mode and Auto mode.
High | The |
Auto | The |
| according to the internal temperature. |
When you wish to cool down the temperature inside the projector quickly, select “High”.
NOTE: Select High Speed Fan mode if you continue to use the projector for consecutive days.
Selecting Signal Format [Signal Select]
<Computer>
Allows you to choose “RGB” for an RGB source such as a computer, or “Component” for a component video source such as a DVD player. Normally select “RGB/Component” and the projector automatically detects a component signal. However there may be some component signals that the projector is unable to detect. If this is the case, select “Component”. Select “Scart” for the European Scart.
<Video &
This feature enables you to select composite video standards manu- ally. Normally select “Auto”.
When you select the video standard for Video and
This must be done for Video and