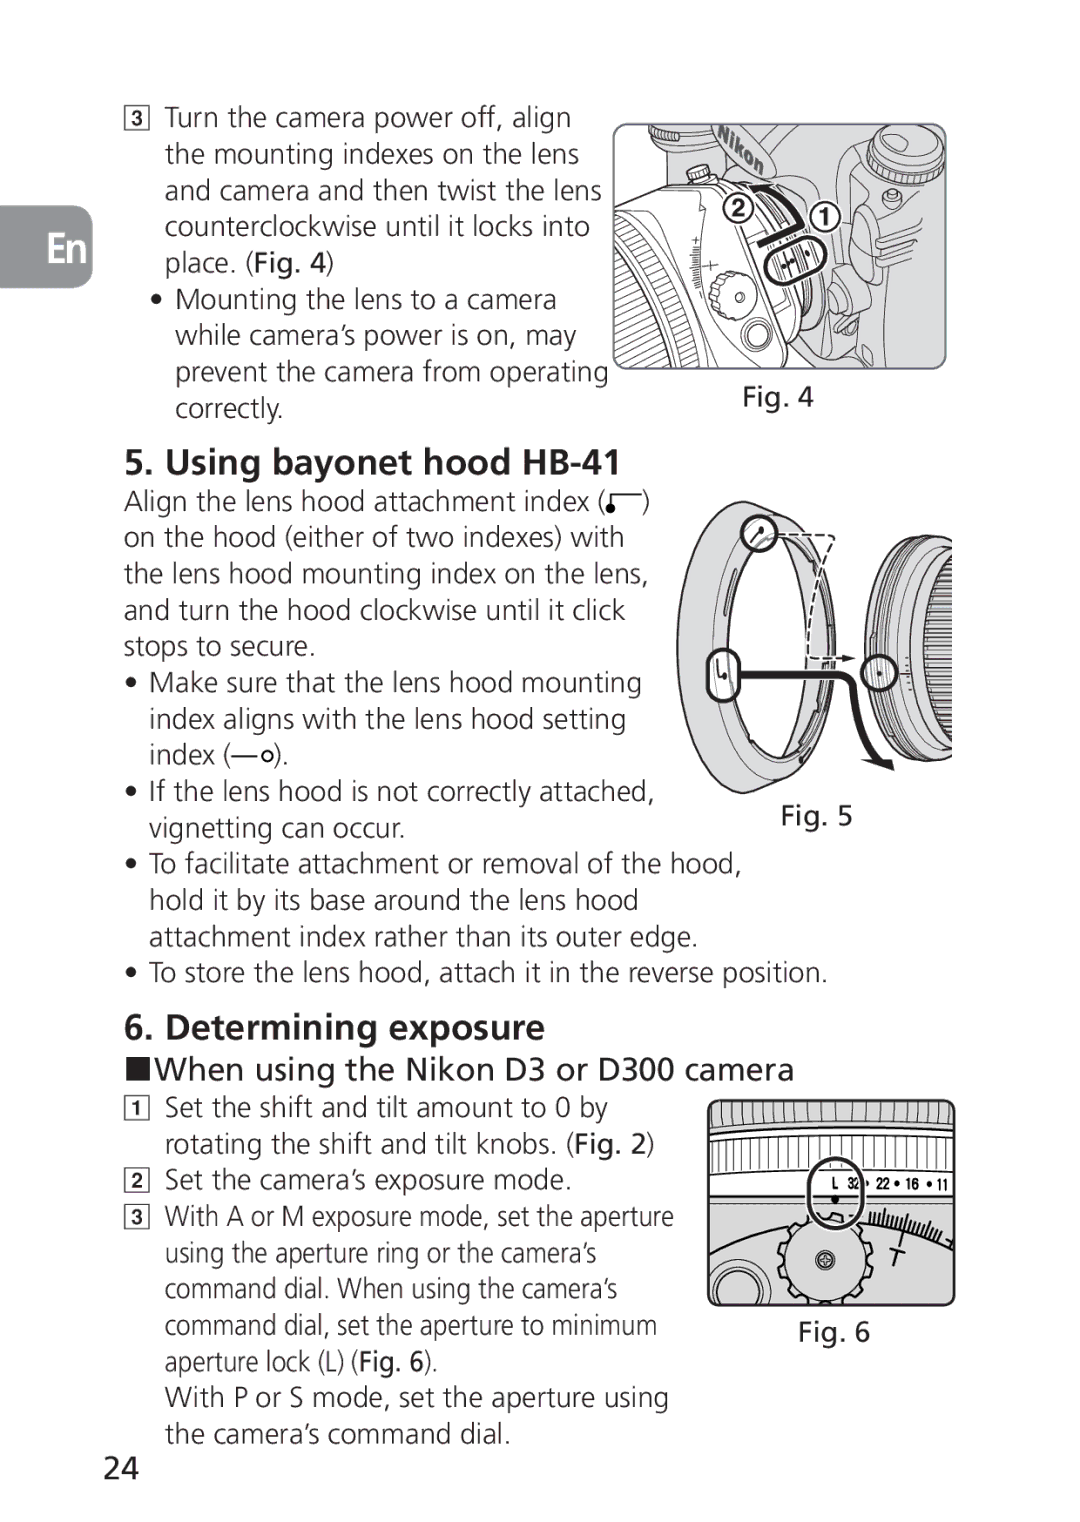
cTurn the camera power off, align
| the mounting indexes on the lens |
|
| and camera and then twist the lens |
|
En | counterclockwise until it locks into |
|
place. (Fig. 4) |
| |
| • Mounting the lens to a camera |
|
| while camera’s power is on, may |
|
| prevent the camera from operating | Fig. 4 |
| correctly. | |
|
|
5. Using bayonet hood HB-41
Align the lens hood attachment index (![]() ) on the hood (either of two indexes) with the lens hood mounting index on the lens, and turn the hood clockwise until it click stops to secure.
) on the hood (either of two indexes) with the lens hood mounting index on the lens, and turn the hood clockwise until it click stops to secure.
• Make sure that the lens hood mounting index aligns with the lens hood setting index (![]() ).
).
• If the lens hood is not correctly attached, vignetting can occur.
•To facilitate attachment or removal of the hood, hold it by its base around the lens hood attachment index rather than its outer edge.
•To store the lens hood, attach it in the reverse position.
6. Determining exposure
When using the Nikon D3 or D300 camera
a Set the shift and tilt amount to 0 by |
|
rotating the shift and tilt knobs. (Fig. 2) |
|
b Set the camera’s exposure mode. |
|
c With A or M exposure mode, set the aperture |
|
using the aperture ring or the camera’s |
|
command dial. When using the camera’s |
|
command dial, set the aperture to minimum | Fig. 6 |
aperture lock (L) (Fig. 6).
With P or S mode, set the aperture using the camera’s command dial.
24
