First time installation
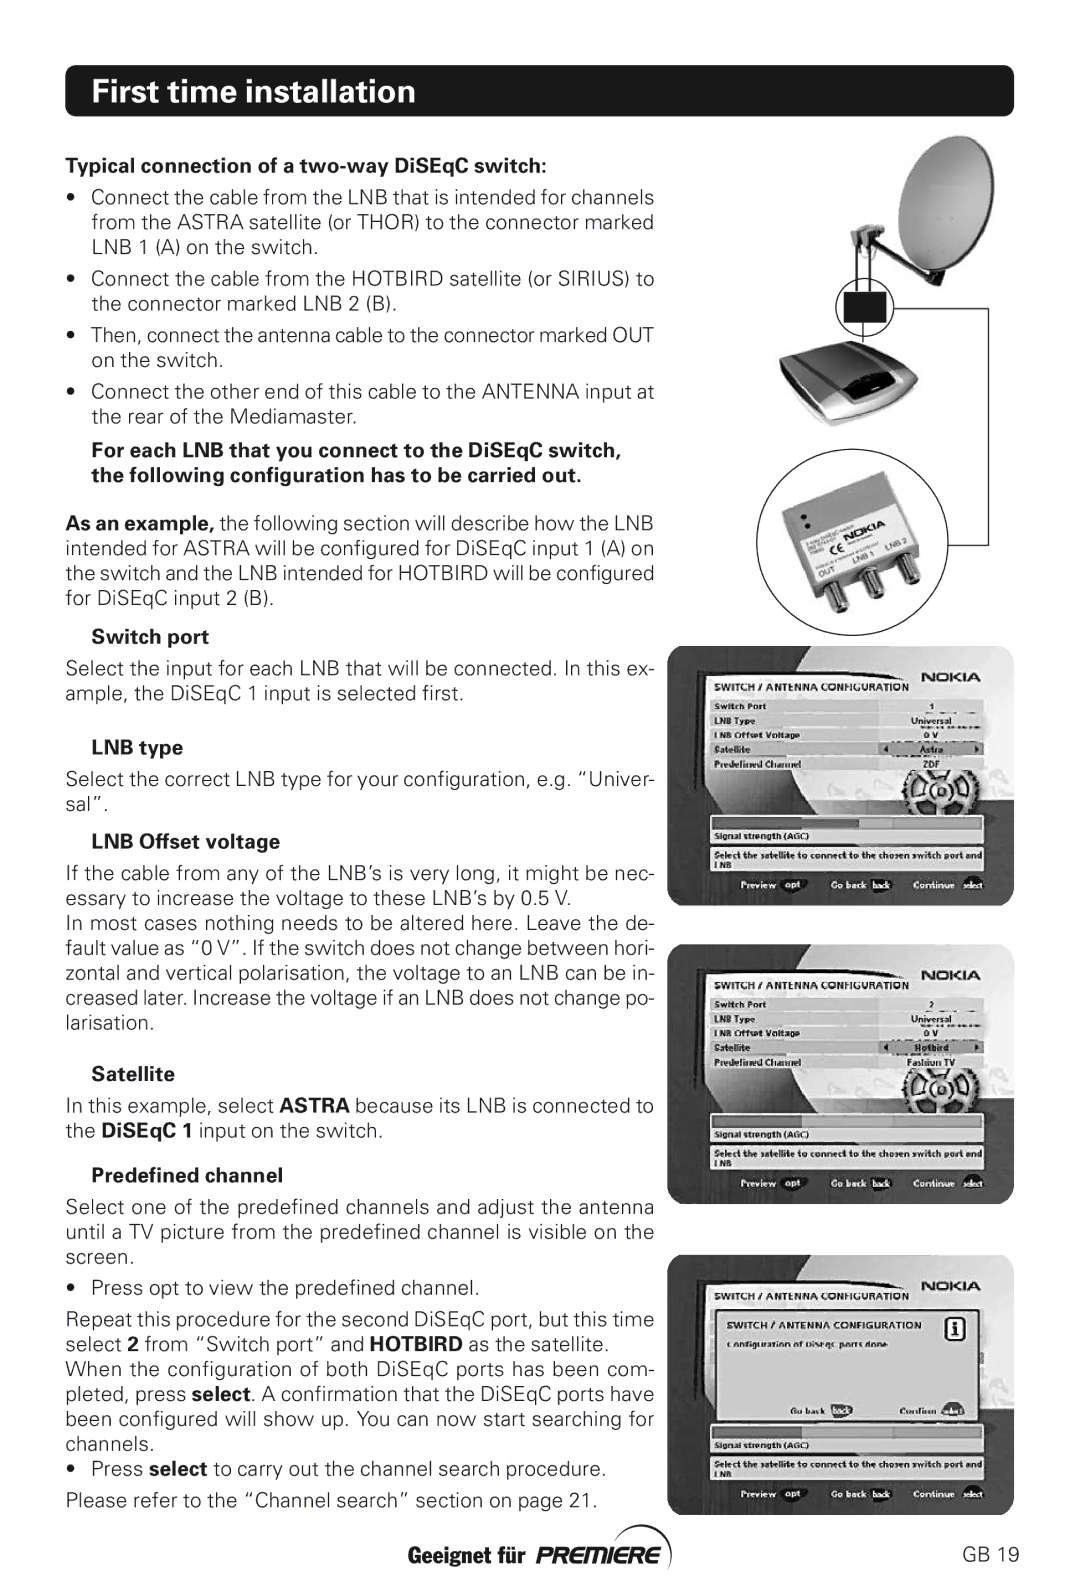
Typical connection of a two-way DiSEqC switch:
•Connect the cable from the LNB that is intended for channels from the ASTRA satellite (or THOR) to the connector marked LNB 1 (A) on the switch.
•Connect the cable from the HOTBIRD satellite (or SIRIUS) to
the connector marked LNB 2 (B).
•Then, connect the antenna cable to the connector marked OUT on the switch.
•Connect the other end of this cable to the ANTENNA input at the rear of the Mediamaster.
For each LNB that you connect to the DiSEqC switch, the following configuration has to be carried out.
As an example, the following section will describe how the LNB intended for ASTRA will be configured for DiSEqC input 1 (A) on the switch and the LNB intended for HOTBIRD will be configured for DiSEqC input 2 (B).
Switch port
Select the input for each LNB that will be connected. In this ex- ample, the DiSEqC 1 input is selected first.
LNB type
Select the correct LNB type for your configuration, e.g. “Univer- sal”.
LNB Offset voltage
If the cable from any of the LNB’s is very long, it might be nec- essary to increase the voltage to these LNB’s by 0.5 V.
In most cases nothing needs to be altered here. Leave the de- fault value as “0 V”. If the switch does not change between hori- zontal and vertical polarisation, the voltage to an LNB can be in- creased later. Increase the voltage if an LNB does not change po- larisation.
Satellite
In this example, select ASTRA because its LNB is connected to the DiSEqC 1 input on the switch.
Predefined channel
Select one of the predefined channels and adjust the antenna until a TV picture from the predefined channel is visible on the screen.
• Press opt to view the predefined channel.
Repeat this procedure for the second DiSEqC port, but this time select 2 from “Switch port” and HOTBIRD as the satellite. When the configuration of both DiSEqC ports has been com- pleted, press select. A confirmation that the DiSEqC ports have been configured will show up. You can now start searching for channels.
•Press select to carry out the channel search procedure. Please refer to the “Channel search” section on page 21.
GB 19