Installing the DFC on systems equipped with DVCs 13
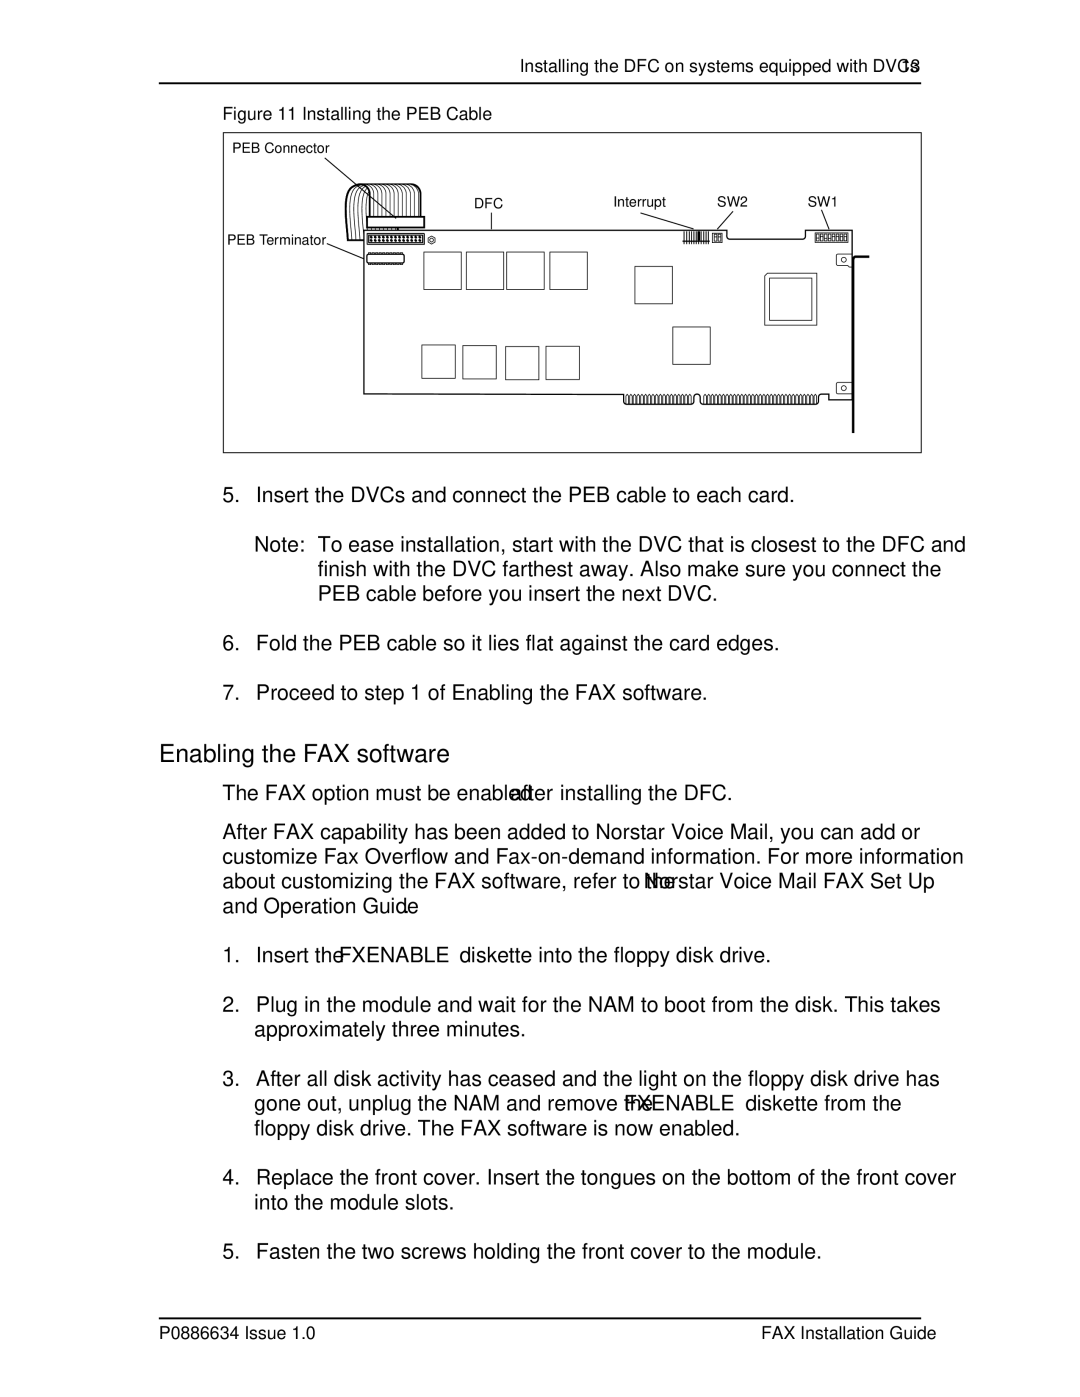
Figure 11 Installing the PEB Cable
PEB Connector |
|
|
|
DFC | Interrupt | SW2 | SW1 |
PEB Terminator |
|
|
|
5.Insert the DVCs and connect the PEB cable to each card.
Note: To ease installation, start with the DVC that is closest to the DFC and finish with the DVC farthest away. Also make sure you connect the PEB cable before you insert the next DVC.
6.Fold the PEB cable so it lies flat against the card edges.
7.Proceed to step 1 of Enabling the FAX software.
Enabling the FAX software
The FAX option must be enabled after installing the DFC.
After FAX capability has been added to Norstar Voice Mail, you can add or customize Fax Overflow and
1.Insert the FXENABLE diskette into the floppy disk drive.
2.Plug in the module and wait for the NAM to boot from the disk. This takes approximately three minutes.
3.After all disk activity has ceased and the light on the floppy disk drive has gone out, unplug the NAM and remove the FXENABLE diskette from the floppy disk drive. The FAX software is now enabled.
4.Replace the front cover. Insert the tongues on the bottom of the front cover into the module slots.
5.Fasten the two screws holding the front cover to the module.
P0886634 Issue 1.0 | FAX Installation Guide |
