TARGET Series | ENMET Corporation |
6.4 Advanced Maintenance Menu, Software 4.94 version
The Advanced Maintenance menu provides access to enhanced programming features of the TARGETinstrument.
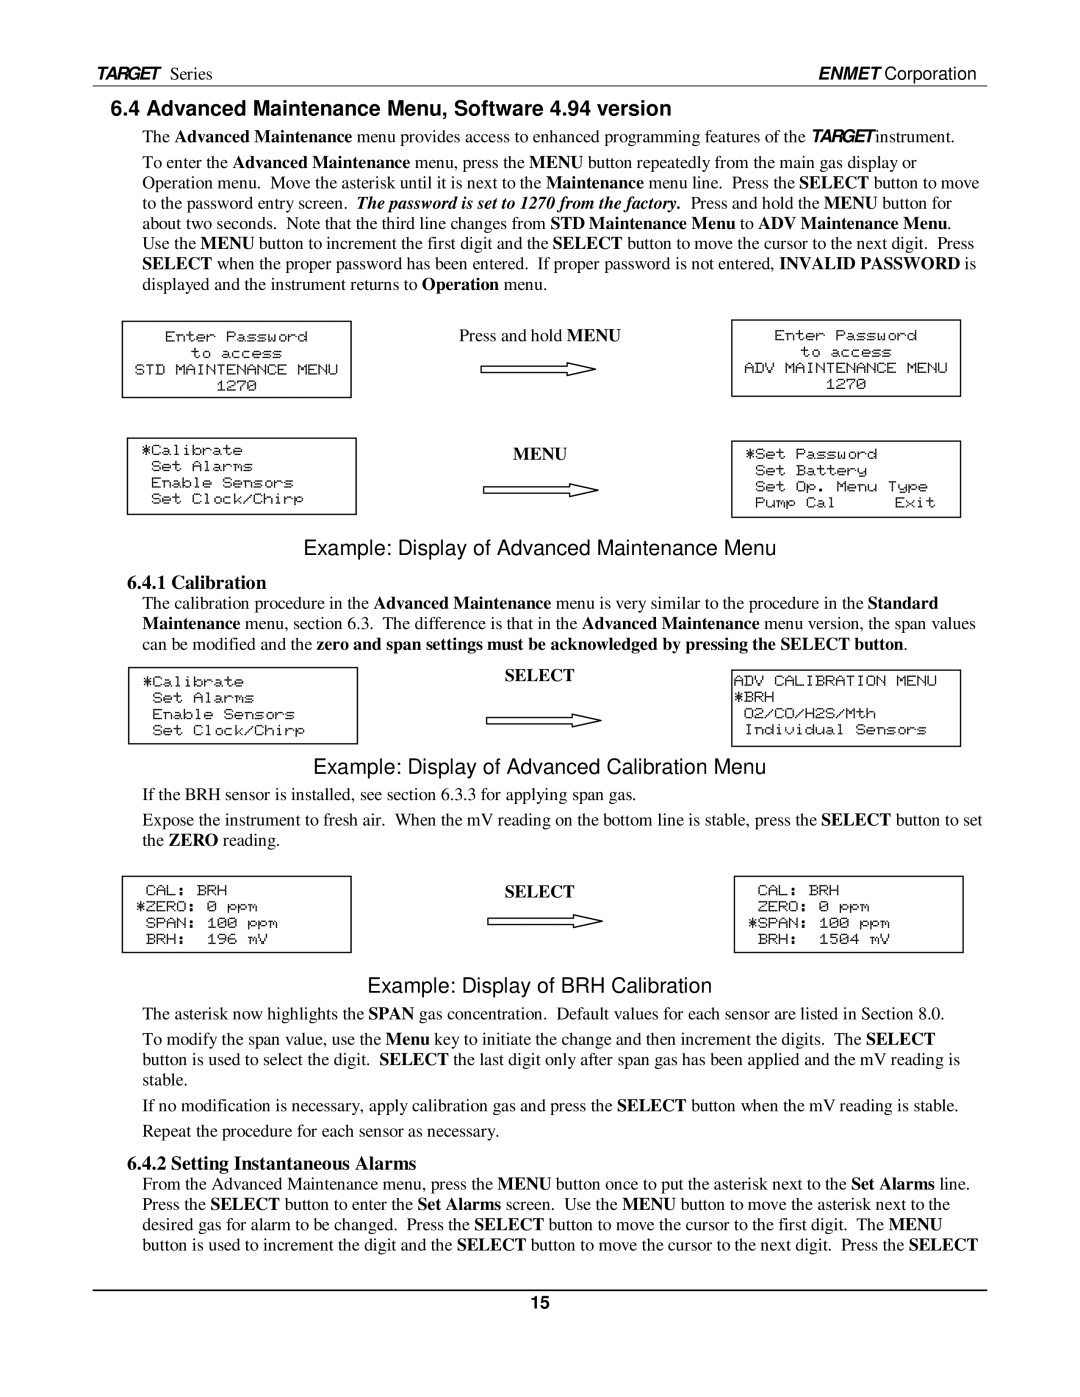
To enter the Advanced Maintenance menu, press the MENU button repeatedly from the main gas display or Operation menu. Move the asterisk until it is next to the Maintenance menu line. Press the SELECT button to move to the password entry screen. The password is set to 1270 from the factory. Press and hold the MENU button for about two seconds. Note that the third line changes from STD Maintenance Menu to ADV Maintenance Menu. Use the MENU button to increment the first digit and the SELECT button to move the cursor to the next digit. Press SELECT when the proper password has been entered. If proper password is not entered, INVALID PASSWORD is displayed and the instrument returns to Operation menu.
Enter Password
to access
STD MAINTENANCE MENU
1270
*Calibrate Set Alarms Enable Sensors Set Clock/Chirp
Press and hold MENU
MENU
Enter Password
to access
ADV MAINTENANCE MENU
1270
*Set | Password |
|
Set | Battery |
|
Set | Op. Menu Type | |
Pump Cal | Exit | |
|
|
|
Example: Display of Advanced Maintenance Menu
6.4.1 Calibration
The calibration procedure in the Advanced Maintenance menu is very similar to the procedure in the Standard Maintenance menu, section 6.3. The difference is that in the Advanced Maintenance menu version, the span values can be modified and the zero and span settings must be acknowledged by pressing the SELECT button.
*Calibrate Set Alarms Enable Sensors Set Clock/Chirp
SELECT
ADV CALIBRATION MENU *BRH O2/CO/H2S/Mth Individual Sensors
Example: Display of Advanced Calibration Menu
If the BRH sensor is installed, see section 6.3.3 for applying span gas.
Expose the instrument to fresh air. When the mV reading on the bottom line is stable, press the SELECT button to set the ZERO reading.
CAL: BRH *ZERO: 0 ppm SPAN: 100 ppm BRH: 196 mV
SELECT
CAL: BRH
ZERO: 0 ppm *SPAN: 100 ppm BRH: 1504 mV
Example: Display of BRH Calibration
The asterisk now highlights the SPAN gas concentration. Default values for each sensor are listed in Section 8.0.
To modify the span value, use the Menu key to initiate the change and then increment the digits. The SELECT button is used to select the digit. SELECT the last digit only after span gas has been applied and the mV reading is stable.
If no modification is necessary, apply calibration gas and press the SELECT button when the mV reading is stable.
Repeat the procedure for each sensor as necessary.
6.4.2 Setting Instantaneous Alarms
From the Advanced Maintenance menu, press the MENU button once to put the asterisk next to the Set Alarms line. Press the SELECT button to enter the Set Alarms screen. Use the MENU button to move the asterisk next to the desired gas for alarm to be changed. Press the SELECT button to move the cursor to the first digit. The MENU button is used to increment the digit and the SELECT button to move the cursor to the next digit. Press the SELECT
15