HD3000 User’s Guide
Professional Video Scaler and Color Management System
Initial Setup
•During the initial setup, adjustment of the color and image quality should be performed. After this initial setup is completed, the HD3000 will automatically store the settings for optimal image viewing.
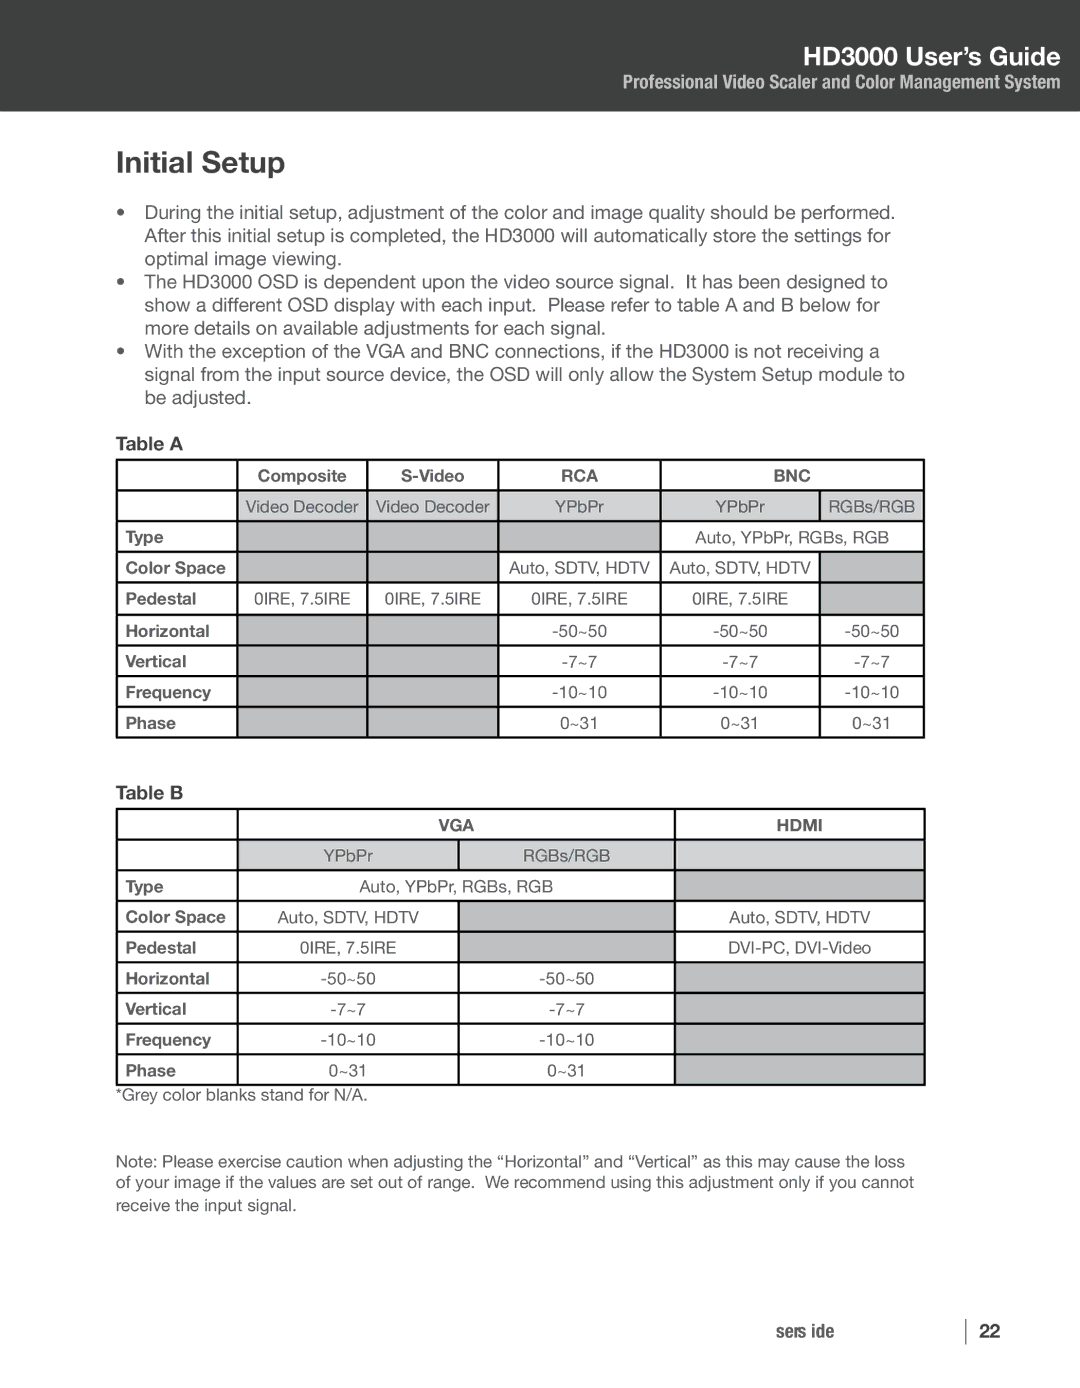
•The HD3000 OSD is dependent upon the video source signal. It has been designed to show a different OSD display with each input. Please refer to table A and B below for more details on available adjustments for each signal.
•With the exception of the VGA and BNC connections, if the HD3000 is not receiving a signal from the input source device, the OSD will only allow the System Setup module to be adjusted.
Table A
| Composite | RCA | BNC |
| |
|
|
|
|
|
|
| Video Decoder | Video Decoder | YPbPr | YPbPr | RGBs/RGB |
|
|
|
|
|
|
Type |
|
|
| Auto, YPbPr, RGBs, RGB | |
|
|
|
|
|
|
Color Space |
|
| Auto, SDTV, HDTV | Auto, SDTV, HDTV |
|
|
|
|
|
|
|
Pedestal | 0IRE, 7.5IRE | 0IRE, 7.5IRE | 0IRE, 7.5IRE | 0IRE, 7.5IRE |
|
|
|
|
|
|
|
Horizontal |
|
| |||
|
|
|
|
|
|
Vertical |
|
| |||
|
|
|
|
|
|
Frequency |
|
| |||
|
|
|
|
|
|
Phase |
|
| 0~31 | 0~31 | 0~31 |
|
|
|
|
|
|
Table B
| VGA | HDMI | |
|
|
| |
| YPbPr |
| RGBs/RGB |
|
|
| |
Type | Auto, YPbPr, RGBs, RGB | ||
|
|
| |
Color Space | Auto, SDTV, HDTV | Auto, SDTV, HDTV | |
|
|
| |
Pedestal | 0IRE, 7.5IRE | ||
|
|
|
|
Horizontal |
| ||
|
|
|
|
Vertical |
| ||
|
|
|
|
Frequency |
| ||
|
|
|
|
Phase | 0~31 |
| 0~31 |
*Grey color blanks stand for N/A.
Note: Please exercise caution when adjusting the “Horizontal” and “Vertical” as this may cause the loss of your image if the values are set out of range. We recommend using this adjustment only if you cannot
receive the input signal.
HD3000 User’s Guide
22