Handset Phonebook
Handset phonebook
You can add up to 100 items to the handset phonebook and search for phonebook items by name.
Important:
L Caller ID subscribers can use ringer ID and
L You can add and edit phonebook items by accessing your account on the Awebsite (www.joip.com), then downloading your web phonebook to the base unit. To import them to your handset, see page 71.
Adding items to the handset phonebook
1{C}
2{ADD}
3Enter the name (max. 16 characters; see the character table, page 39). i{OK}
4Enter the phone number (max. 32 digits). i{OK}
L If you do not need to assign the ringer ID and
5{V}/{^}: “Set Ringer ID” i
{SELECT}
6{V}/{^}: Select the desired ringer ID (page 44). i{OK}
L When selecting “No Ringer ID”, the ringer tone set for the IP line rings (page 53).
7{V}/{^}: “Set Light-up ID” i
{SELECT}
8{V}/{^}: Select the desired
9{SAVE}
L To add other items, repeat from step 3.
10{OFF}
Note:
LIn step 2, you can also press {MENU} i{V}/{^}: “New entry” i
{SELECT} instead of pressing {ADD}.
L If you select “No Ringer ID” (default) in step 6, the handset uses the ringer tone you selected on page 53 when a call is received from that caller.
LIf you select “No
(default) in step 8, the handset uses the ringer indicator color you selected on page 51 when a call is received from that caller.
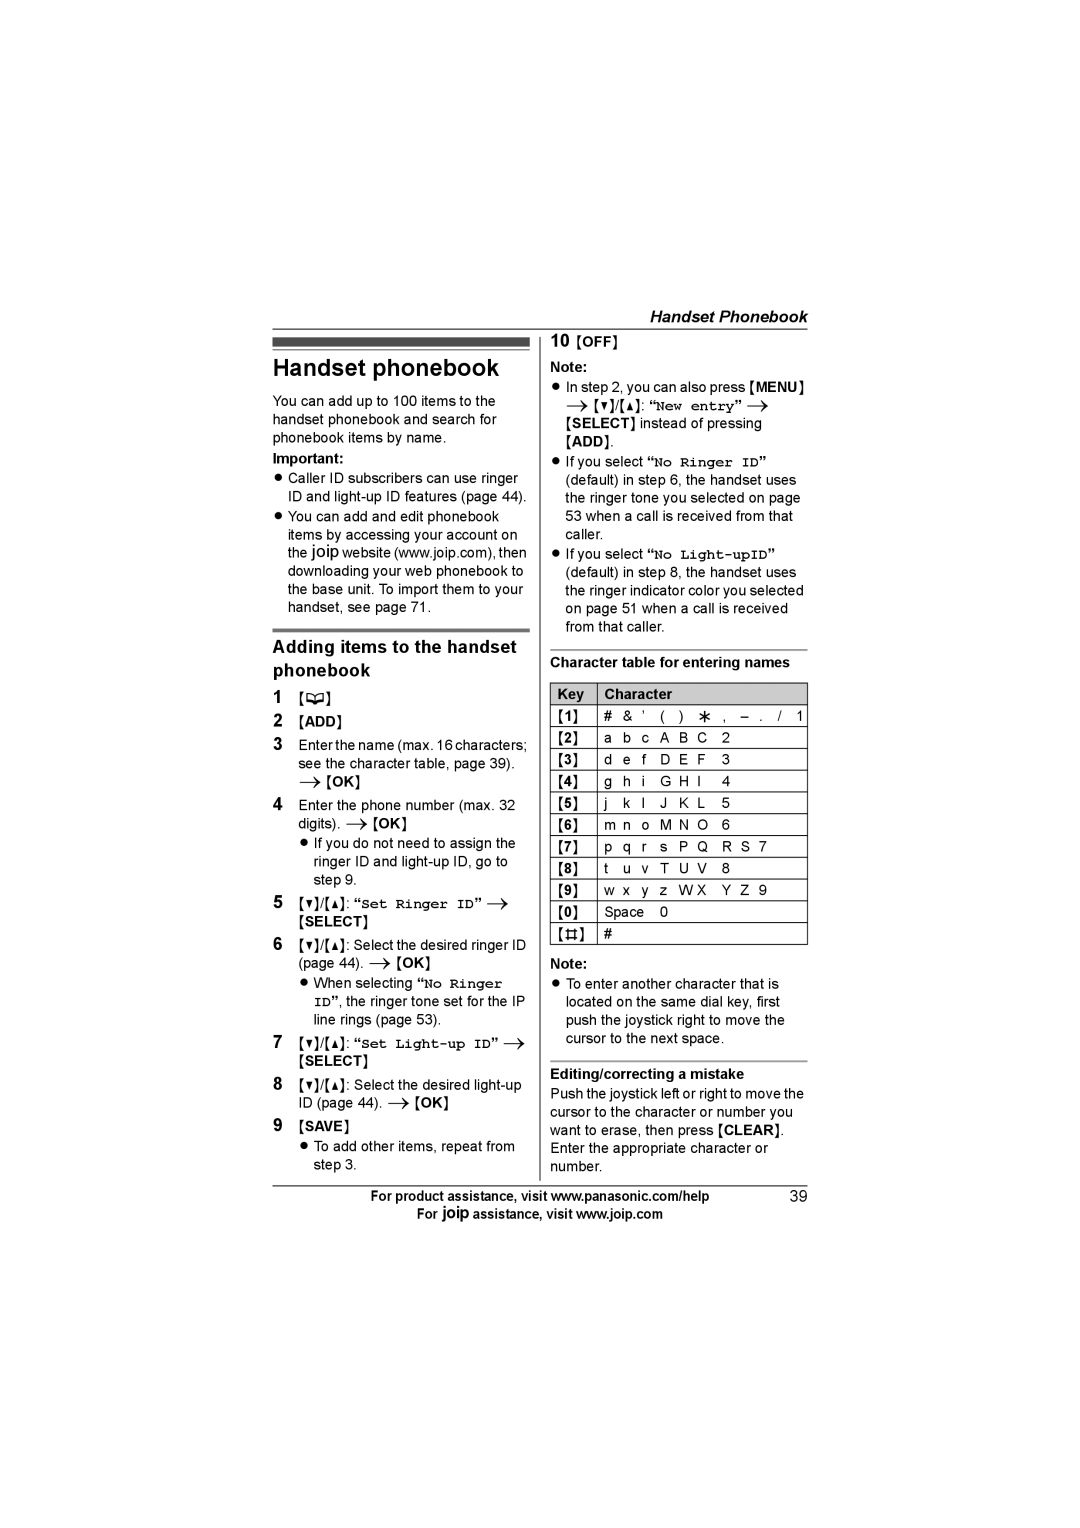
Character table for entering names
Key | Character |
|
|
| |||
{1} | # | & | ’ | ( | ) | ; | , |
{2} | a | b | c | A | B | C | 2 |
{3} | d | e | f | D | E | F | 3 |
{4} | g | h | i | G | H | I | 4 |
{5} | j | k | l | J | K | L | 5 |
{6} | m n | o | M | N | O | 6 | |
{7} | p | q | r | s | P Q | R S 7 | |
{8} | t | u | v | T | U | V | 8 |
{9} | w x | y | z | W X | Y Z 9 | ||
{0} | Space | 0 |
|
|
| ||
{#} | # |
|
|
|
|
|
|
Note:
L To enter another character that is located on the same dial key, first push the joystick right to move the cursor to the next space.
Editing/correcting a mistake
Push the joystick left or right to move the cursor to the character or number you want to erase, then press {CLEAR}. Enter the appropriate character or number.
For product assistance, visit www.panasonic.com/help | 39 |
For Aassistance, visit www.joip.com |
|