CU-2E18NBU specifications
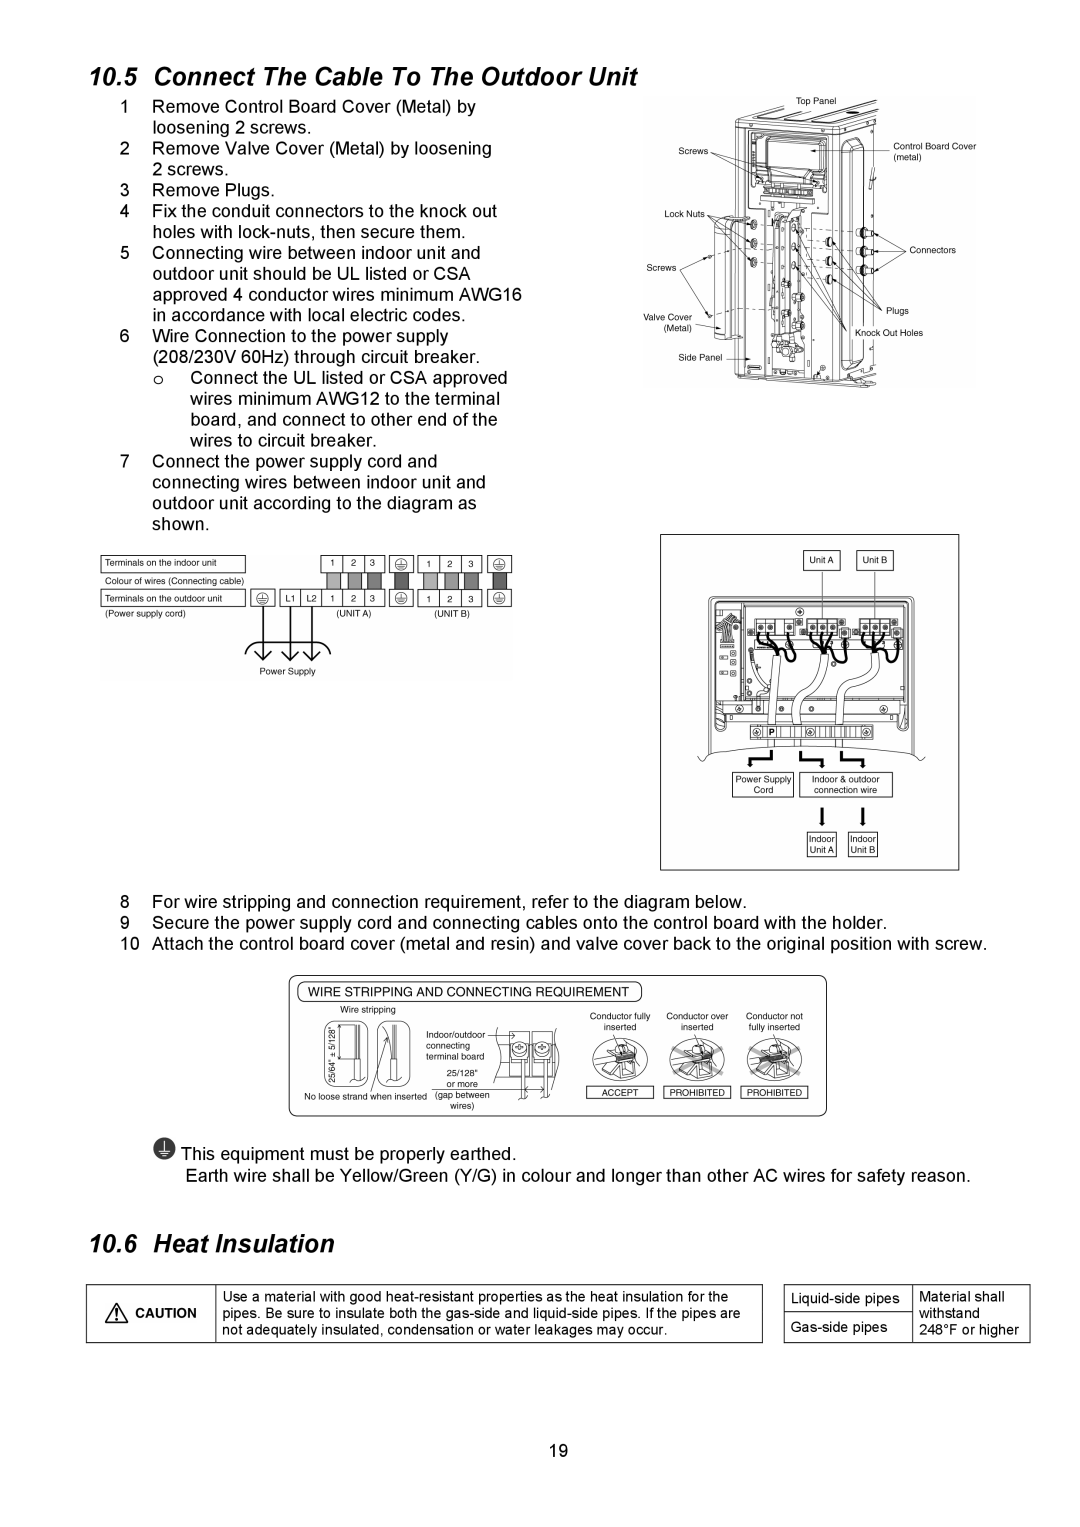
The Panasonic CU-2E18NBU is a highly efficient outdoor unit designed for residential and commercial applications, providing reliable heating and cooling year-round. This unit is part of Panasonic's extensive range of HVAC solutions, known for their innovation and energy efficiency.One of the standout features of the CU-2E18NBU is its advanced inverter technology. This technology allows the system to adjust the compressor speed based on the temperature demand, resulting in reduced energy consumption and enhanced comfort. By continuously varying the output, the inverter system maintains a consistent indoor climate without the frequent on/off cycles typical of conventional systems. This not only saves energy but also extends the lifespan of the unit.
The CU-2E18NBU is designed to operate efficiently in a wide range of conditions, showcasing excellent performance in harsh climates. With a capacity of 18,000 BTU, it can efficiently cool or heat spaces effectively, making it suitable for medium-sized rooms or multiple areas when paired with compatible indoor units.
Another significant characteristic of this Panasonic model is its environmentally friendly refrigerant, R32. This refrigerant has a lower impact on global warming and ozone depletion compared to older options, making the CU-2E18NBU a smart choice for eco-conscious consumers. R32 also enhances the system's efficiency, further contributing to lower energy costs.
The unit features a robust construction, allowing it to withstand outdoor conditions while promoting durability. Its compact design allows for flexible installation options, making it easier to fit in various environments without compromising aesthetic appeal.
Moreover, the CU-2E18NBU incorporates advanced air filtration and purification technologies, improving indoor air quality. The filters are designed to capture dust, allergens, and other particulates, ensuring cleaner, healthier air.
In summary, the Panasonic CU-2E18NBU stands out for its efficient inverter technology, environmentally friendly refrigerant, and compact, durable design. With its ability to provide consistent temperature control and improve indoor air quality, this unit is a reliable solution for anyone looking to enhance their heating and cooling systems.

