Taking pictures with automatic settings
[Intelligent Auto] Mode
Recording Mode: 
Optimum settings are made automatically from information such as “face,” “movement,” “brightness,” and “distance” just by pointing the camera at the subject, meaning that clear pictures can be taken without the need to make settings manually.
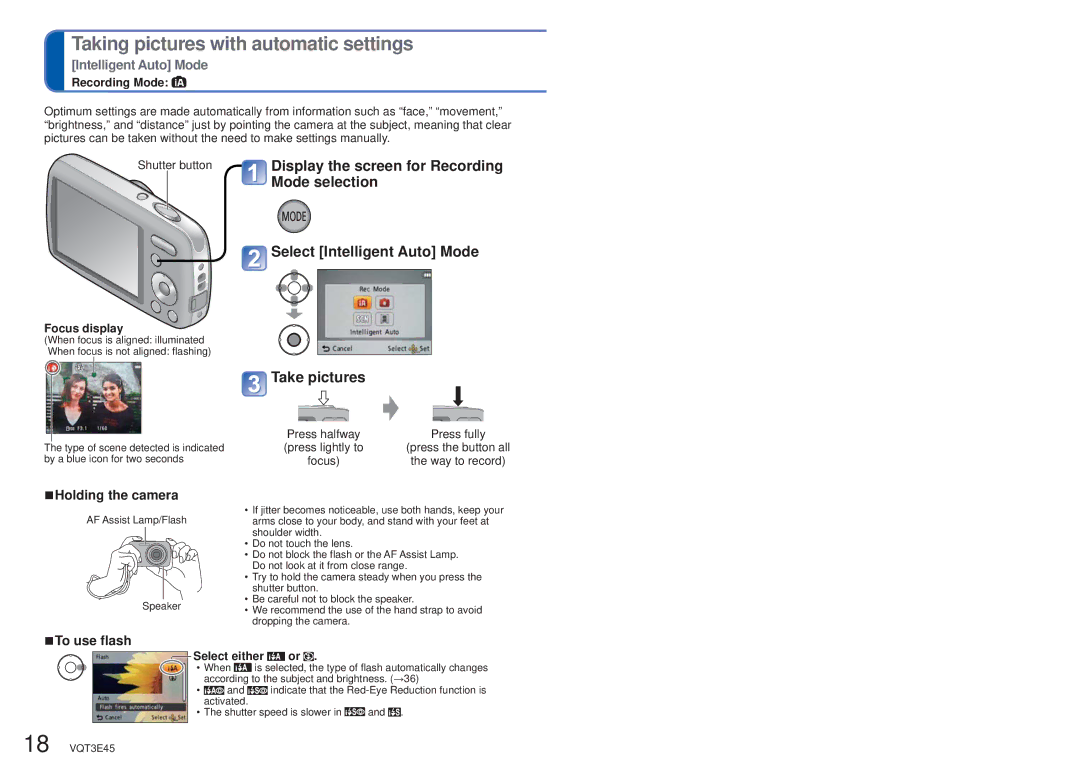
Shutter button
Focus display
(When focus is aligned: illuminated When focus is not aligned: flashing)
The type of scene detected is indicated by a blue icon for two seconds
![]() Display the screen for Recording Mode selection
Display the screen for Recording Mode selection
![]() Select [Intelligent Auto] Mode
Select [Intelligent Auto] Mode
![]() Take pictures
Take pictures
Press halfway | Press fully |
(press lightly to | (press the button all |
focus) | the way to record) |
■Holding the camera
AF Assist Lamp/Flash
Speaker
■To use flash
18 VQT3E45
•If jitter becomes noticeable, use both hands, keep your arms close to your body, and stand with your feet at shoulder width.
•Do not touch the lens.
•Do not block the flash or the AF Assist Lamp. Do not look at it from close range.
•Try to hold the camera steady when you press the shutter button.
•Be careful not to block the speaker.
•We recommend the use of the hand strap to avoid dropping the camera.
Select either  or
or  .
.
•When ![]() is selected, the type of flash automatically changes according to the subject and brightness. (→36)
is selected, the type of flash automatically changes according to the subject and brightness. (→36)
•![]() and
and ![]() indicate that the
indicate that the
•The shutter speed is slower in ![]() and
and ![]() .
.