Installation of the unit
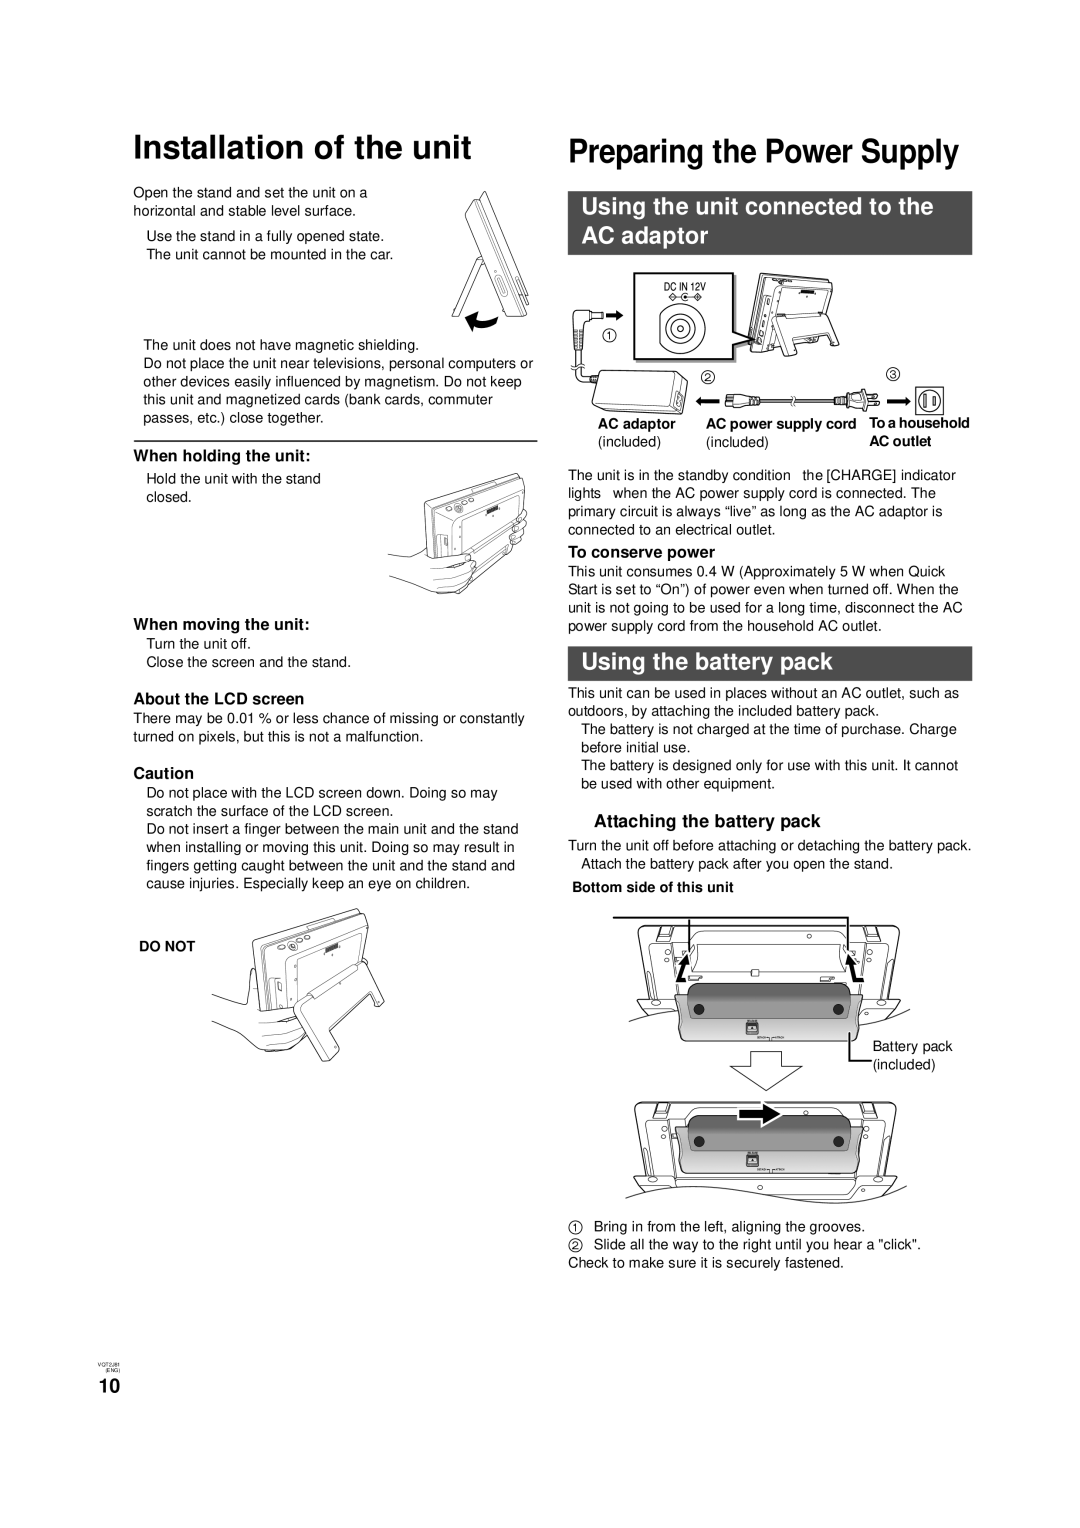
Open the stand and set the unit on a horizontal and stable level surface.
≥Use the stand in a fully opened state.
≥The unit cannot be mounted in the car.
≥The unit does not have magnetic shielding.
Do not place the unit near televisions, personal computers or other devices easily influenced by magnetism. Do not keep this unit and magnetized cards (bank cards, commuter passes, etc.) close together.
When holding the unit:
≥Hold the unit with the stand
closed.
When moving the unit:
≥Turn the unit off.
≥Close the screen and the stand.
About the LCD screen
There may be 0.01 % or less chance of missing or constantly turned on pixels, but this is not a malfunction.
Caution
≥Do not place with the LCD screen down. Doing so may scratch the surface of the LCD screen.
≥Do not insert a finger between the main unit and the stand when installing or moving this unit. Doing so may result in fingers getting caught between the unit and the stand and cause injuries. Especially keep an eye on children.
DO NOT
Preparing the Power Supply
Using the unit connected to the AC adaptor
1 |
|
|
| 2 | 3 |
AC adaptor | AC power supply cord | To a household |
(included) | (included) | AC outlet |
The unit is in the standby condition (the [CHARGE] indicator lights) when the AC power supply cord is connected. The primary circuit is always “live” as long as the AC adaptor is connected to an electrical outlet.
To conserve power
This unit consumes 0.4 W (Approximately 5 W when Quick Start is set to “On”) of power even when turned off. When the unit is not going to be used for a long time, disconnect the AC power supply cord from the household AC outlet.
Using the battery pack
This unit can be used in places without an AC outlet, such as outdoors, by attaching the included battery pack.
≥The battery is not charged at the time of purchase. Charge before initial use.
≥The battery is designed only for use with this unit. It cannot be used with other equipment.
∫Attaching the battery pack
Turn the unit off before attaching or detaching the battery pack.
≥Attach the battery pack after you open the stand.
Bottom side of this unit
|
RELEASE
DETACH![]()
![]() ATTACH
ATTACH
RELEASE
DETACH![]()
![]() ATTACH
ATTACH
Battery pack ![]() (included)
(included)
VQT2J81
(ENG)
1Bring in from the left, aligning the grooves.
2Slide all the way to the right until you hear a "click". Check to make sure it is securely fastened.
10
