Preparation
Menu icons
When in standby mode, pressing down on the centre of the joystick reveals the handset’s main menu. From here you can access various features and settings.
Icon |
|
|
| Feature | |
j |
| [ |
| Caller List | |
J |
| [ |
| Ringer Setup | |
K |
| < |
| Time Settings | |
N |
| ] |
| Handset Setup | |
! |
| " |
| Base Unit Setup | |
# |
| $ |
| Incoming No. Bar | |
|
|
|
|
|
|
Soft key icons | |||||
|
|
|
|
|
|
Icon |
|
| Action | ||
U |
|
| Returns to the previous | ||
|
|
|
| screen. | |
K |
|
| Displays the menu. | ||
|
|
|
| ||
M |
|
| Accepts the current | ||
|
|
|
| selection. | |
j |
|
| Displays a previously | ||
|
|
|
| dialled phone number. | |
n |
|
| Opens the phonebook. | ||
|
|
|
| ||
~ |
|
| Stores phone numbers in | ||
|
|
|
| the bar call list. (page 28) | |
|
|
|
| ||
k |
|
| Displays the phonebook | ||
|
|
|
| search menu. | |
& |
|
|
| Turns the key lock feature | |
|
|
|
| off. (page 18) | |
/ |
|
| Selects a character entry | ||
|
|
|
| mode. | |
l |
|
| Inserts a dialling pause. | ||
|
|
|
| ||
W |
|
| Erases the selected item. | ||
( |
|
| No function | ||
|
|
|
|
|
|
Connections
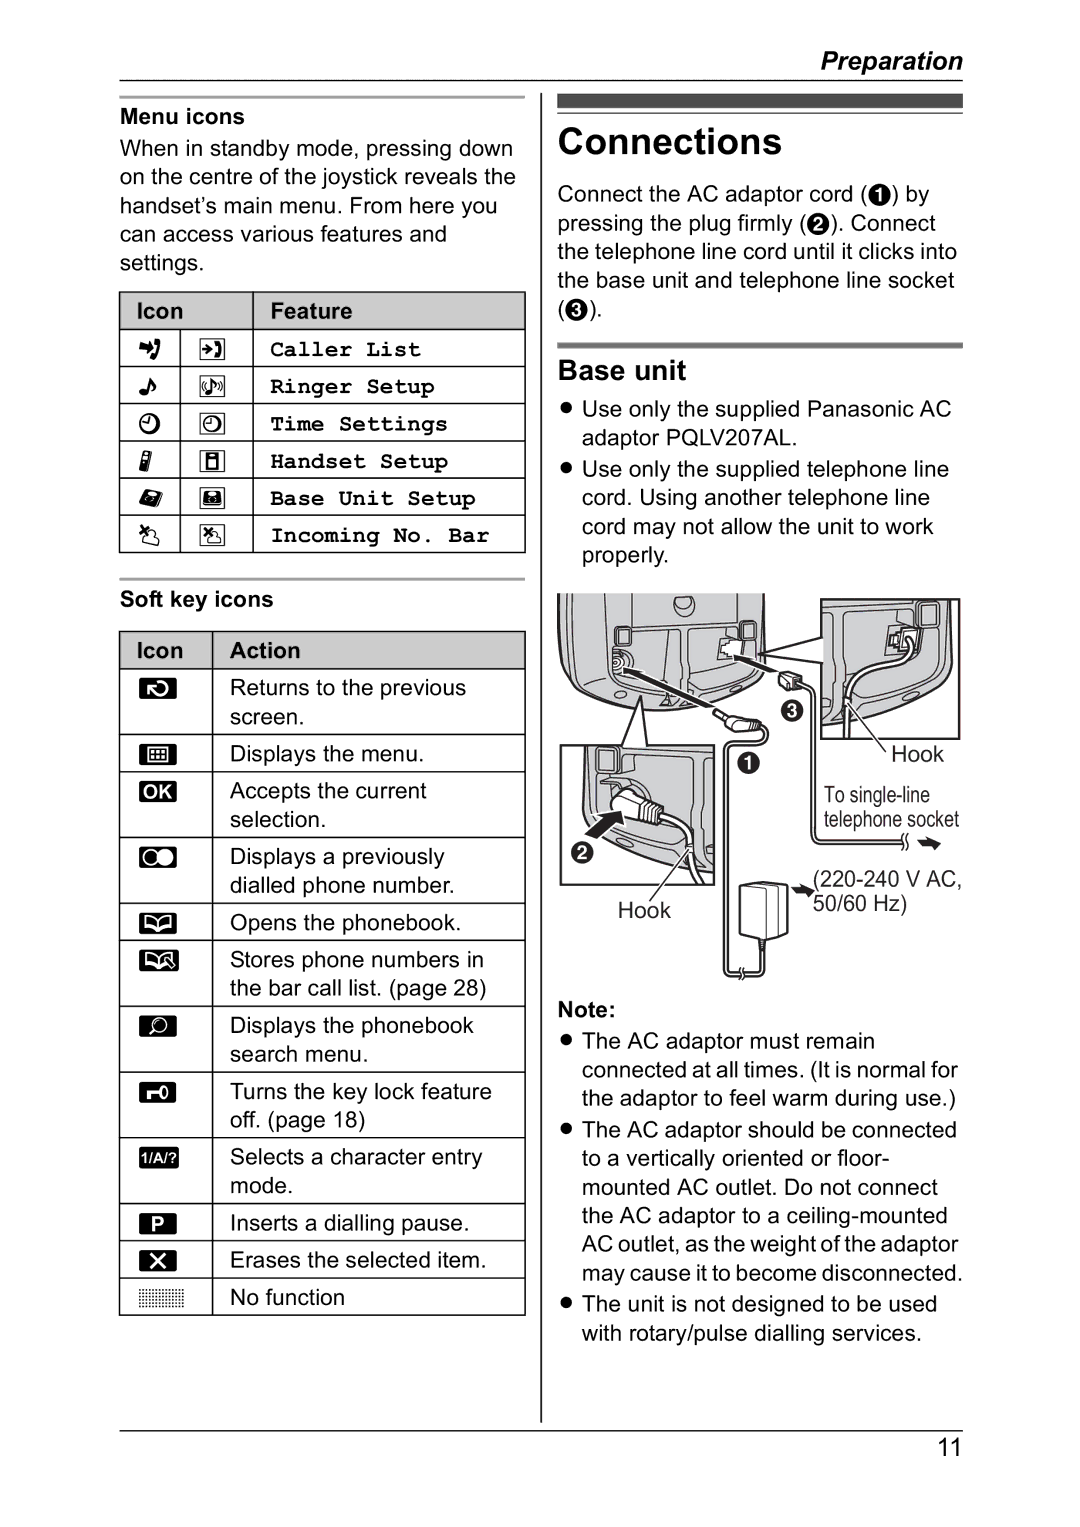
Connect the AC adaptor cord (A) by pressing the plug firmly (B). Connect the telephone line cord until it clicks into the base unit and telephone line socket (C).
Base unit
L Use only the supplied Panasonic AC adaptor PQLV207AL.
L Use only the supplied telephone line cord. Using another telephone line cord may not allow the unit to work properly.
|
| C |
| A | Hook |
|
| |
|
| To |
|
| telephone socket |
B |
|
|
|
| |
Hook |
| 50/60 Hz) |
|
|
Note:
L The AC adaptor must remain connected at all times. (It is normal for the adaptor to feel warm during use.)
L The AC adaptor should be connected to a vertically oriented or floor- mounted AC outlet. Do not connect the AC adaptor to a
L The unit is not designed to be used with rotary/pulse dialling services.
11
