Starting to use

Turning on the power

Please ensure that all preparations have been completed before turning on the power. (Refer to pages 24 29.)

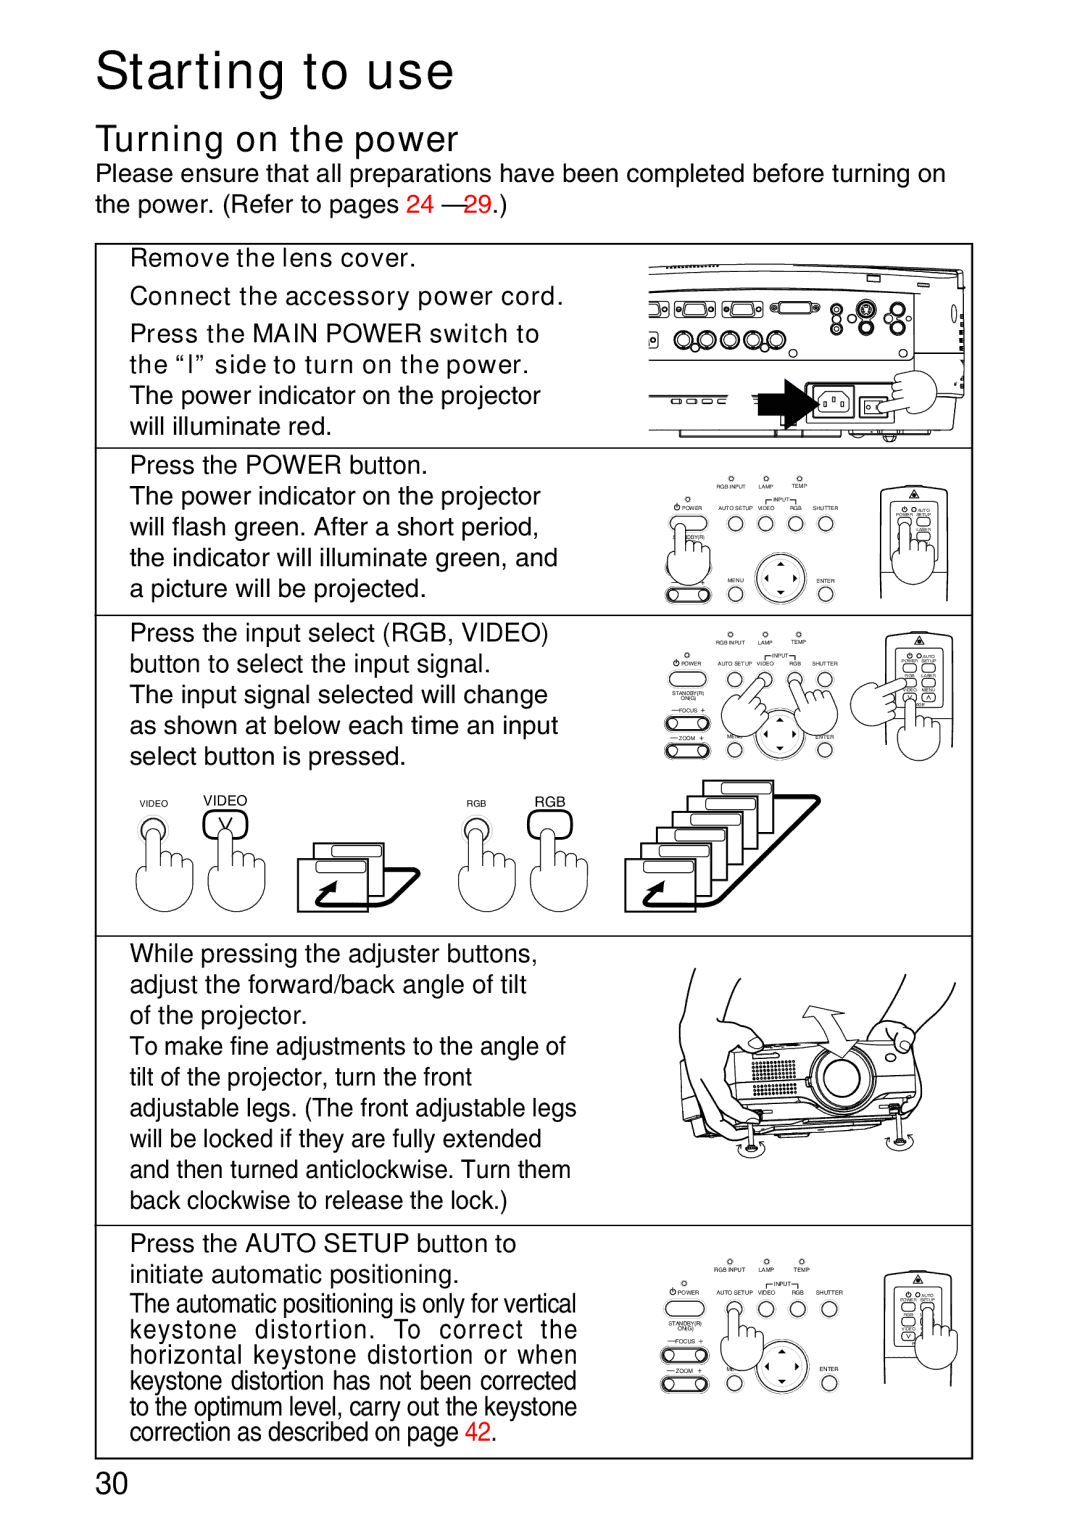
#Remove the lens cover.


$Connect the accessory power cord.


%Press the MAIN POWER switch to


the “l” side to turn on the power.


%

The power indicator on the projector


$


will illuminate red.


&Press the POWER button.


The power indicator on the projector


RGB INPUT

LAMP

TEMP


POWER

AUTO SETUP

VIDEO

RGB

SHUTTER

AUTO


INPUT


will flash green. After a short period,


POWER SETUP

STANDBY(R)


RGB LASER

the indicator will illuminate green, and

ON(G)


VIDEO MENU

FOCUS +


PAGE


a picture will be projected.


ZOOM +

MENU


ENTER


'Press the input select (RGB, VIDEO)


RGB INPUT

LAMP

TEMP


button to select the input signal.


INPUT


RGB

AUTO


LASER


POWER

AUTO SETUP

VIDEO

RGB

SHUTTER

POWER

SETUP

The input signal selected will change


PAGE


STANDBY(R)


VIDEO

MENU


ON(G)


as shown at below each time an input

– FOCUS +


– ZOOM +

MENU


ENTER


select button is pressed.


SD CARD


VIDEO

VIDEO

RGB

RGB


NETWORK


DVI


RGB3


S-VIDEO


RGB2


VIDEO


RGB1


(While pressing the adjuster buttons,


adjust the forward/back angle of tilt


of the projector.


To make fine adjustments to the angle of


tilt of the projector, turn the front


adjustable legs. (The front adjustable legs


will be locked if they are fully extended


and then turned anticlockwise. Turn them


back clockwise to release the lock.)


)Press the AUTO SETUP button to


initiate automatic positioning.


RGB INPUT

INPUT


LAMP

TEMP


The automatic positioning is only for vertical

POWER

AUTO SETUP

VIDEO

RGB

SHUTTER


AUTO


RGB

LASER

keystone distortion. To

correct

the


POWER

SETUP

– FOCUS +


PAGE


STANDBY(R)


ON(G)


VIDEO

MENU

horizontal keystone distortion or when


keystone distortion has not been corrected

– ZOOM +

MENU


ENTER


to the optimum level, carry out the keystone


correction as described on page 42.


30

Page 30
Image 30
Panasonic TQBH9003-6 Starting to use, Turning on the power, Press the Power button, Press the input select RGB, Video

PT-L750U R, TQBH9003-6 specifications

The Panasonic TQBH9003-6, PT-L750U R is a remarkable projector designed for versatile professional use, ideal for a wide range of applications from corporate presentations to educational settings. This high-performance model combines cutting-edge technology with user-friendly features to deliver stunning visuals and reliable operation.

One of the standout characteristics of the PT-L750U R is its brightness, boasting an impressive output of 7,500 lumens. This high brightness level ensures vivid and sharp images even in well-lit environments, making it perfect for large conference rooms or lecture halls. Coupled with a high contrast ratio, the projector produces deep blacks and vibrant colors, enhancing the overall viewing experience.

The projector employs advanced DLP technology, renowned for its excellent color accuracy and longevity. This technology minimizes the risk of color degradation over time, ensuring that images remain consistent in quality throughout its lifespan. The inclusion of a durable laser light source not only increases the projector's longevity but also enhances its energy efficiency, significantly reducing maintenance costs.

Connectivity is another critical feature of the Panasonic PT-L750U R. It comes equipped with a range of input options, including HDMI, USB, and LAN, allowing for easy integration with various devices. This flexibility makes it suitable for different content sources, whether it be streaming media, laptops, or presentation tools. The projector also supports wireless connectivity, enabling users to present content directly from their smartphones or tablets without cumbersome cables.

In terms of design, the PT-L750U R is compact and lightweight, making it easy to transport and install in various environments. The projector is also equipped with advanced lens shift and keystone correction capabilities, allowing for easy adjustments to achieve the perfect image alignment, despite the placement of the device.

Furthermore, the Panasonic TQBH9003-6 model emphasizes quiet operation, ensuring that fan noise is minimized, allowing for undistracted presentations. This feature is particularly beneficial in settings where concentration and focus are essential.

In conclusion, the Panasonic TQBH9003-6, PT-L750U R is a powerful, versatile projector that delivers high-quality visuals with a range of advanced features to cater to the demands of professional settings. Its combination of brightness, connectivity options, and user-friendly design makes it a top choice for anyone seeking reliable projection solutions in corporate or educational environments.