FIGURE 42 | 92 | 25 |
|
|
|
| |
|
| 103 AB CABLE | |
| 42 |
| 91 |
|
|
| |
SEE DETAIL 39 |
| 49 |
|
|
|
| |
|
| 3/8 X | 85 |
|
|
| DETAIL 42 |
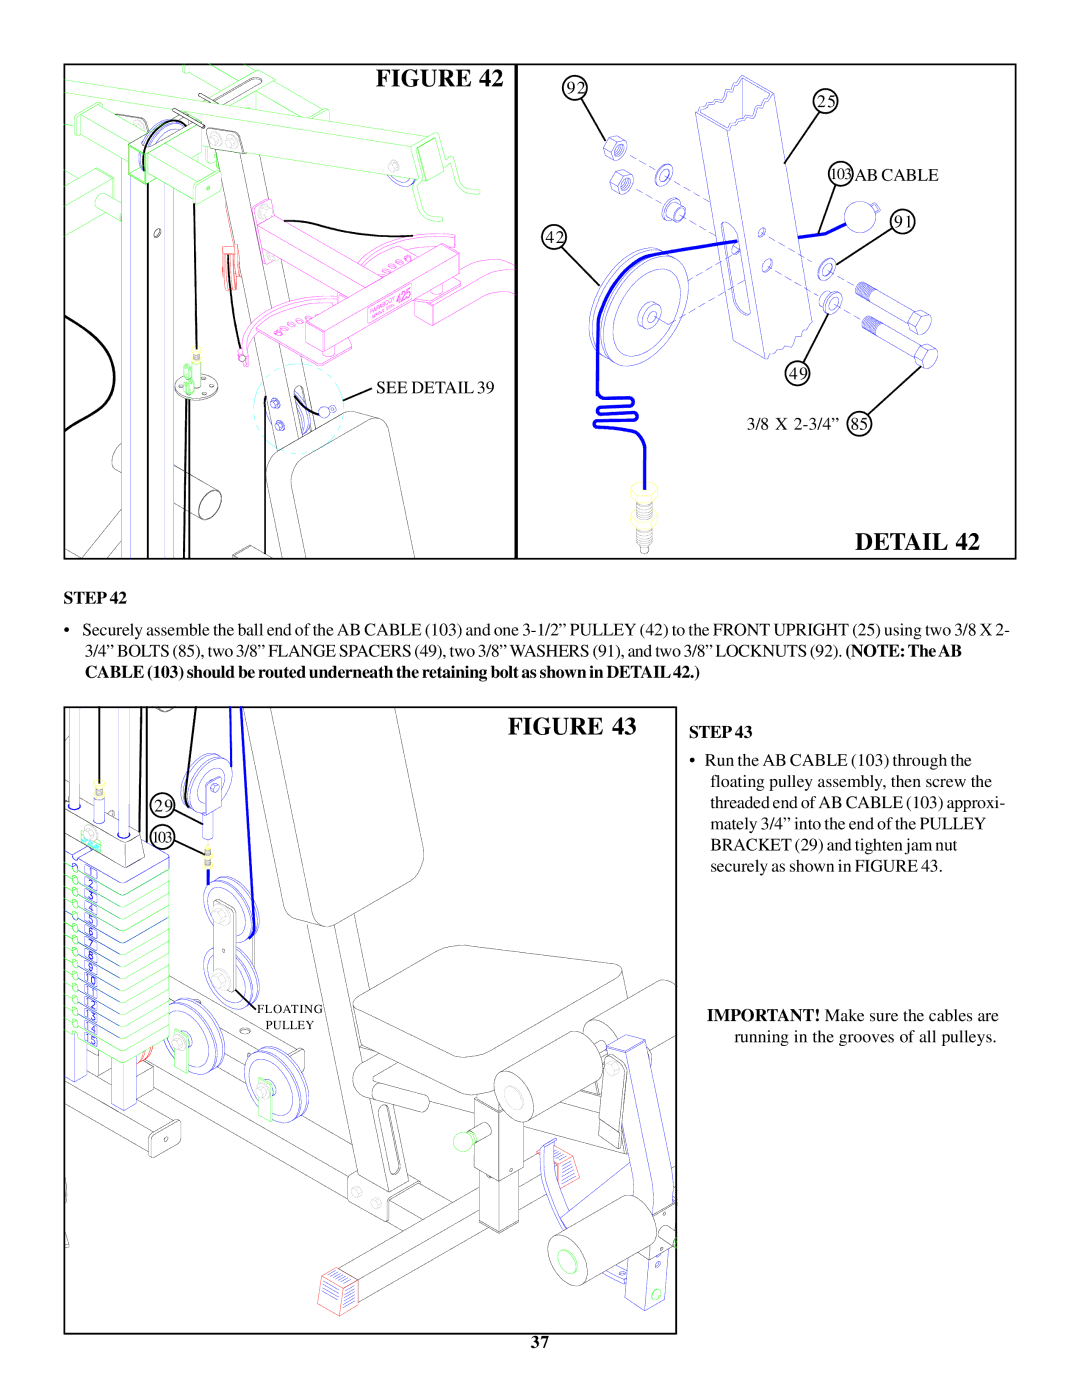
STEP 42
•Securely assemble the ball end of the AB CABLE (103) and one
CABLE (103) should be routed underneath the retaining bolt as shown in DETAIL42.)
FIGURE 43 | STEP 43 | |
| • Run the AB CABLE (103) through the | |
| floating pulley assembly, then screw the | |
29 | threaded end of AB CABLE (103) approxi- | |
103 | mately 3/4” into the end of the PULLEY | |
BRACKET (29) and tighten jam nut | ||
| ||
| securely as shown in FIGURE 43. | |
FLOATING | IMPORTANT! Make sure the cables are | |
PULLEY | ||
running in the grooves of all pulleys. | ||
| ||
37 |
|
