Edit a Decoder Monitor Entry in the EDI5000 Configuration
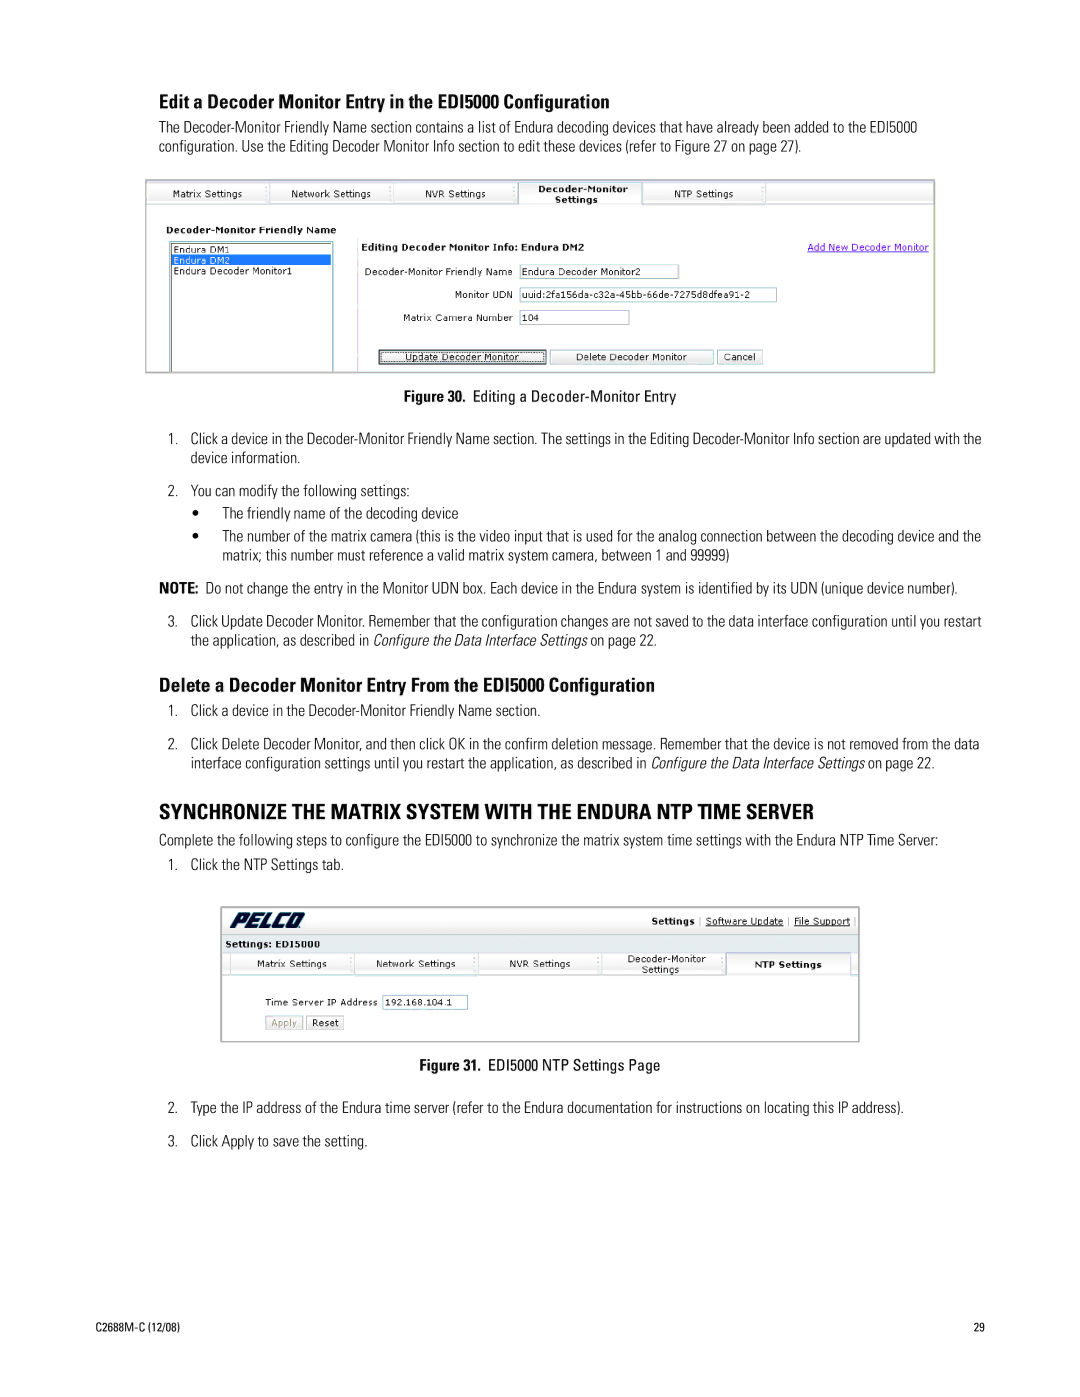
The
Figure 30. Editing a Decoder-Monitor Entry
1.Click a device in the Decoder-Monitor Friendly Name section. The settings in the Editing Decoder-Monitor Info section are updated with the device information.
2.You can modify the following settings:
•The friendly name of the decoding device
•The number of the matrix camera (this is the video input that is used for the analog connection between the decoding device and the matrix; this number must reference a valid matrix system camera, between 1 and 99999)
NOTE: Do not change the entry in the Monitor UDN box. Each device in the Endura system is identified by its UDN (unique device number).
3.Click Update Decoder Monitor. Remember that the configuration changes are not saved to the data interface configuration until you restart the application, as described in Configure the Data Interface Settings on page 22.
Delete a Decoder Monitor Entry From the EDI5000 Configuration
1.Click a device in the Decoder-Monitor Friendly Name section.
2.Click Delete Decoder Monitor, and then click OK in the confirm deletion message. Remember that the device is not removed from the data interface configuration settings until you restart the application, as described in Configure the Data Interface Settings on page 22.
SYNCHRONIZE THE MATRIX SYSTEM WITH THE ENDURA NTP TIME SERVER
Complete the following steps to configure the EDI5000 to synchronize the matrix system time settings with the Endura NTP Time Server:
1. Click the NTP Settings tab.
Figure 31. EDI5000 NTP Settings Page
2.Type the IP address of the Endura time server (refer to the Endura documentation for instructions on locating this IP address).
3.Click Apply to save the setting.
29 |
