Product Information
To control the LightFrameTM DR feature in your monitor, you'll want install the LightFrameTM DR application found on this
To install LightFrameTM DR, place the CD in your
When the CD menu appears on your screen,
1)select preferred language
2)select model number (170X6 or 190X6)
3)click on Install LightFrameTM Digital Reality.
Follow the
After installation, the LightFrameTM DR shortcut icon automatically appears at your desktop, click it to load the control bar on screen.
Use Tips
1. Cursor with a yellow light bulb versus a blue light bulb
Your mouse pointer takes the shape of a light bulb to indicate that LightFrameTM DR is ready to activate or deactivate a target window that contains photos, videos or other content that can be enhanced. A yellow light bulb means that you are moving over a window where LightFrameTM DR can be activated. Click on the window to activate enhancement. A blue light bulb appears when moving over an activated window. Click on the window to
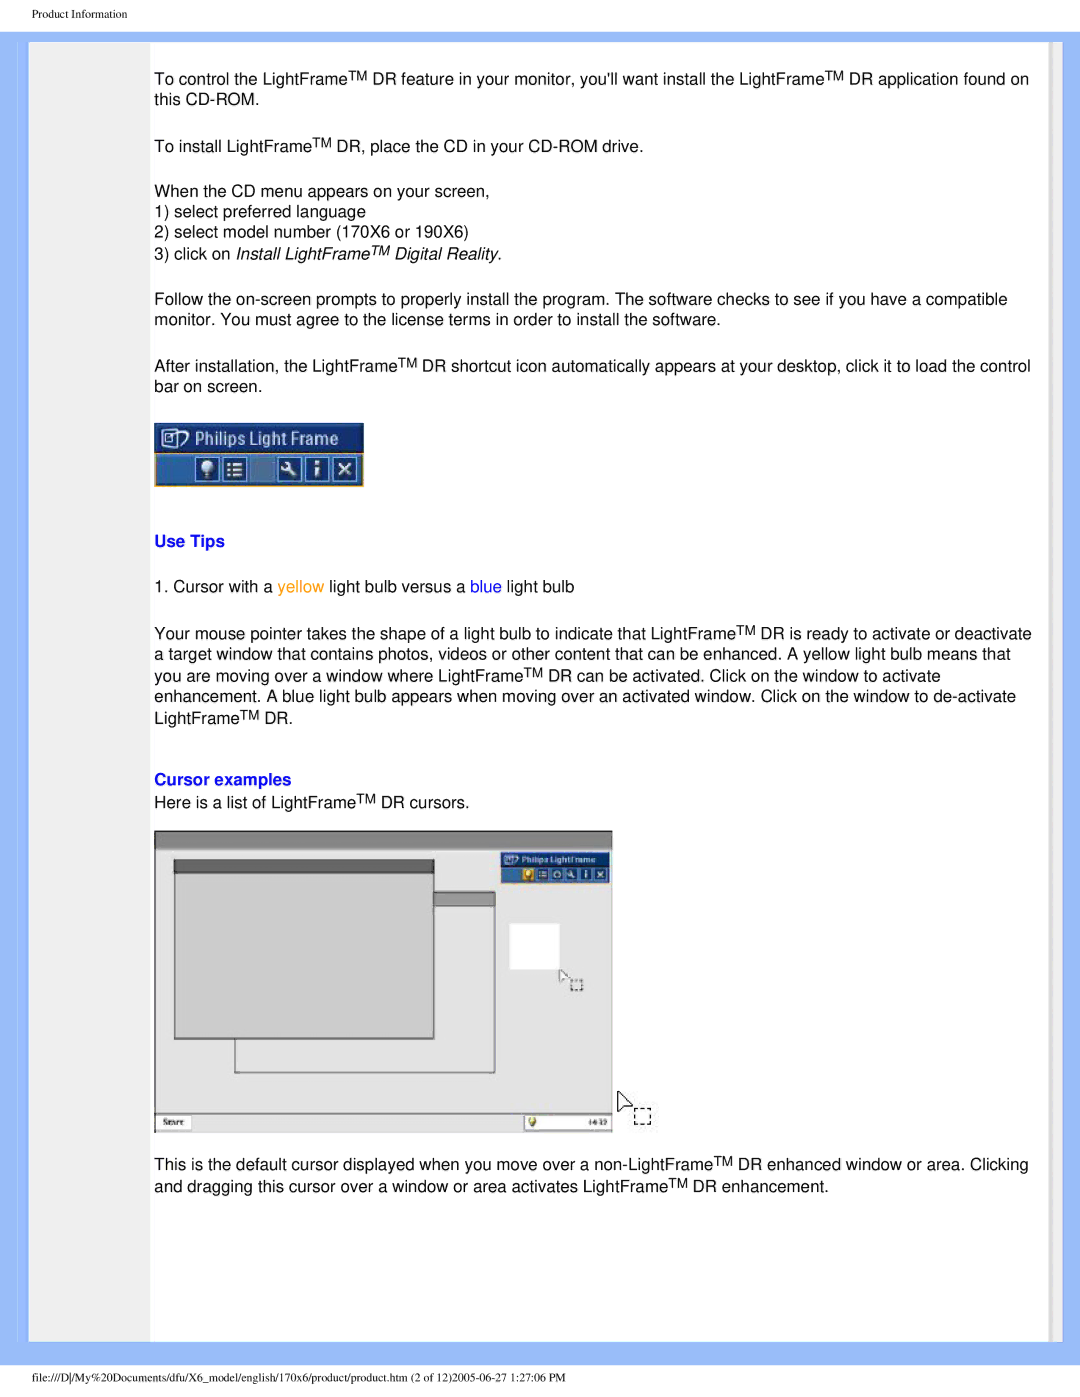
Cursor examples
Here is a list of LightFrameTM DR cursors.
This is the default cursor displayed when you move over a
file:///D/My%20Documents/dfu/X6_model/english/170x6/product/product.htm (2 of