How to Use the On Screen Display (OSD)
Color Temperature window
User 1 / User 2
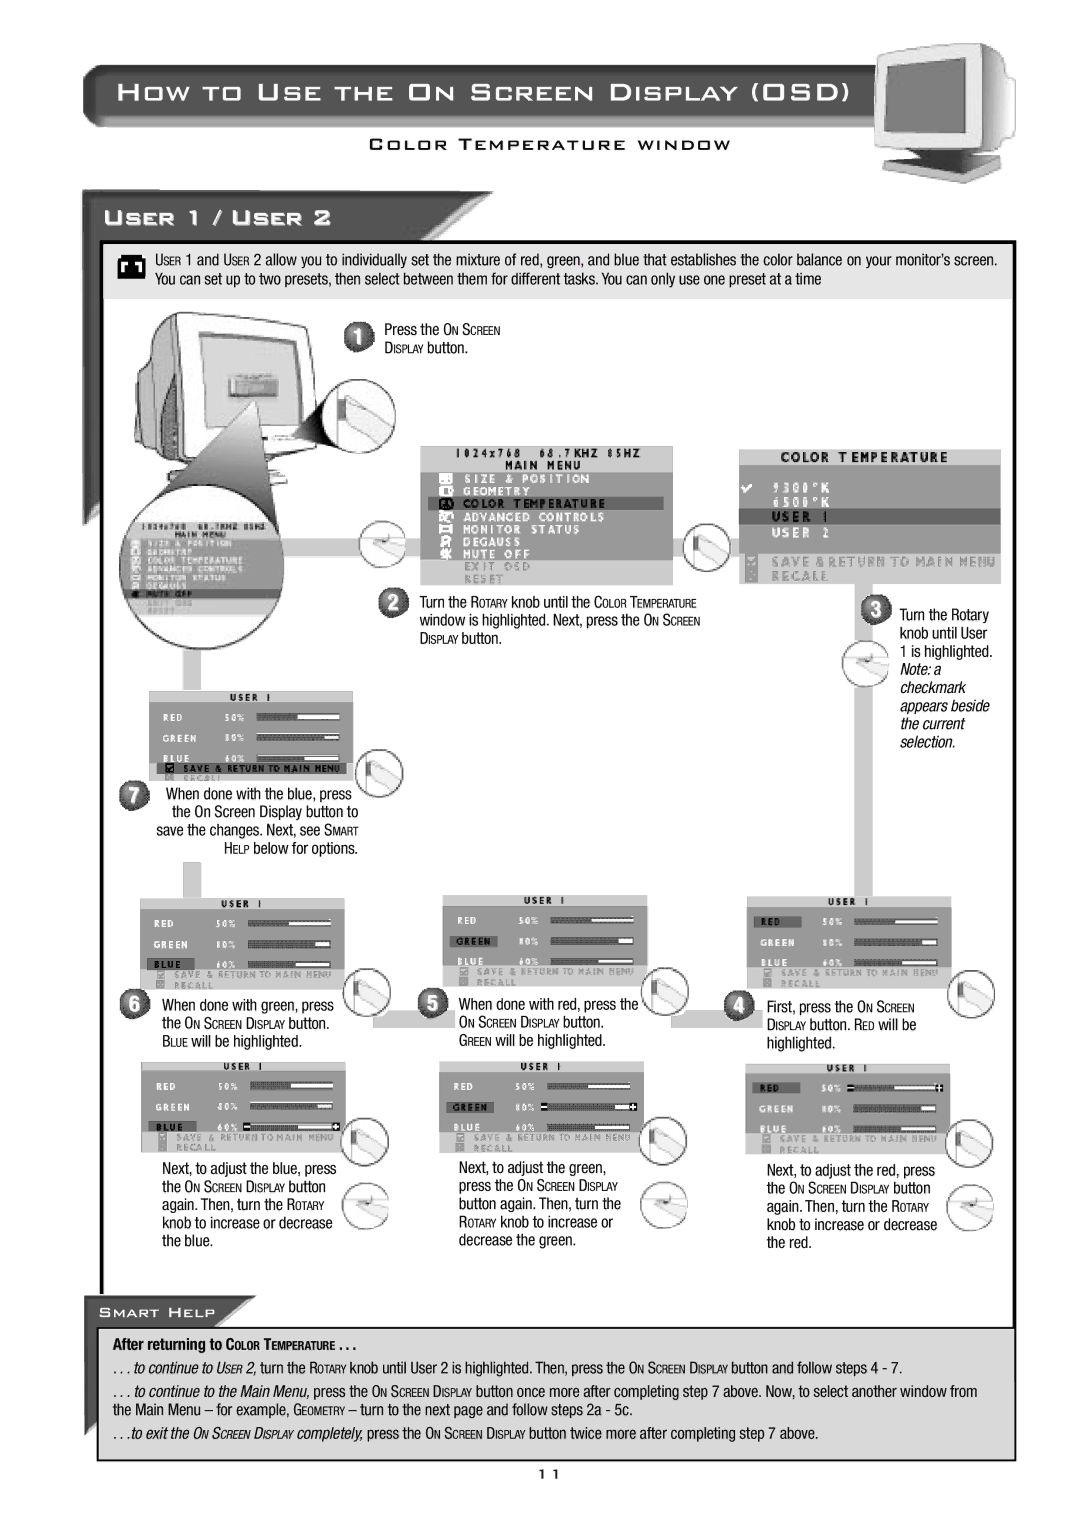
USER 1 and USER 2 allow you to individually set the mixture of red, green, and blue that establishes the color balance on your monitor’s screen. You can set up to two presets, then select between them for different tasks. You can only use one preset at a time
1Press the ON SCREEN DISPLAY button.
2Turn the ROTARY knob until the COLOR TEMPERATURE window is highlighted. Next, press the ON SCREEN DISPLAY button.
7When done with the blue, press the On Screen Display button to
save the changes. Next, see SMART HELP below for options.
3Turn the Rotary knob until User 1 is highlighted. Note: a checkmark appears beside the current selection.
6When done with green, press the ON SCREEN DISPLAY button. BLUE will be highlighted.
Next, to adjust the blue, press the ON SCREEN DISPLAY button again. Then, turn the ROTARY knob to increase or decrease the blue.
5When done with red, press the
ON SCREEN DISPLAY button.
GREEN will be highlighted.
Next, to adjust the green,
press the ON SCREEN DISPLAY
button again. Then, turn the ROTARY knob to increase or decrease the green.
4First, press the ON SCREEN DISPLAY button. RED will be highlighted.
Next, to adjust the red, press the ON SCREEN DISPLAY button again. Then, turn the ROTARY knob to increase or decrease the red.
Smart Help
After returning to COLOR TEMPERATURE . . .
. . . to continue to USER 2, turn the ROTARY knob until User 2 is highlighted. Then, press the ON SCREEN DISPLAY button and follow steps 4 - 7.
. . . to continue to the Main Menu, press the ON SCREEN DISPLAY button once more after completing step 7 above. Now, to select another window from the Main Menu – for example, GEOMETRY – turn to the next page and follow steps 2a - 5c.
. . .to exit the ON SCREEN DISPLAY completely, press the ON SCREEN DISPLAY button twice more after completing step 7 above.
11