| Description of Controls | |||||
|
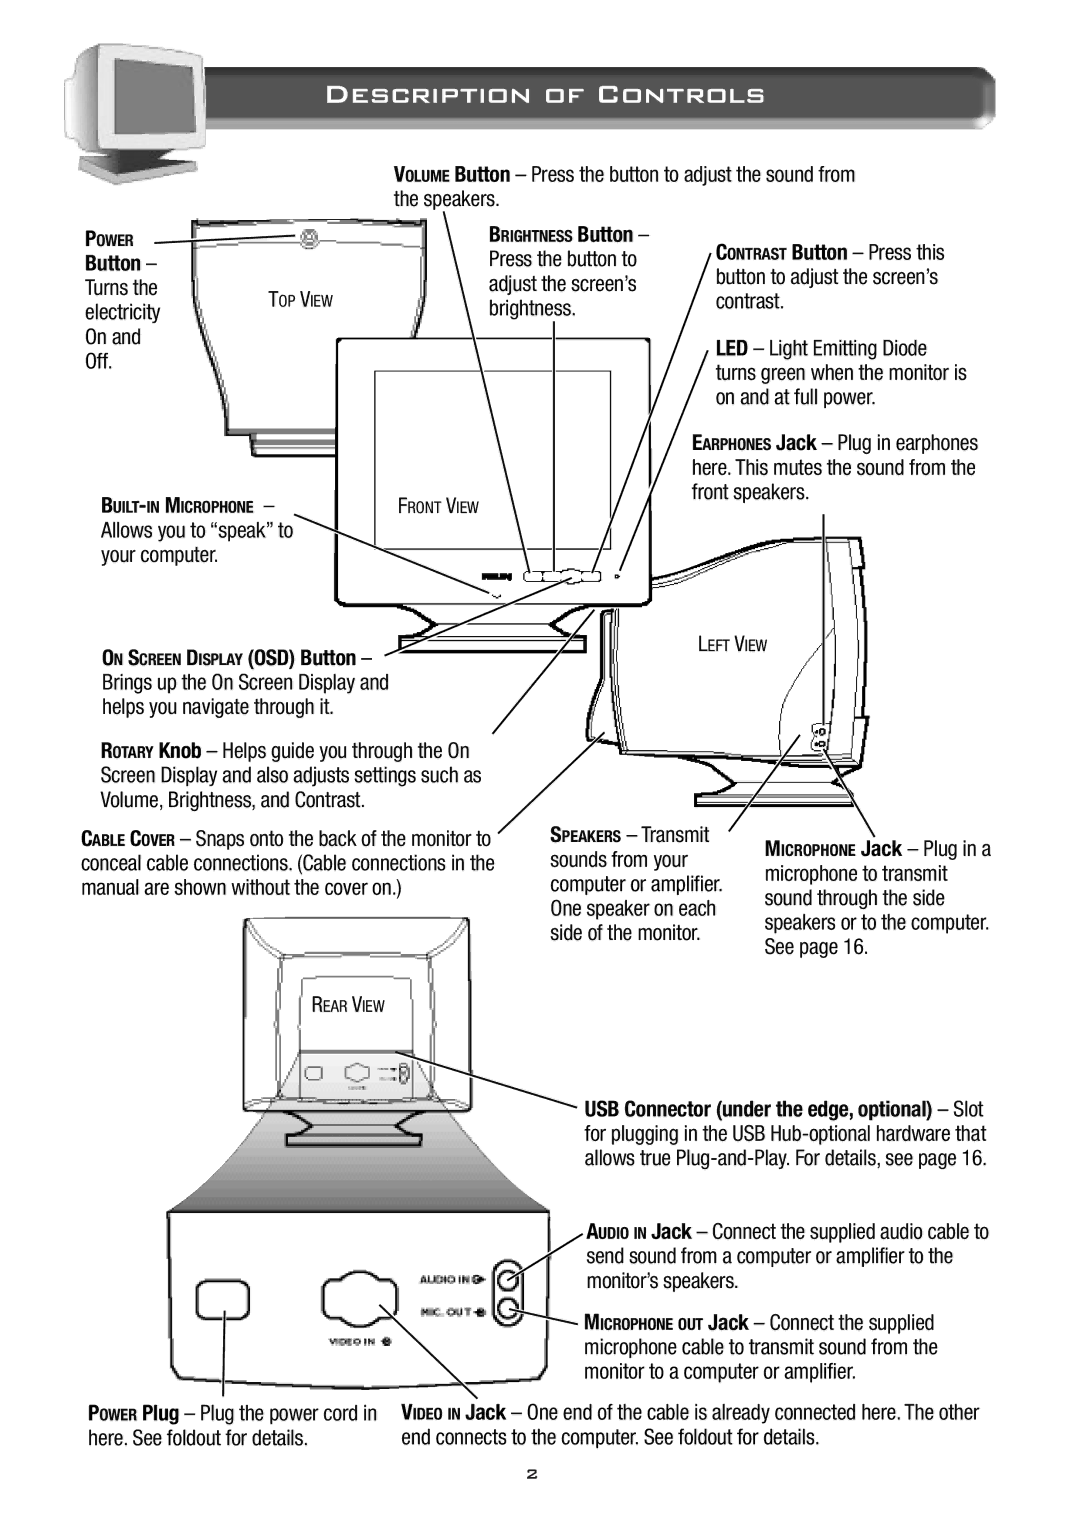
| VOLUME Button – Press the button to adjust the sound from | ||||
|
| the speakers. |
|
| ||
POWER |
| BRIGHTNESS Button – | CONTRAST Button – Press this | |||
Button – |
| Press the button to | ||||
| button to adjust the screen’s | |||||
Turns the | TOP VIEW | adjust the screen’s | ||||
contrast. | ||||||
electricity | brightness. | |||||
|
|
| ||||
On and |
|
|
| LED – Light Emitting Diode | ||
Off. |
|
|
| |||
|
|
| turns green when the monitor is | |||
|
|
|
| |||
|
|
|
| on and at full power. | ||
|
|
|
| EARPHONES Jack – Plug in earphones | ||
|
|
|
| here. This mutes the sound from the | ||
FRONT VIEW |
| front speakers. | ||||
|
|
| ||||
Allows you to “speak” to |
|
|
|
| ||
your computer. |
|
|
|
|
| |
ON SCREEN DISPLAY (OSD) Button – |
|
| LEFT VIEW |
| ||
|
|
|
| |||
Brings up the On Screen Display and |
|
|
|
| ||
helps you navigate through it. |
|
|
|
| ||
|
|
|
|
|
| |
ROTARY Knob – Helps guide you through the On |
|
| |
Screen Display and also adjusts settings such as |
|
| |
Volume, Brightness, and Contrast. |
|
| |
CABLE COVER – Snaps onto the back of the monitor to | SPEAKERS – Transmit | MICROPHONE Jack – Plug in a | |
conceal cable connections. (Cable connections in the | sounds from your | ||
microphone to transmit | |||
manual are shown without the cover on.) | computer or amplifier. | ||
sound through the side | |||
| One speaker on each | ||
| speakers or to the computer. | ||
| side of the monitor. | ||
| See page 16. | ||
|
| ||
REAR VIEW |
|
|
POWER Plug – Plug the power cord in here. See foldout for details.
USB Connector (under the edge, optional) – Slot for plugging in the USB
AUDIO IN Jack – Connect the supplied audio cable to send sound from a computer or amplifier to the monitor’s speakers.
![]() MICROPHONE OUT Jack – Connect the supplied microphone cable to transmit sound from the monitor to a computer or amplifier.
MICROPHONE OUT Jack – Connect the supplied microphone cable to transmit sound from the monitor to a computer or amplifier.
VIDEO IN Jack – One end of the cable is already connected here. The other end connects to the computer. See foldout for details.
2