Connection to PC
1. Connection to PC | 2. Function key definition |
Please follow the steps to connect your LCD Monitor to PC.
a. Assembly LCD Monitor with base
200VW8 LCD
5
b. Connect to PC
1). Turn off your computer and unplug its power cable.
2). Connect the monitor signal cable to the video connector on the back of your computer.
3). Plug the power cord of your computer and your monitor Into a nearby outlet.
4). Turn on your computer and monitor. If the monitor displays an image, installation is complete.
1 | 1 |
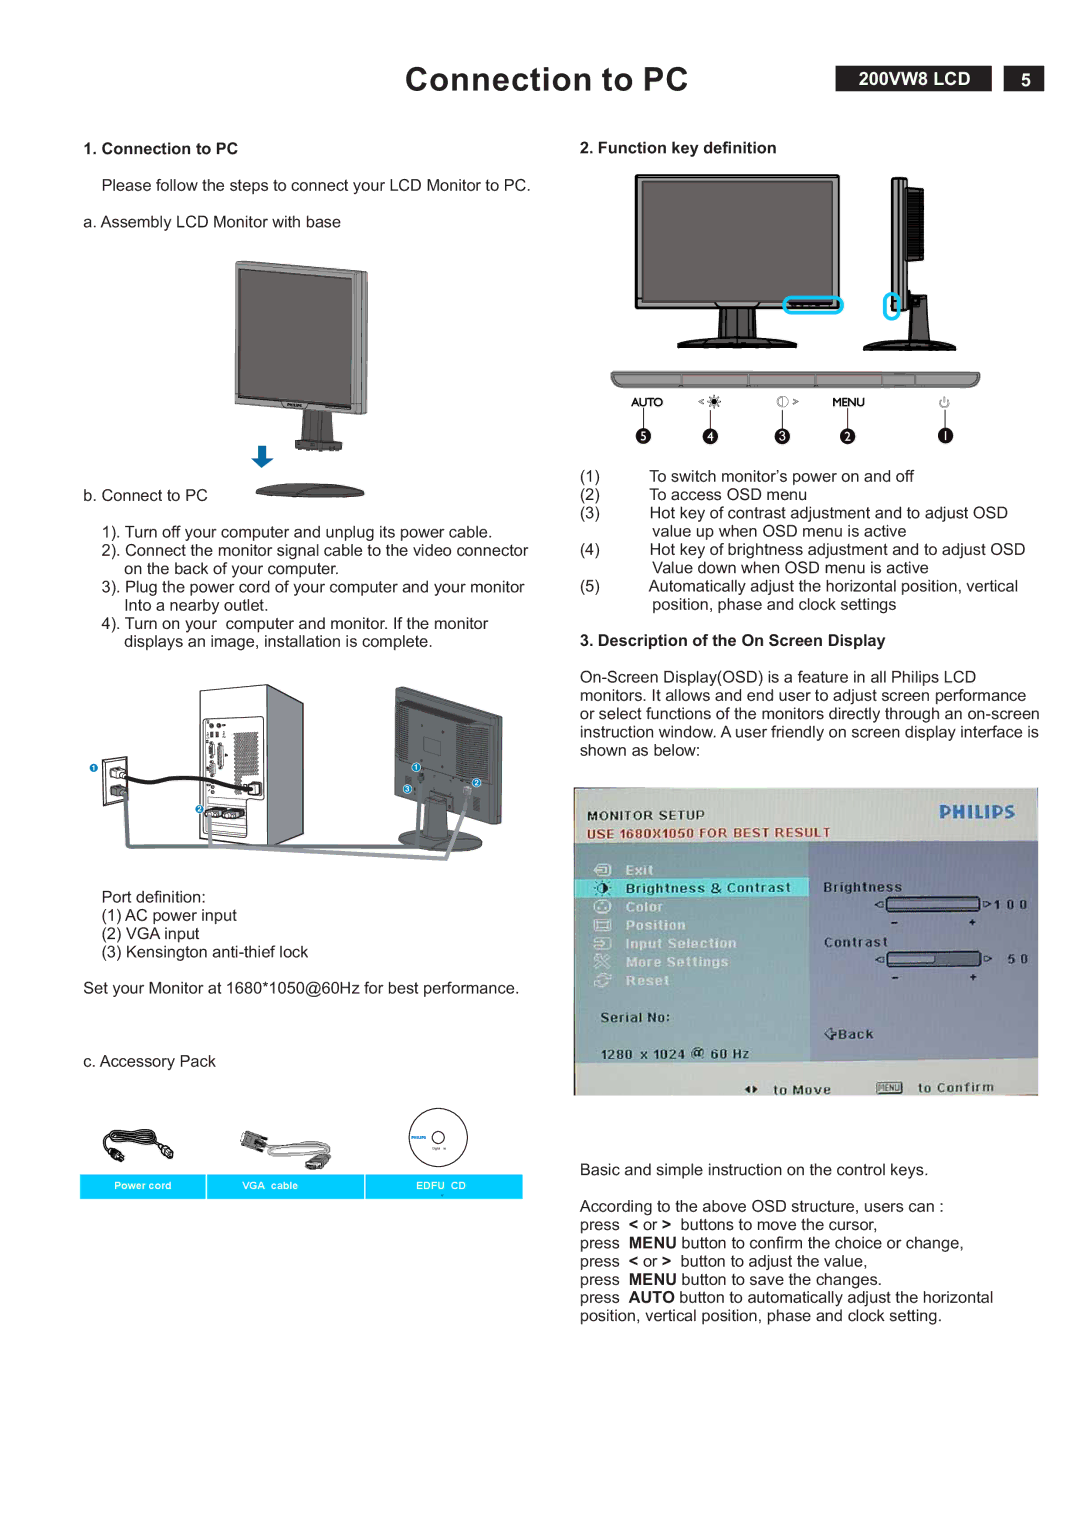
(1)To switch monitor’s power on and off
(2)To access OSD menu
(3)Hot key of contrast adjustment and to adjust OSD value up when OSD menu is active
(4)Hot key of brightness adjustment and to adjust OSD Value down when OSD menu is active
(5)Automatically adjust the horizontal position, vertical position, phase and clock settings
3. Description of the On Screen Display
3
2 |
Port definition:
(1)AC power input
(2)VGA input
(3)Kensington
2
Set your Monitor at 1680*1050@60Hz for best performance.
c. Accessory Pack
Basic and simple instruction on the control keys.
Power cord | VGA cable | EDFU CD |
According to the above OSD structure, users can : press < or > buttons to move the cursor,
press MENU button to confirm the choice or change, press < or > button to adjust the value,
press MENU button to save the changes.
press AUTO button to automatically adjust the horizontal position, vertical position, phase and clock setting.