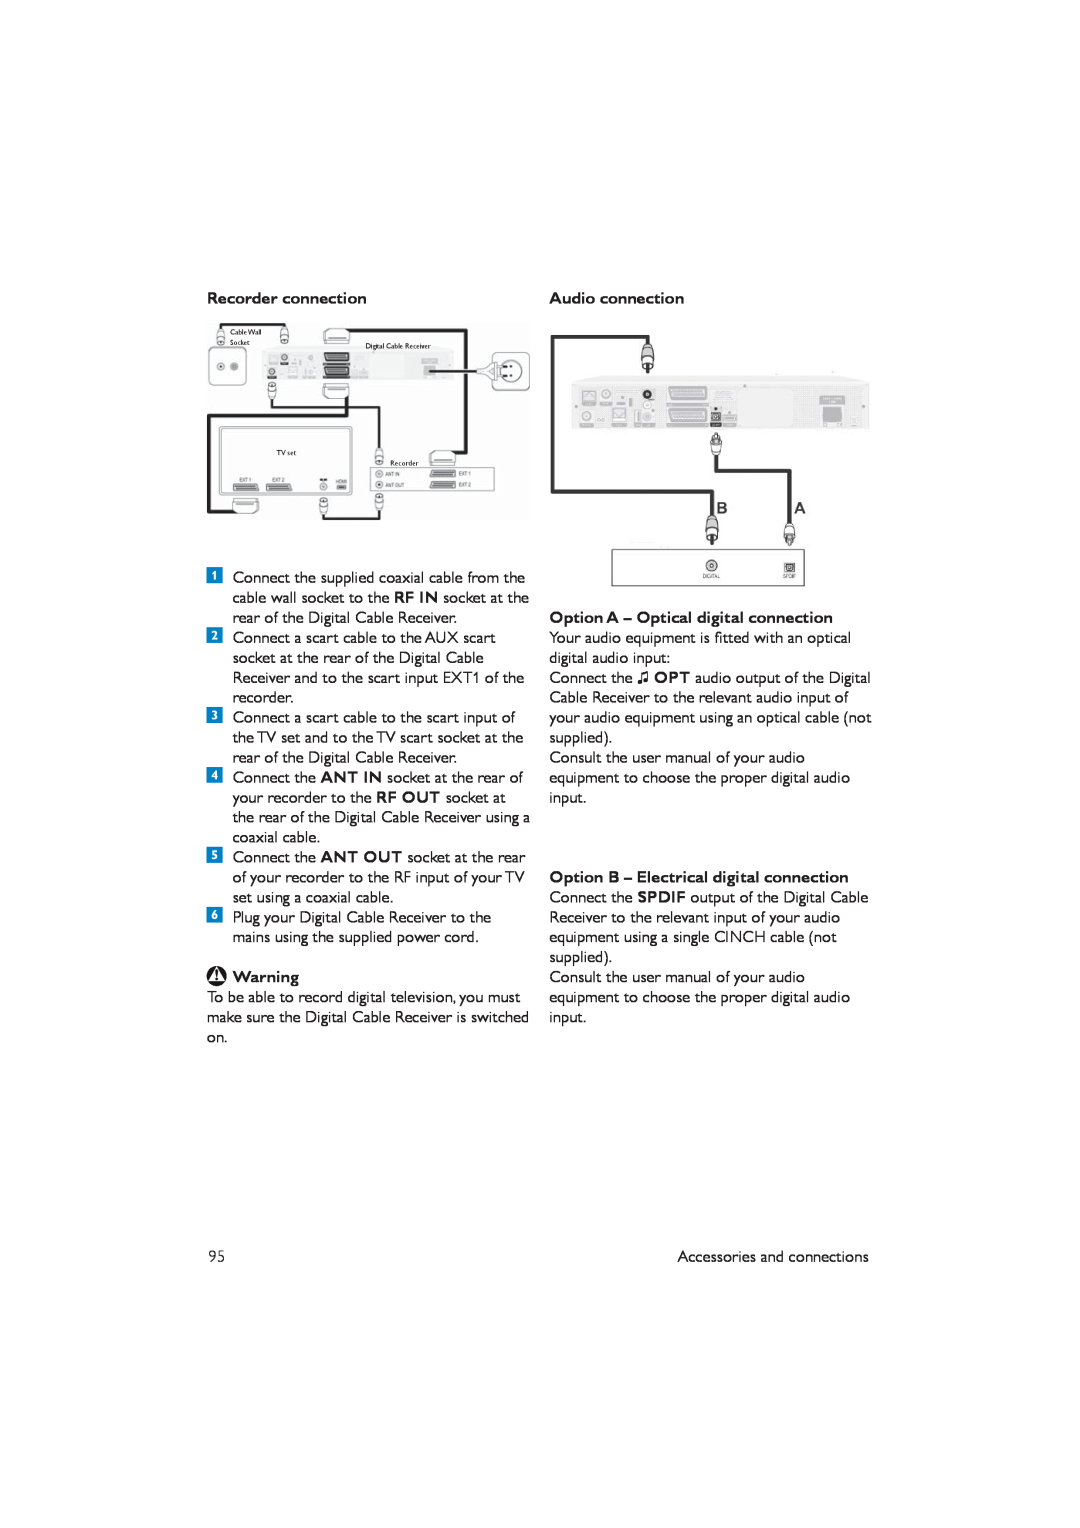
Recorder connection
Cable Wall |
|
Socket | Digital Cable Receiver |
|
TV set
Recorder
Connect the supplied coaxial cable from the cable wall socket to the RF IN socket at the rear of the Digital Cable Receiver.
Connect a scart cable to the AUX scart socket at the rear of the Digital Cable Receiver and to the scart input EXT1 of the recorder.
Connect a scart cable to the scart input of the TV set and to the TV scart socket at the rear of the Digital Cable Receiver.
Connect the ANT IN socket at the rear of your recorder to the RF OUT socket at the rear of the Digital Cable Receiver using a coaxial cable.
Connect the ANT OUT socket at the rear of your recorder to the RF input of your TV set using a coaxial cable.
Plug your Digital Cable Receiver to the mains using the supplied power cord.
![]() Warning
Warning
To be able to record digital television, you must make sure the Digital Cable Receiver is switched on.
Audio connection
Option A – Optical digital connection Your audio equipment is fitted with an optical digital audio input:
Connect the ♫ OPT audio output of the Digital Cable Receiver to the relevant audio input of your audio equipment using an optical cable (not supplied).
Consult the user manual of your audio equipment to choose the proper digital audio input.
Option B – Electrical digital connection Connect the SPDIF output of the Digital Cable Receiver to the relevant input of your audio equipment using a single CINCH cable (not supplied).
Consult the user manual of your audio equipment to choose the proper digital audio input.
95 | Accessories and connections |