Product description
Front panel | EN |
| W E R |
|
|
|
|
|
|
|
|
|
|
| Q | T | ||
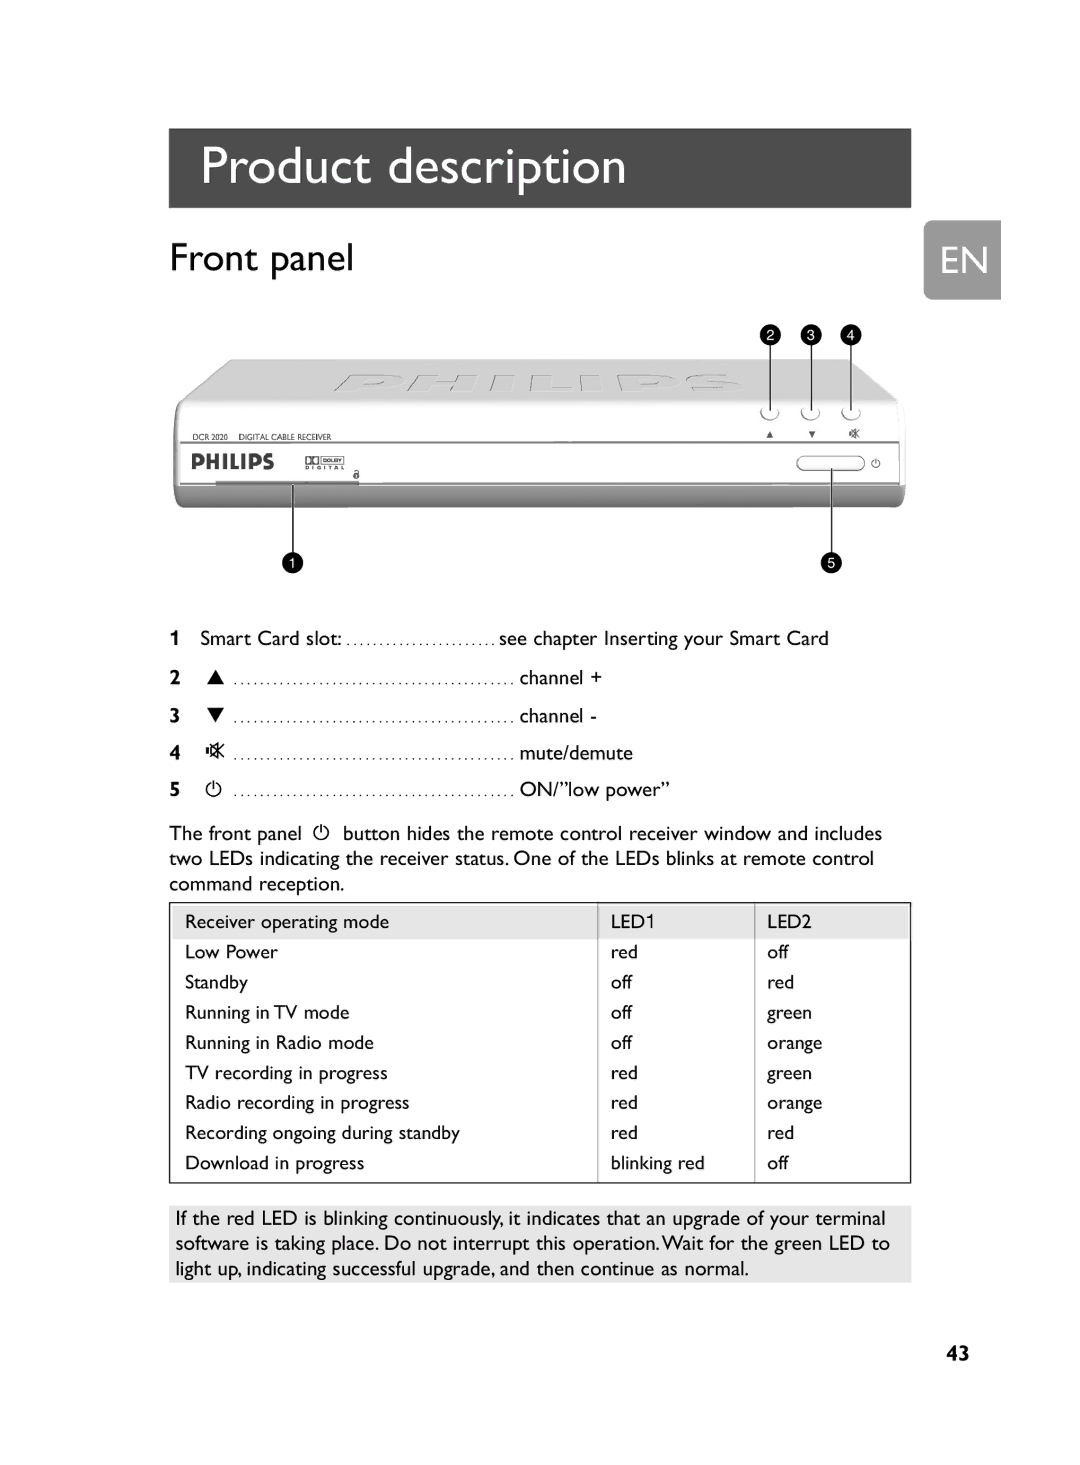
1 | Smart Card slot: | see chapter Inserting your Smart Card | ||
2 | U | . . . channel + | ||
3 | I | . . . channel - | ||
4 | . . . . . . . . . | . . . . . . . . . . . . . . . . . . . . . . . . . . . . . . . | . . . mute/demute | |
5 | . . . . . . . . . | . . . . . . . . . . . . . . . . . . . . . . . . . . . . . . . | . . . ON/”low power” | |
The front panel | button hides the remote control receiver window and includes | ||
two LEDs indicating the receiver status. One of the LEDs blinks at remote control | |||
command reception. |
|
| |
Receiver operating mode | LED1 | LED2 | |
Low Power |
| red | off |
Standby |
| off | red |
Running in TV mode | off | green | |
Running in Radio mode | off | orange | |
TV recording in progress | red | green | |
Radio recording in progress | red | orange | |
Recording ongoing during standby | red | red | |
Download in progress | blinking red | off | |
If the red LED is blinking continuously, it indicates that an upgrade of your terminal software is taking place. Do not interrupt this operation.Wait for the green LED to light up, indicating successful upgrade, and then continue as normal.
43
