TIMER RECORD
Prior to timer record
Please ensure that the recordable DVD disc or the HDD has enough available space for the Timer Record function. Before you start to record, follow the steps to set the date, time, picture quality and channel of the program or input source manually. You can set up 16 individual sessions in the Timer Recording function.
Setting the timer
1.Press [
2.Press [TIMER] to display the “Timer Record” menu.
8.Press [t] [u] [p][q] to select the “Repeat (once, daily or weekly),” and then press [OK]
to bring up the list.
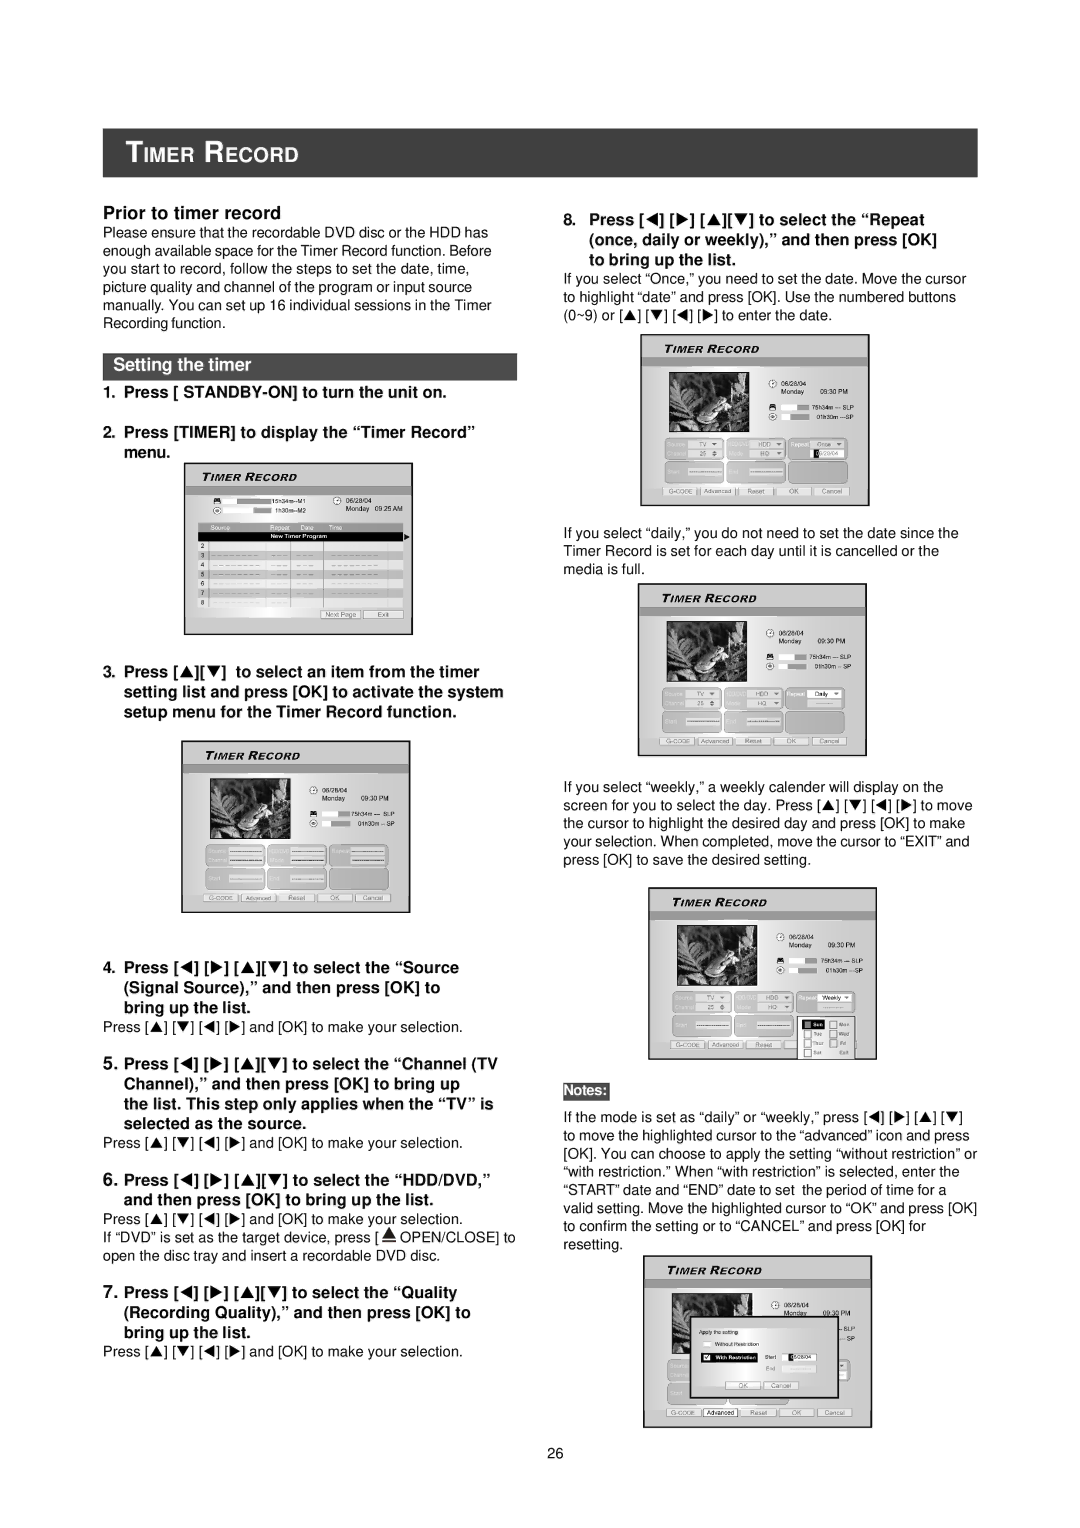
If you select “Once,” you need to set the date. Move the cursor to highlight “date” and press [OK]. Use the numbered buttons (0~9) or [p] [q] [t] [u] to enter the date.
If you select “daily,” you do not need to set the date since the Timer Record is set for each day until it is cancelled or the media is full.
3.Press [p][q] to select an item from the timer setting list and press [OK] to activate the system setup menu for the Timer Record function.
If you select “weekly,” a weekly calender will display on the screen for you to select the day. Press [p] [q] [t] [u] to move the cursor to highlight the desired day and press [OK] to make your selection. When completed, move the cursor to “EXIT” and press [OK] to save the desired setting.
4.Press [t] [u] [p][q] to select the “Source (Signal Source),” and then press [OK] to
bring up the list.
Press [p] [q] [t] [u] and [OK] to make your selection.
5.Press [t] [u] [p][q] to select the “Channel (TV
Channel),” and then press [OK] to bring up
the list. This step only applies when the “TV” is
selected as the source.
Press [p] [q] [t] [u] and [OK] to make your selection.
6.Press [t] [u] [p][q] to select the “HDD/DVD,”
and then press [OK] to bring up the list.
Press [p] [q] [t] [u] and [OK] to make your selection.
If “DVD” is set as the target device, press [ ![]() OPEN/CLOSE] to open the disc tray and insert a recordable DVD disc.
OPEN/CLOSE] to open the disc tray and insert a recordable DVD disc.
7.Press [t] [u] [p][q] to select the “Quality (Recording Quality),” and then press [OK] to
bring up the list.
Press [p] [q] [t] [u] and [OK] to make your selection.
Notes:
If the mode is set as “daily” or “weekly,” press [t] [u] [p] [q] to move the highlighted cursor to the “advanced” icon and press [OK]. You can choose to apply the setting “without restriction” or “with restriction.” When “with restriction” is selected, enter the “START” date and “END” date to set the period of time for a valid setting. Move the highlighted cursor to “OK” and press [OK] to confirm the setting or to “CANCEL” and press [OK] for resetting.
26